

GraphQL Transform
The GraphQL Transform provides a simple to use abstraction that helps you quickly create backends for your web and mobile applications on AWS. With the GraphQL Transform, you define your application’s data model using the GraphQL Schema Definition Language (SDL) and the library handles converting your SDL definition into a set of fully descriptive AWS CloudFormation templates that implement your data model.
For example you might create the backend for a blog like this:
type Blog @model {
  id: ID!
  name: String!
  posts: [Post] @connection(name: "BlogPosts")
}
type Post @model {
  id: ID!
  title: String!
  blog: Blog @connection(name: "BlogPosts")
  comments: [Comment] @connection(name: "PostComments")
}
type Comment @model {
  id: ID!
  content: String
  post: Post @connection(name: "PostComments")
}
When used along with tools like the Amplify CLI, the GraphQL Transform simplifies the process of
developing, deploying, and maintaining GraphQL APIs. With it, you define your API using the
GraphQL Schema Definition Language (SDL) and can then use automation to transform it into a fully
descriptive cloudformation template that implements the spec. The transform also provides a framework
through which you can define your own transformers as @directives for custom workflows.
Quick Start
Navigate into the root of a JavaScript, iOS, or Android project and run:
amplify init
Follow the wizard to create a new app. After finishing the wizard run:
amplify add api

# Select the graphql option and when asked if you
# have a schema, say No.
# Select one of the default samples. You can change it later.
# Choose to edit the schema and it will open your schema.graphql in your editor.
You can leave the sample as is or try this schema.
type Blog @model {
  id: ID!
  name: String!
  posts: [Post] @connection(name: "BlogPosts")
}
type Post @model {
  id: ID!
  title: String!
  blog: Blog @connection(name: "BlogPosts")
  comments: [Comment] @connection(name: "PostComments")
}
type Comment @model {
  id: ID!
  content: String
  post: Post @connection(name: "PostComments")
}
Once you are happy with your schema, save the file and click enter in your terminal window. if no error messages are thrown this means the transformation was successful and you can deploy your new API.
amplify push
Go to AWS CloudFormation to view it. You can also find your project assets in the amplify/backend folder under your API.
Once the API is finished deploying, try going to the AWS AppSync console and running some of these queries in your new API’s query page.
# Create a blog. Remember the returned id.
# Provide the returned id as the "blogId" variable.
mutation CreateBlog {
  createBlog(input: {
    name: "My New Blog!"
  }) {
    id
    name
  }
}

# Create a post and associate it with the blog via the "postBlogId" input field.
# Provide the returned id as the "postId" variable.
mutation CreatePost($blogId:ID!) {
  createPost(input:{title:"My Post!", postBlogId: $blogId}) {
    id
    title
    blog {
      id
      name
    }
  }
}

# Provide the returned id from the CreateBlog mutation as the "blogId" variable
# in the "variables" pane (bottom left pane) of the query editor:
{
  "blogId": "returned-id-goes-here"
}

# Create a comment and associate it with the post via the "commentPostId" input field.
mutation CreateComment($postId:ID!) {
  createComment(input:{content:"A comment!", commentPostId:$postId}) {
    id
    content
    post {
      id
      title
      blog {
        id
        name
      }
    }
  }
}

# Provide the returned id from the CreatePost mutation as the "postId" variable
# in the "variables" pane (bottom left pane) of the query editor:
{
  "postId": "returned-id-goes-here"
}

# Get a blog, its posts, and its posts' comments.
query GetBlog($blogId:ID!) {
  getBlog(id:$blogId) {
    id
    name
    posts(filter: {
      title: {
        eq: "My Post!"
      }
    }) {
      items {
        id
        title
        comments {
          items {
            id
            content
          }
        }
      }
    }
  }
}

# List all blogs, their posts, and their posts' comments.
query ListBlogs {
  listBlogs { # Try adding: listBlog(filter: { name: { eq: "My New Blog!" } })
    items {
      id
      name
      posts { # or try adding: posts(filter: { title: { eq: "My Post!" } })
        items {
          id
          title
          comments { # and so on ...
            items {
              id
              content
            }
          }
        }
      }
    }
  }
}
If you want to update your API, open your project’s backend/api/~apiname~/schema.graphql file (NOT the one in the backend/api/~apiname~/build folder) and edit it in your favorite code editor. You can compile the backend/api/~apiname~/schema.graphql by running:
amplify api gql-compile
and view the compiled schema output in backend/api/~apiname~/build/schema.graphql.
You can then push updated changes with:
amplify push
Directives
@model
Object types that are annotated with @model are top-level entities in the
generated API. Objects annotated with @model are stored in Amazon DynamoDB and are
capable of being protected via @auth, related to other objects via @connection,
and streamed into Amazon Elasticsearch via @searchable. You may also apply the
@versioned directive to instantly add a version field and conflict detection to a
model type.
Definition
The following SDL defines the @model directive that allows you to easily define
top level object types in your API that are backed by Amazon DynamoDB.
directive @model(
  queries: ModelQueryMap,
  mutations: ModelMutationMap,
  subscriptions: ModelSubscriptionMap
) on OBJECT
input ModelMutationMap { create: String, update: String, delete: String }
input ModelQueryMap { get: String, list: String }
input ModelSubscriptionMap {
  onCreate: [String]
  onUpdate: [String]
  onDelete: [String]
  level: ModelSubscriptionLevel
}
enum ModelSubscriptionLevel { off public on }
Usage
Define a GraphQL object type and annotate it with the @model directive to store
objects of that type in DynamoDB and automatically configure CRUDL queries and
mutations.
type Post @model {
  id: ID! # id: ID! is a required attribute.
  title: String!
  tags: [String!]!
}
You may also override the names of any generated queries, mutations and subscriptions, or remove operations entirely.
type Post @model(queries: { get: "post" }, mutations: null, subscriptions: null) {
  id: ID!
  title: String!
  tags: [String!]!
}
This would create and configure a single query field post(id: ID!): Post and
no mutation fields.
Generates
A single @model directive configures the following AWS resources:
- An Amazon DynamoDB table with PAY_PER_REQUEST billing mode enabled by default.
- An AWS AppSync DataSource configured to access the table above.
- An AWS IAM role attached to the DataSource that allows AWS AppSync to call the above table on your behalf.
- Up to 8 resolvers (create, update, delete, get, list, onCreate, onUpdate, onDelete) but this is configurable via the
queries,mutations, andsubscriptionsarguments on the@modeldirective. - Input objects for create, update, and delete mutations.
- Filter input objects that allow you to filter objects in list queries and connection fields.
This input schema document
type Post @model {
  id: ID!
  title: String
  metadata: MetaData
}
type MetaData {
  category: Category
}
enum Category { comedy news }
would generate the following schema parts
type Post {
  id: ID!
  title: String!
  metadata: MetaData
}

type MetaData {
  category: Category
}

enum Category {
  comedy
  news
}

input MetaDataInput {
  category: Category
}

enum ModelSortDirection {
  ASC
  DESC
}

type ModelPostConnection {
  items: [Post]
  nextToken: String
}

input ModelStringFilterInput {
  ne: String
  eq: String
  le: String
  lt: String
  ge: String
  gt: String
  contains: String
  notContains: String
  between: [String]
  beginsWith: String
}

input ModelIDFilterInput {
  ne: ID
  eq: ID
  le: ID
  lt: ID
  ge: ID
  gt: ID
  contains: ID
  notContains: ID
  between: [ID]
  beginsWith: ID
}

input ModelIntFilterInput {
  ne: Int
  eq: Int
  le: Int
  lt: Int
  ge: Int
  gt: Int
  contains: Int
  notContains: Int
  between: [Int]
}

input ModelFloatFilterInput {
  ne: Float
  eq: Float
  le: Float
  lt: Float
  ge: Float
  gt: Float
  contains: Float
  notContains: Float
  between: [Float]
}

input ModelBooleanFilterInput {
  ne: Boolean
  eq: Boolean
}

input ModelPostFilterInput {
  id: ModelIDFilterInput
  title: ModelStringFilterInput
  and: [ModelPostFilterInput]
  or: [ModelPostFilterInput]
  not: ModelPostFilterInput
}

type Query {
  getPost(id: ID!): Post
  listPosts(filter: ModelPostFilterInput, limit: Int, nextToken: String): ModelPostConnection
}

input CreatePostInput {
  title: String!
  metadata: MetaDataInput
}

input UpdatePostInput {
  id: ID!
  title: String
  metadata: MetaDataInput
}

input DeletePostInput {
  id: ID
}

type Mutation {
  createPost(input: CreatePostInput!): Post
  updatePost(input: UpdatePostInput!): Post
  deletePost(input: DeletePostInput!): Post
}

type Subscription {
  onCreatePost: Post @aws_subscribe(mutations: ["createPost"])
  onUpdatePost: Post @aws_subscribe(mutations: ["updatePost"])
  onDeletePost: Post @aws_subscribe(mutations: ["deletePost"])
}
@key
The @key directive makes it simple to configure custom index structures for @model types.
Amazon DynamoDB is a key-value and document database that delivers single-digit millisecond performance at any scale but making it work for your access patterns requires a bit of forethought. DynamoDB query operations may use at most two attributes to efficiently query data. The first query argument passed to a query (the hash key) must use strict equality and the second attribute (the sort key) may use gt, ge, lt, le, eq, beginsWith, and between. DynamoDB can effectively implement a wide variety of access patterns that are powerful enough for the majority of applications.
When modeling your data during schema design there are common patterns that you may need to leverage. We provide a fully working schema with 17 patterns related to relational designs.
Definition
directive @key(fields: [String!]!, name: String, queryField: String) on OBJECT
Argument
| Argument | Description |
|---|---|
| fields | A list of fields that should comprise the @key, used in conjunction with an @model type. The first field in the list will always be the HASH key. If two fields are provided the second field will be the SORT key. If more than two fields are provided, a single composite SORT key will be created from a combination of fields[1...n]. All generated GraphQL queries & mutations will be updated to work with custom @key directives. |
| name | When provided, specifies the name of the secondary index. When omitted, specifies that the @key is defining the primary index. You may have at most one primary key per table and therefore you may have at most one @key that does not specify a name per @model type. |
| queryField | When defining a secondary index (by specifying the name argument), this specifies that a new top level query field that queries the secondary index should be generated with the given name. |
How to use @key
When designing data models using the @key directive, the first step should be to write down your application’s expected access patterns. For example, let’s say we were building an e-commerce application
and needed to implement access patterns like:
- Get customers by email.
- Get orders by customer by createdAt.
- Get items by order by status by createdAt.
- Get items by status by createdAt.
Let’s take a look at how you would define custom keys to implement these access patterns in your schema.graphql.
# Get customers by email.
type Customer @model @key(fields: ["email"]) {
  email: String!
  username: String
}
A @key without a name specifies the key for the DynamoDB table’s primary index. You may only provide 1 @key without a name per @model type. The example above shows the simplest case where we are specifying that the table’s primary index should have a simple key where the hash key is email. This allows us to get unique customers by their email.
query GetCustomerById {
  getCustomer(email:"me@email.com") {
    email
    username
  }
}
This is great for simple lookup operations, but what if we need to perform slightly more complex queries?
# Get orders by customer by createdAt.
type Order @model @key(fields: ["customerEmail", "createdAt"]) {
    customerEmail: String!
    createdAt: String!
    orderId: ID!
}
This @key above allows us to efficiently query Order objects by both a customerEmail and the createdAt time stamp. The @key above creates a DynamoDB table where the primary index’s hash key is customerEmail and the sort key is createdAt. This allows us to write queries like this:
query ListOrdersForCustomerIn2019 {
  listOrders(customerEmail:"me@email.com", createdAt: { beginsWith: "2019" }) {
    items {
      orderId
      customerEmail
      createdAt
    }
  }
}
The query above shows how we can use compound key structures to implement more powerful query patterns on top of DynamoDB but we are not quite done yet. Given that DynamoDB limits you to query by at most two attributes at a time, the @key directive helps by streamlining the process of creating composite sort keys such that you can support querying by more than two attributes at a time. For example, we can implement “Get items by order, status, and createdAt” as well as “Get items by status and createdAt” for a single @model with this schema.
type Item @model
  @key(fields: ["orderId", "status", "createdAt"])
  @key(name: "ByStatus", fields: ["status", "createdAt"], queryField: "itemsByStatus") {
  orderId: ID!
  status: Status!
  createdAt: AWSDateTime!
  name: String!
}
enum Status {
  DELIVERED
  IN_TRANSIT
  PENDING
  UNKNOWN
}
The primary @key with 3 fields performs a bit more magic than the 1 and 2 field variants. The first field orderId will be the HASH key as expected, but the SORT key will be a new composite key named status#createdAt that is made of the status and createdAt fields on the @model. The @key directive creates the table structures and also generates resolvers that inject composite key values for you during queries and mutations.
Using this schema, you can query the primary index to get IN_TRANSIT items created in 2019 for a given order.
# Get items for order by status by createdAt.
query ListInTransitItemsForOrder {
  listItems(orderId:"order1", statusCreatedAt: { beginsWith: { status: IN_TRANSIT, createdAt: "2019" }}) {
    items {
      orderId
      status
      createdAt
      name
    }
  }
}
The query above exposes the statusCreatedAt argument that allows you to configure DynamoDB key condition expressions without worrying about how the composite key is formed under the hood. Using the same schema, you can get all PENDING items created in 2019 by querying the secondary index “ByStatus” via the Query.itemsByStatus field.
query ItemsByStatus {
  itemsByStatus(status: PENDING, createdAt: {beginsWith:"2019"}) {
    items {
      orderId
      status
      createdAt
      name
    }
    nextToken
  }
}
Evolving APIs with @key
There are a few important things to think about when making changes to APIs using @key. When you need to enable a new access pattern or change an existing access pattern you should follow these steps.
- Create a new index that enables the new or updated access pattern.
- If adding a @key with 3 or more fields, you will need to back-fill the new composite sort key for existing data. With a
@key(fields: ["email", "status", "date"]), you would need to backfill thestatus#datefield with composite key values made up of each object’s status and date fields joined by a#. You do not need to backfill data for @key directives with 1 or 2 fields. - Deploy your additive changes and update any downstream applications to use the new access pattern.
- Once you are certain that you do not need the old index, remove its @key and deploy the API again.
Combining @key with @connection
Secondary indexes created with the @key directive can be used to resolve connections when creating relationships between types. To learn how this works, check out the documentation for @connection.
@auth
Authorization is required for applications to interact with your GraphQL API. API Keys are best used for public APIs (or parts of your schema which you wish to be public) or prototyping, and you must specify the expiration time before deploying. IAM authorization uses Signature Version 4 to make request with policies attached to Roles. OIDC tokens provided by Amazon Cognito User Pools or 3rd party OpenID Connect providers can also be used for authorization, and simply enabling this provides a simple access control requiring users to authenticate to be granted top level access to API actions. You can set finer grained access controls using @auth on your schema which leverages authorization metadata provided as part of these tokens or set on the database items themselves.
@auth object types that are annotated with @auth are protected by a set of authorization rules giving you additional controls than the top level authorization on an API. You may use the @auth directive on object type definitions and field definitions in your project’s schema.
When using the @auth directive on object type definitions that are also annotated with
@model, all resolvers that return objects of that type will be protected. When using the
@auth directive on a field definition, a resolver will be added to the field that authorize access
based on attributes found in the parent type.
Definition
# When applied to a type, augments the application with
# owner and group-based authorization rules.
directive @auth(rules: [AuthRule!]!) on OBJECT, FIELD_DEFINITION
input AuthRule {
  allow: AuthStrategy!
  provider: AuthProvider
  ownerField: String # defaults to "owner" when using owner auth
  identityClaim: String # defaults to "username" when using owner auth
  groupClaim: String # defaults to "cognito:groups" when using Group auth
  groups: [String]  # Required when using Static Group auth
  groupsField: String # defaults to "groups" when using Dynamic Group auth
  operations: [ModelOperation] # Required for finer control

  # The following arguments are deprecated. It is encouraged to use the 'operations' argument.
  queries: [ModelQuery]
  mutations: [ModelMutation]
}
enum AuthStrategy { owner groups private public }
enum AuthProvider { apiKey iam oidc userPools }
enum ModelOperation { create update delete read }

# The following objects are deprecated. It is encouraged to use ModelOperations.
enum ModelQuery { get list }
enum ModelMutation { create update delete }
Note: The operations argument was added to replace the ‘queries’ and ‘mutations’ arguments. The ‘queries’ and ‘mutations’ arguments will continue to work but it is encouraged to move to ‘operations’. If both are provided, the ‘operations’ argument takes precedence over ‘queries’.
Owner Authorization
# The simplest case
type Post @model @auth(rules: [{allow: owner}]) {
  id: ID!
  title: String!
}

# The long form way
type Post
  @model
  @auth(
    rules: [
      {allow: owner, ownerField: "owner", operations: [create, update, delete, read]},
    ])
{
  id: ID!
  title: String!
  owner: String
}
Owner authorization specifies that a user can access an object. To do so, each object has an ownerField (by default “owner”) that stores ownership information and is verified in various ways during resolver execution.
You can use the operations argument to specify which operations are augmented as follows:
- read: If the record’s owner is not the same as the logged in user (via
$ctx.identity.username), throw$util.unauthorized()in any resolver that returns an object of this type. - create: Inject the logged in user’s
$ctx.identity.usernameas the ownerField automatically. - update: Add conditional update that checks the stored ownerField is the same as
$ctx.identity.username. - delete: Add conditional update that checks the stored ownerField is the same as
$ctx.identity.username.
Note: When specifying operations as a part of the @auth rule, the operations not included in the list are not protected by default. For example, let’s say you have the following schema:
type Todo @model
  @auth(rules: [{ allow: owner, operations: [create, read] }]) {
  id: ID!
  updatedAt: AWSDateTime!
  content: String!
}
In this schema, only the owner of the object has the authorization to perform read (getTodo and listTodos) operations on the owner created object. But this does not prevent any other owner (any user other than the creator or owner of the object) to update/delete some other owner’s object.
Here’s a truth table for the above-mentioned schema. In the table below other refers to any user other than the creator or owner of the object.
| getTodo | listTodos | createTodo | updateTodo | deleteTodo | |
|---|---|---|---|---|---|
| owner | ✅ | ✅ | ✅ | ✅ | ✅ |
| other | ❌ | ❌ | ✅ | ✅ | ✅ |
If you want to prevent updates and deletes operations, you would need to modify the @auth rule to explicitly include the update and delete operation and your schema should look like the following:
type Todo @model
  @auth(rules: [{ allow: owner, operations: [create, read, update, delete] }]) {
  id: ID!
  updatedAt: AWSDateTime!
  content: String!
}
Here’s a truth table for the above-mentioned schema. In the table below other refers to any user other than the creator or owner of the object.
| getTodo | listTodos | createTodo | updateTodo | deleteTodo | |
|---|---|---|---|---|---|
| owner | ✅ | ✅ | ✅ | ✅ | ✅ |
| other | ❌ | ❌ | ✅ | ❌ | ❌ |
Note: Specifying @auth(rules: [{ allow: owner, operations: [create]}]) still allows anyone who has access to your API to create records (as shown in the above truth table). However, including this is necessary when specifying other owner auth rules to ensure that the owner is stored with the record so it can be verified on subsequent requests.
You may also apply multiple ownership rules on a single @model type. For example, imagine you have a type Draft
that stores unfinished posts for a blog. You might want to allow the Draft’s owner to create, update, delete, and
read Draft objects. However, you might also want the Draft’s editors to be able to update and read Draft objects.
To allow for this use case you could use the following type definition:
type Draft @model
  @auth(rules: [

    # Defaults to use the "owner" field.
    { allow: owner },

    # Authorize the update mutation and both queries. Use `queries: null` to disable auth for queries.
    { allow: owner, ownerField: "editors", operations: [update] }
  ]) {
  id: ID!
  title: String!
  content: String
  owner: String
  editors: [String]
}
Ownership with create mutations
The ownership authorization rule tries to make itself as easy as possible to use. One feature that helps with this is that it will automatically fill ownership fields unless told explicitly not to do so. To show how this works, lets look at how the create mutation would work for the Draft type above:
mutation CreateDraft {
  createDraft(input: { title: "A new draft" }) {
    id
    title
    owner
    editors
  }
}
Let’s assume that when I call this mutation I am logged in as someuser@my-domain.com. The result would be:
{
    "data": {
        "createDraft": {
            "id": "...",
            "title": "A new draft",
            "owner": "someuser@my-domain.com",
            "editors": ["someuser@my-domain.com"]
        }
    }
}
The Mutation.createDraft resolver is smart enough to match your auth rules to attributes
and will fill them in be default. If you do not want the value to be automatically set all
you need to do is include a value for it in your input. For example, to have the resolver
automatically set the owner but not the editors, you would run this:
mutation CreateDraft {
  createDraft(
    input: {
      title: "A new draft",
      editors: []
    }
  ) {
    id
    title
    owner
    editors
  }
}
This would return:
{
    "data": {
        "createDraft": {
            "id": "...",
            "title": "A new draft",
            "owner": "someuser@my-domain.com",
            "editors": []
        }
    }
}
You can try to do the same to owner but this will throw an Unauthorized exception because you are no longer the owner of the object you are trying to create
mutation CreateDraft {
  createDraft(
    input: {
      title: "A new draft",
      editors: [],
      owner: null
    }
  ) {
    id
    title
    owner
    editors
  }
}
To set the owner to null with the current schema, you would still need to be in the editors list:
mutation CreateDraft {
  createDraft(
    input: {
      title: "A new draft",
      editors: ["someuser@my-domain.com"],
      owner: null
    }
  ) {
    id
    title
    owner
    editors
  }
}
Would return:
{
    "data": {
        "createDraft": {
            "id": "...",
            "title": "A new draft",
            "owner": null,
            "editors": ["someuser@my-domain.com"]
        }
    }
}
Static Group Authorization
Static group authorization allows you to protect @model types by restricting access
to a known set of groups. For example, you can allow all Admin users to create,
update, delete, get, and list Salary objects.
type Salary @model @auth(rules: [{allow: groups, groups: ["Admin"]}]) {
  id: ID!
  wage: Int
  currency: String
}
When calling the GraphQL API, if the user credential (as specified by the resolver’s $ctx.identity) is not
enrolled in the Admin group, the operation will fail.
To enable advanced authorization use cases, you can layer auth rules to provide specialized functionality. To show how we might do that, let’s expand the Draft example we started in the Owner Authorization section above. When we last left off, a Draft object could be updated and read by both its owner and any of its editors and could be created and deleted only by its owner. Let’s change it so that now any member of the “Admin” group can also create, update, delete, and read a Draft object.
type Draft @model
  @auth(rules: [

    # Defaults to use the "owner" field.
    { allow: owner },

    # Authorize the update mutation and both queries. Use `queries: null` to disable auth for queries.
    { allow: owner, ownerField: "editors", operations: [update] },

    # Admin users can access any operation.
    { allow: groups, groups: ["Admin"] }
  ]) {
  id: ID!
  title: String!
  content: String
  owner: String
  editors: [String]!
}
Dynamic Group Authorization
# Dynamic group authorization with multiple groups
type Post @model @auth(rules: [{allow: groups, groupsField: "groups"}]) {
  id: ID!
  title: String
  groups: [String]
}

# Dynamic group authorization with a single group
type Post @model @auth(rules: [{allow: groups, groupsField: "group"}]) {
  id: ID!
  title: String
  group: String
}
With dynamic group authorization, each record contains an attribute specifying
what groups should be able to access it. Use the groupsField argument to
specify which attribute in the underlying data store holds this group
information. To specify that a single group should have access, use a field of
type String. To specify that multiple groups should have access, use a field of
type [String].
Just as with the other auth rules, you can layer dynamic group rules on top of other rules. Let’s again expand the Draft example from the Owner Authorization and Static Group Authorization sections above. When we last left off editors could update and read objects, owners had full access, and members of the admin group had full access to Draft objects. Now we have a new requirement where each record should be able to specify an optional list of groups that can read the draft. This would allow you to share an individual document with an external team, for example.
type Draft @model
  @auth(rules: [

    # Defaults to use the "owner" field.
    { allow: owner },

    # Authorize the update mutation and both queries. Use `queries: null` to disable auth for queries.
    { allow: owner, ownerField: "editors", operations: [update] },

    # Admin users can access any operation.
    { allow: groups, groups: ["Admin"] }

    # Each record may specify which groups may read them.
    { allow: groups, groupsField: "groupsCanAccess", operations: [read] }
  ]) {
  id: ID!
  title: String!
  content: String
  owner: String
  editors: [String]!
  groupsCanAccess: [String]!
}
With this setup, you could create an object that can be read by the “BizDev” group:
mutation CreateDraft {
  createDraft(input: {
    title: "A new draft",
    editors: [],
    groupsCanAccess: ["BizDev"]
  }) {
    id
    groupsCanAccess
  }
}
And another draft that can be read by the “Marketing” group:
mutation CreateDraft {
  createDraft(input: {
    title: "Another draft",
    editors: [],
    groupsCanAccess: ["Marketing"]
  }) {
    id
    groupsCanAccess
  }
}
public Authorization
# The simplest case
type Post @model @auth(rules: [{allow: public}]) {
  id: ID!
  title: String!
}
The public authorization specifies that everyone will be allowed to access the API, behind the scenes the API will be protected with an API Key. To be able to use public the API must have API Key configured.
# public authorization with provider override
type Post @model @auth(rules: [{allow: public, provider: iam}]) {
  id: ID!
  title: String!
}
The @auth directive allows the override of the default provider for a given authorization mode. In the sample above iam is specified as the provider which allows you to use an “UnAuthenticated Role” from Cognito Identity Pools for public access, instead of an API Key. When used in conjunction with amplify add auth the CLI generates scoped down IAM policies for the “UnAuthenticated” role automatically.
private Authorization
# The simplest case
type Post @model @auth(rules: [{allow: private}]) {
  id: ID!
  title: String!
}
The private authorization specifies that everyone will be allowed to access the API with a valid JWT token from the configured Cognito User Pool. To be able to use private the API must have Cognito User Pool configured.
# private authorization with provider override
type Post @model @auth(rules: [{allow: private, provider: iam}]) {
  id: ID!
  title: String!
}
The @auth directive allows the override of the default provider for a given authorization mode. In the sample above iam is specified as the provider which allows you to use an “Authenticated Role” from Cognito Identity Pools for private access. When used in conjunction with amplify add auth the CLI generates scoped down IAM policies for the “Authenticated” role automatically.
Authorization Using an oidc Provider
# private authorization with provider override
type Post @model @auth(rules: [{allow: private, provider: oidc}]) {
  id: ID!
  title: String!
}

# owner authorization with provider override
type Profile @model @auth(rules: [{allow: owner, provider: oidc, identityClaim: "sub"}]) {
  id: ID!
  displayNAme: String!
}
By using a configured oidc provider for the API, it is possible to authenticate the users against it to perform operations on the Post type, and owner authorization is also possible.
Combining Authorization Rules
The objects and fields in the GraphQL schema can have rules with different authorization providers assigned.
type Post @model
  @auth (
    rules: [
      { allow: owner },
      { allow: private, provider: iam, operations: [read] }
    ]
  ) {
  id: ID!
  title: String
  owner: String
}
In the example above the model is protected by Cognito User Pools by default and the owner can perform any operation on the Post type, but a Lambda function through the configured IAM policies can only call the getPost and listPosts query.
type Post @model @auth (rules: [{ allow: private }]) {
  id: ID!
  title: String
  owner: String
  secret: String
    @auth (rules: [{ allow: private, provider: iam, operations: [create, update] }])
}
In the example above the model is protected by Cognito User Pools by default and anyone with a valid JWT token can perform any operation on the Post type, but cannot update the secret field. The secret field can only be modified through the configured IAM policies, from a Lambda function for example.
Allowed Authorization Mode vs. Provider Combinations
The following table shows the allowed combinations of authorization modes and providers.
| owner | groups | public | private | |
|---|---|---|---|---|
| userPools | ✅ | ✅ | ✅ | |
| oidc | ✅ | |||
| apiKey | ✅ | |||
| iam | ✅ | ✅ |
Please note that groups is leveraging Cognito User Pools but no provider assignment needed/possible.
Custom Claims
@auth supports using custom claims if you do not wish to use the default username or cognito:groups claims from your JWT token which are populated by Amazon Cognito. This can be helpful if you are using tokens from a 3rd party OIDC system or if you wish to populate a claim with a list of groups from an external system, such as when using a Pre Token Generation Lambda Trigger which reads from a database. To use custom claims specify identityClaim or groupClaim as appropriate like in the example below:
type Post @model
@auth(rules: [
	{allow: owner, identityClaim: "user_id"},
	{allow: groups, groups: ["Moderator"], groupClaim: "user_groups"}
])
{
  id: ID!
  owner: String
  postname: String
  content: String
}
In this example the object owner will check against a user_id claim. Similarly if the user_groups claim contains a “Moderator” string then access will be granted.
Note identityField is being deprecated for identityClaim.
Authorizing Subscriptions
Prior to version 2.0 of the CLI, @auth rules did not apply to subscriptions. Instead you were required to either turn them off or use Custom Resolvers to manually add authorization checks. In the latest versions @auth protections have been added to subscriptions, however this can introduce different behavior into existing applications: First, owner is now a required argument for Owner-based authorization, as shown below. Second, the selection set will set null on fields when mutations are invoked if per-field @auth is set on that field. Read more here. If you wish to keep the previous behavior set level: public on your model as defined below.
When @auth is used subscriptions have a few subtle behavior differences than queries and mutations based on their event based nature. When protecting a model using the owner auth strategy, each subscription request will require that the user is passed as an argument to the subscription request. If the user field is not passed, the subscription connection will fail. In the case where it is passed, the user will only get notified of updates to records for which they are the owner.
Alternatively, when the model is protected using the static group auth strategy, the subscription request will only succeed if the user is in an allowed group. Further, the user will only get notifications of updates to records if they are in an allowed group. Note: You don’t need to pass the user as an argument in the subscription request, since the resolver will instead check the contents of your JWT token.
Dynamic groups have no impact to subscriptions. You will not get notified of any updates to them.
For example suppose you have the following schema:
type Post @model
@auth(rules: [{allow: owner}])
{
  id: ID!
  owner: String
  postname: String
  content: String
}
This means that the subscription must look like the following or it will fail:
subscription onCreatePost(owner: “Bob”){
  postname
  content
}
Note that if your type doesn’t already have an owner field the Transformer will automatically add this for you. Passing in the current user can be done dynamically in your code by using Auth.currentAuthenticatedUser() in JavaScript, AWSMobileClient.default().username in iOS, or AWSMobileClient.getInstance().getUsername() in Android.
In the case of groups if you define the following:
type Post @model
@auth(rules: [{allow: groups, groups: ["Admin"]}]) {
{
  id: ID!
  owner: String
  postname: String
  content: String
}
Then you don’t need to pass an argument, as the resolver will check the contents of your JWT token at subscription time and ensure you are in the “Admin” group.
Finally, if you use both owner and group authorization then the username argument becomes optional. This means the following:
- If you don’t pass the user in, but are a member of an allowed group, the subscription will notify you of records added.
- If you don’t pass the user in, but are NOT a member of an allowed group, the subscription will fail to connect.
- If you pass the user in who IS the owner but is NOT a member of a group, the subscription will notify you of records added of which you are the owner.
- If you pass the user in who is NOT the owner and is NOT a member of a group, the subscription will not notify you of anything as there are no records for which you own
You may disable authorization checks on subscriptions or completely turn off subscriptions as well by specifying either public or off in @model:
@model (subscriptions: { level: public })
Field Level Authorization
The @auth directive specifies that access to a specific field should be restricted
according to its own set of rules. Here are a few situations where this is useful:
Protect access to a field that has different permissions than the parent model
You might want to have a user model where some fields, like username, are a part of the public profile and the ssn field is visible to owners.
type User @model {
  id: ID!
  username: String
  ssn: String @auth(rules: [{ allow: owner, ownerField: "username" }])
}
Protect access to a @connection resolver based on some attribute in the source object
This schema will protect access to Post objects connected to a user based on an attribute
in the User model. You may turn off top level queries by specifying queries: null in the @model
declaration which restricts access such that queries must go through the @connection resolvers
to reach the model.
type User @model {
  id: ID!
  username: String
  posts: [Post]
    @connection(name: "UserPosts")
    @auth(rules: [{ allow: owner, ownerField: "username" }])
}
type Post @model(queries: null) { ... }
Protect mutations such that certain fields can have different access rules than the parent model
When used on field definitions, @auth directives protect all operations by default.
To protect read operations, a resolver is added to the protected field that implements authorization logic.
To protect mutation operations, logic is added to existing mutations that will be run if the mutation’s input
contains the protected field. For example, here is a model where owners and admins can read employee
salaries but only admins may create or update them.
type Employee @model {
  id: ID!
  email: String

  # Owners & members of the "Admin" group may read employee salaries.
  # Only members of the "Admin" group may create an employee with a salary
  # or update a salary.
  salary: String
    @auth(rules: [
      { allow: owner, ownerField: "username", operations: [read] },
      { allow: groups, groups: ["Admin"], operations: [create, update, read] }
    ])
}
Note The delete operation, when used in @auth directives on field definitions, translates
to protecting the update mutation such that the field cannot be set to null unless authorized.
Note: When specifying operations as a part of the @auth rule on a field, the operations not included in the operations list are not protected by default. For example, let’s say you have the following schema:
type Todo
  @model
{
  id: ID!
  updatedAt: AWSDateTime!
  content: String! @auth(rules: [{ allow: owner, operations: [update] }])
}
In this schema, only the owner of the object has the authorization to perform update operations on the content field. But this does not prevent any other owner (any user other than the creator or owner of the object) to update some other field in the object owned by another user. If you want to prevent update operations on a field, the user would need to explicitly add auth rules to restrict access to that field. One of the ways would be to explicitly specify @auth rules on the fields that you would want to protect like the following:
type Todo
  @model
{
  id: ID!
  updatedAt: AWSDateTime! @auth(rules: [{ allow: owner, operations: [update] }]) // or @auth(rules: [{ allow: groups, groups: ["Admins"] }])
  content: String! @auth(rules: [{ allow: owner, operations: [update] }])
}
You can also provide explicit deny rules to your field like the following:
type Todo
  @model
{
  id: ID!
  updatedAt: AWSDateTime! @auth(rules: [{ allow: groups, groups: ["ForbiddenGroup"] }])
  content: String! @auth(rules: [{ allow: owner, operations: [update] }])
}
You can also combine top-level @auth rules on the type with field level auth rules. For example, let’s consider the following schema:
type Todo
  @model @auth(rules: [{allow: groups, groups: ["Admin"], operations:[update] }]
{
  id: ID!
  updatedAt: AWSDateTime!
  content: String! @auth(rules: [{ allow: owner, operations: [update] }])
}
In the above schema users in the Admin group have the authorization to create, read, delete and update (except the content field in the object of another owner) for the type Todo.
An owner of an object, has the authorization to create Todo types and read all the objects of type Todo. In addition an owner can perform an update operation on the Todo object, only when the content field is present as a part of the input.
Any other user - who isn’t an owner of an object isn’t authorized to update that object.
Per-Field with Subscriptions
When setting per-field @auth the Transformer will alter the response of mutations for those fields by setting them to null in order to prevent sensitive data from being sent over subscriptions. For example in the schema below:
type Employee @model
  @auth(rules: [
	  { allow: owner },
	  { allow: groups, groups: ["Admins"] }
  ]) {
	id: ID!
	name: String!
	address: String!
	ssn: String @auth(rules: [{allow: owner}])
}
Subscribers might be a member of the “Admins” group and should get notified of the new item, however they should not get the ssn field. If you run the following mutation:
mutation {
  createEmployee(input: {
    name: "Nadia"
    address: "123 First Ave"
    ssn: "392-95-2716"
  }){
    title
    content
    ssn
  }
}
The mutation will run successfully, however ssn will return null in the GraphQL response. This prevents anyone in the “Admins” group who is subscribed to updates from receiving the private information. Subscribers would still receive the name and address. The data is still written and this can be verified by running a query.
Generates
The @auth directive will add authorization snippets to any relevant resolver
mapping templates at compile time. Different operations use different methods
of authorization.
Owner Authorization
type Post @model @auth(rules: [{allow: owner}]) {
  id: ID!
  title: String!
}
The generated resolvers would be protected like so:
Mutation.createX: Verify the requesting user has a valid credential and automatically set the owner attribute to equal$ctx.identity.username.Mutation.updateX: Update the condition expression so that the DynamoDBUpdateItemoperation only succeeds if the record’s owner attribute equals the caller’s$ctx.identity.username.Mutation.deleteX: Update the condition expression so that the DynamoDBDeleteItemoperation only succeeds if the record’s owner attribute equals the caller’s$ctx.identity.username.Query.getX: In the response mapping template verify that the result’s owner attribute is the same as the$ctx.identity.username. If it is not return null.Query.listX: In the response mapping template filter the result’s items such that only items with an owner attribute that is the same as the$ctx.identity.usernameare returned.@connectionresolvers: In the response mapping template filter the result’s items such that only items with an owner attribute that is the same as the$ctx.identity.usernameare returned. This is not enabled when using thequeriesargument.
Static Group Authorization
type Post @model @auth(rules: [{allow: groups, groups: ["Admin"]}]) {
  id: ID!
  title: String!
  groups: String
}
Static group auth is simpler than the others. The generated resolvers would be protected like so:
Mutation.createX: Verify the requesting user has a valid credential and that$ctx.identity.claims.get("cognito:groups")contains the Admin group. If it does not, fail.Mutation.updateX: Verify the requesting user has a valid credential and that$ctx.identity.claims.get("cognito:groups")contains the Admin group. If it does not, fail.Mutation.deleteX: Verify the requesting user has a valid credential and that$ctx.identity.claims.get("cognito:groups")contains the Admin group. If it does not, fail.Query.getX: Verify the requesting user has a valid credential and that$ctx.identity.claims.get("cognito:groups")contains the Admin group. If it does not, fail.Query.listX: Verify the requesting user has a valid credential and that$ctx.identity.claims.get("cognito:groups")contains the Admin group. If it does not, fail.@connectionresolvers: Verify the requesting user has a valid credential and that$ctx.identity.claims.get("cognito:groups")contains the Admin group. If it does not, fail. This is not enabled when using thequeriesargument.
Dynamic Group Authorization
type Post @model @auth(rules: [{allow: groups, groupsField: "groups"}]) {
  id: ID!
  title: String!
  groups: String
}
The generated resolvers would be protected like so:
Mutation.createX: Verify the requesting user has a valid credential and that it contains a claim to at least one group passed to the query in the$ctx.args.input.groupsargument.Mutation.updateX: Update the condition expression so that the DynamoDBUpdateItemoperation only succeeds if the record’s groups attribute contains at least one of the caller’s claimed groups via$ctx.identity.claims.get("cognito:groups").Mutation.deleteX: Update the condition expression so that the DynamoDBDeleteItemoperation only succeeds if the record’s groups attribute contains at least one of the caller’s claimed groups via$ctx.identity.claims.get("cognito:groups")Query.getX: In the response mapping template verify that the result’s groups attribute contains at least one of the caller’s claimed groups via$ctx.identity.claims.get("cognito:groups").Query.listX: In the response mapping template filter the result’s items such that only items with a groups attribute that contains at least one of the caller’s claimed groups via$ctx.identity.claims.get("cognito:groups").@connectionresolver: In the response mapping template filter the result’s items such that only items with a groups attribute that contains at least one of the caller’s claimed groups via$ctx.identity.claims.get("cognito:groups"). This is not enabled when using thequeriesargument.
@function
The @function directive allows you to quickly & easily configure AWS Lambda resolvers within your AWS AppSync API.
Definition
directive @function(name: String!, region: String) on FIELD_DEFINITION
Usage
The @function directive allows you to quickly connect lambda resolvers to an AppSync API. You may deploy the AWS Lambda functions via the Amplify CLI, AWS Lambda console, or any other tool. To connect an AWS Lambda resolver, add the @function directive to a field in your schema.graphql.
Let’s assume we have deployed an echo function with the following contents:
exports.handler = function (event, context) {
  context.done(null, event.arguments.msg);
};
If you deployed your function using the ‘amplify function’ category
The Amplify CLI provides support for maintaining multiple environments out of the box. When you deploy a function via amplify add function, it will automatically add the environment suffix to your Lambda function name. For example if you create a function named echofunction using amplify add function in the dev environment, the deployed function will be named echofunction-dev. The @function directive allows you to use ${env} to reference the current Amplify CLI environment.
type Query {
  echo(msg: String): String @function(name: "echofunction-${env}")
}
If you deployed your function without amplify
If you deployed your API without amplify then you must provide the full Lambda function name. If we deployed the same function with the name echofunction then you would have:
type Query {
  echo(msg: String): String @function(name: "echofunction")
}
Example: Return custom data and run custom logic
You can use the @function directive to write custom business logic in an AWS Lambda function. To get started, use
amplify add function, the AWS Lambda console, or other tool to deploy an AWS Lambda function with the following contents.
For example purposes assume the function is named GraphQLResolverFunction:
const POSTS = [
    { id: 1, title: "AWS Lambda: How To Guide." },
    { id: 2, title: "AWS Amplify Launches @function and @key directives." },
    { id: 3, title: "Serverless 101" }
];
const COMMENTS = [
    { postId: 1, content: "Great guide!" },
    { postId: 1, content: "Thanks for sharing!" },
    { postId: 2, content: "Can't wait to try them out!" }
];

// Get all posts. Write your own logic that reads from any data source.
function getPosts() {
    return POSTS;
}

// Get the comments for a single post.
function getCommentsForPost(postId) {
    return COMMENTS.filter(comment => comment.postId === postId);
}

/**
 * Using this as the entry point, you can use a single function to handle many resolvers.
 */
const resolvers = {
  Query: {
    posts: ctx => {
      return getPosts();
    },
  },
  Post: {
    comments: ctx => {
      return getCommentsForPost(ctx.source.id);
    },
  },
}

// event
// {
//   "typeName": "Query", /* Filled dynamically based on @function usage location */
//   "fieldName": "me", /* Filled dynamically based on @function usage location */
//   "arguments": { /* GraphQL field arguments via $ctx.arguments */ },
//   "identity": { /* AppSync identity object via $ctx.identity */ },
//   "source": { /* The object returned by the parent resolver. E.G. if resolving field 'Post.comments', the source is the Post object. */ },
//   "request": { /* AppSync request object. Contains things like headers. */ },
//   "prev": { /* If using the built-in pipeline resolver support, this contains the object returned by the previous function. */ },
// }
exports.handler = async (event) => {
  const typeHandler = resolvers[event.typeName];
  if (typeHandler) {
    const resolver = typeHandler[event.fieldName];
    if (resolver) {
      return await resolver(event);
    }
  }
  throw new Error("Resolver not found.");
};
Example: Get the logged in user from Amazon Cognito User Pools
When building applications, it is often useful to fetch information for the current user. We can use the @function directive to quickly add a resolver that uses AppSync identity information to fetch a user from Amazon Cognito User Pools. First make sure you have added Amazon Cognito User Pools enabled via amplify add auth and a GraphQL API via amplify add api to an amplify project. Once you have created the user pool, get the UserPoolId from amplify-meta.json in the backend/ directory of your amplify project. You will provide this value as an environment variable in a moment. Next, using the Amplify function category, AWS console, or other tool, deploy a AWS Lambda function with the following contents.
For example purposes assume the function is named GraphQLResolverFunction:
/* Amplify Params - DO NOT EDIT
You can access the following resource attributes as environment variables from your Lambda function
var environment = process.env.ENV
var region = process.env.REGION
var authMyResourceNameUserPoolId = process.env.AUTH_MYRESOURCENAME_USERPOOLID

Amplify Params - DO NOT EDIT */

const { CognitoIdentityServiceProvider } = require('aws-sdk');
const cognitoIdentityServiceProvider = new CognitoIdentityServiceProvider();

/**
 * Get user pool information from environment variables.
 */
const COGNITO_USERPOOL_ID = process.env.AUTH_MYRESOURCENAME_USERPOOLID;
if (!COGNITO_USERPOOL_ID) {
  throw new Error(`Function requires environment variable: 'COGNITO_USERPOOL_ID'`);
}
const COGNITO_USERNAME_CLAIM_KEY = 'cognito:username';

/**
 * Using this as the entry point, you can use a single function to handle many resolvers.
 */
const resolvers = {
  Query: {
    echo: ctx => {
      return ctx.arguments.msg;
    },
    me: async ctx => {
      var params = {
        UserPoolId: COGNITO_USERPOOL_ID, /* required */
        Username: ctx.identity.claims[COGNITO_USERNAME_CLAIM_KEY], /* required */
      };
      try {
        // Read more: https://docs.aws.amazon.com/AWSJavaScriptSDK/latest/AWS/CognitoIdentityServiceProvider.html#adminGetUser-property
        return await cognitoIdentityServiceProvider.adminGetUser(params).promise();
      } catch (e) {
        throw new Error(`NOT FOUND`);
      }
    }
  },
}

// event
// {
//   "typeName": "Query", /* Filled dynamically based on @function usage location */
//   "fieldName": "me", /* Filled dynamically based on @function usage location */
//   "arguments": { /* GraphQL field arguments via $ctx.arguments */ },
//   "identity": { /* AppSync identity object via $ctx.identity */ },
//   "source": { /* The object returned by the parent resolver. E.G. if resolving field 'Post.comments', the source is the Post object. */ },
//   "request": { /* AppSync request object. Contains things like headers. */ },
//   "prev": { /* If using the built-in pipeline resolver support, this contains the object returned by the previous function. */ },
// }
exports.handler = async (event) => {
  const typeHandler = resolvers[event.typeName];
  if (typeHandler) {
    const resolver = typeHandler[event.fieldName];
    if (resolver) {
      return await resolver(event);
    }
  }
  throw new Error("Resolver not found.");
};
You can connect this function to your AppSync API deployed via Amplify using this schema:
type Query {
    posts: [Post] @function(name: "GraphQLResolverFunction")
}
type Post {
    id: ID!
    title: String!
    comments: [Comment] @function(name: "GraphQLResolverFunction")
}
type Comment {
    postId: ID!
    content: String
}
This simple lambda function shows how you can write your own custom logic using a language of your choosing. Try enhancing the example with your own data and logic.
When deploying the function, make sure your function has access to the auth resource. You can run the
amplify update functioncommand for the CLI to automatically supply an environment variable namedAUTH_<RESOURCE_NAME>_USERPOOLIDto the function and associate corresponding CRUD policies to the execution role of the function.
After deploying our function, we can connect it to AppSync by defining some types and using the @function directive. Add this to your schema, to connect the
Query.echo and Query.me resolvers to our new function.
type Query {
  me: User @function(name: "GraphQLResolverFunction")
  echo(msg: String): String @function(name: "GraphQLResolverFunction")
}
# These types derived from https://docs.aws.amazon.com/AWSJavaScriptSDK/latest/AWS/CognitoIdentityServiceProvider.html#adminGetUser-property
type User {
  Username: String!
  UserAttributes: [Value]
  UserCreateDate: String
  UserLastModifiedDate: String
  Enabled: Boolean
  UserStatus: UserStatus
  MFAOptions: [MFAOption]
  PreferredMfaSetting: String
  UserMFASettingList: String
}
type Value {
  Name: String!
  Value: String
}
type MFAOption {
  DeliveryMedium: String
  AttributeName: String
}
enum UserStatus {
  UNCONFIRMED
  CONFIRMED
  ARCHIVED
  COMPROMISED
  UNKNOWN
  RESET_REQUIRED
  FORCE_CHANGE_PASSWORD
}
Next run amplify push and wait as your project finishes deploying. To test that everything is working as expected run amplify api console to open the GraphiQL editor for your API. You are going to need to open the Amazon Cognito User Pools console to create a user if you do not yet have any. Once you have created a user go back to the AppSync console’s query page and click “Login with User Pools”. You can find the ClientId in amplify-meta.json under the key AppClientIDWeb. Paste that value into the modal and login using your username and password. You can now run this query:
query {
  me {
    Username
    UserStatus
    UserCreateDate
    UserAttributes {
      Name
      Value
    }
    MFAOptions {
      AttributeName
      DeliveryMedium
    }
    Enabled
    PreferredMfaSetting
    UserMFASettingList
    UserLastModifiedDate
  }
}
which will return user information related to the current user directly from your user pool.
Structure of the AWS Lambda function event
When writing lambda function’s that are connected via the @function directive, you can expect the following structure for the AWS Lambda event object.
| Key | Description |
|---|---|
| typeName | The name of the parent object type of the field being resolver. |
| fieldName | The name of the field being resolved. |
| arguments | A map containing the arguments passed to the field being resolved. |
| identity | A map containing identity information for the request. Contains a nested key ‘claims’ that will contains the JWT claims if they exist. |
| source | When resolving a nested field in a query, the source contains parent value at runtime. For example when resolving Post.comments, the source will be the Post object. |
| request | The AppSync request object. Contains header information. |
| prev | When using pipeline resolvers, this contains the object returned by the previous function. You can return the previous value for auditing use cases. |
Calling functions in different regions
By default, we expect the function to be in the same region as the amplify project. If you need to call a function in a different (or static) region, you can provide the region argument.
type Query {
  echo(msg: String): String @function(name: "echofunction", region: "us-east-1")
}
Calling functions in different AWS accounts is not supported via the @function directive but is supported by AWS AppSync.
Chaining functions
The @function directive supports AWS AppSync pipeline resolvers. That means, you can chain together multiple functions such that they are invoked in series when your field’s resolver is invoked. To create a pipeline resolver that calls out to multiple AWS Lambda functions in series, use multiple @function directives on the field.
type Mutation {
  doSomeWork(msg: String): String @function(name: "worker-function") @function(name: "audit-function")
}
In the example above when you run a mutation that calls the Mutation.doSomeWork field, the worker-function will be invoked first then the audit-function will be invoked with an event that contains the results of the worker-function under the event.prev.result key. The audit-function would need to return event.prev.result if you want the result of worker-function to be returned for the field. Under the hood, Amplify creates an AppSync::FunctionConfiguration for each unique instance of @function in a document and a pipeline resolver containing a pointer to a function for each @function on a given field.
Generates
The @function directive generates these resources as necessary:
- An AWS IAM role that has permission to invoke the function as well as a trust policy with AWS AppSync.
- An AWS AppSync data source that registers the new role and existing function with your AppSync API.
- An AWS AppSync pipeline function that prepares the lambda event and invokes the new data source.
- An AWS AppSync resolver that attaches to the GraphQL field and invokes the new pipeline functions.
@connection
The @connection directive enables you to specify relationships between @model types. Currently, this supports one-to-one, one-to-many, and many-to-one relationships. You may implement many-to-many relationships using two one-to-many connections and a joining @model type. See the usage section for details.
We also provide a fully working schema with 17 patterns related to relational designs.
Definition
directive @connection(keyName: String, fields: [String!]) on FIELD_DEFINITION
Usage
Relationships between types are specified by annotating fields on an @model object type with the @connection directive.
The fields argument can be provided and indicates which fields can be queried by to get connected objects. The keyName argument can optionally be used to specify the name of secondary index (an index that was set up using @key) that should be queried from the other type in the relationship.
When specifying a keyName, the fields argument should be provided to indicate which field(s) will be used to get connected objects. If keyName is not provided, then @connection queries the target table’s primary index.
Has One
In the simplest case, you can define a one-to-one connection where a project has one team:
type Project @model {
  id: ID!
  name: String
  team: Team @connection
}

type Team @model {
  id: ID!
  name: String!
}
You can also define the field you would like to use for the connection by populating the first argument to the fields array and matching it to a field on the type:
type Project @model {
  id: ID!
  name: String
  teamID: ID!
  team: Team @connection(fields: ["teamID"])
}

type Team @model {
  id: ID!
  name: String!
}
In this case, the Project type has a teamID field added as an identifier for the team that the project belongs to. @connection can then get the connected Team object by querying the Team table with this teamID.
After it’s transformed, you can create projects and query the connected team as follows:
mutation CreateProject {
    createProject(input: { name: "New Project", teamID: "a-team-id"}) {
        id
        name
        team {
            id
            name
        }
    }
}
Note The Project.team resolver is configured to work with the defined connection. This is done with a query on the Team table where
teamIDis passed in as an argument to the mutation.
Likewise, you can make a simple one-to-many connection as follows for a post that has many comments:
Has Many
type Post @model {
  id: ID!
  title: String!
  comments: [Comment] @connection(keyName: "byPost", fields: ["id"])
}

type Comment @model
  @key(name: "byPost", fields: ["postID", "content"]) {
  id: ID!
  postID: ID!
  content: String!
}
Note how a one-to-many connection needs a @key that allows comments to be queried by the postID and the connection uses this key to get all comments whose postID is the id of the post was called on. After it’s transformed, you can create comments and query the connected Post as follows:
mutation CreatePost {
  createPost(input: { id: "a-post-id", title: "Post Title" } ) {
    id
    title
  }
}

mutation CreateCommentOnPost {
  createComment(input: { id: "a-comment-id", content: "A comment", postID: "a-post-id"}) {
    id
    content
  }
}
And you can query a Post with its comments as follows:
query getPost {
  getPost(id: "a-post-id") {
    id
    title
    comments {
      items {
        id
        content
      }
    }
  }
}
Belongs To
You can make a connection bi-directional by adding a many-to-one connection to types that already have a one-to-many connection. In this case we add a connection from Comment to Post since each comment belongs to a post:
type Post @model {
  id: ID!
  title: String!
  comments: [Comment] @connection(keyName: "byPost", fields: ["id"])
}

type Comment @model
  @key(name: "byPost", fields: ["postID", "content"]) {
  id: ID!
  postID: ID!
  content: String!
  post: Post @connection(fields: ["postID"])
}
After it’s transformed, you can create comments with a post as follows:
mutation CreatePost {
  createPost(input: { id: "a-post-id", title: "Post Title" } ) {
    id
    title
  }
}

mutation CreateCommentOnPost1 {
  createComment(input: { id: "a-comment-id-1", content: "A comment #1", postID: "a-post-id"}) {
    id
    content
  }
}

mutation CreateCommentOnPost2 {
  createComment(input: { id: "a-comment-id-2", content: "A comment #2", postID: "a-post-id"}) {
    id
    content
  }
}
And you can query a Comment with its Post, then all Comments of that Post by navigating the connection:
query GetCommentWithPostAndComments {
  getComment( id: "a-comment-id-1" ) {
    id
    content
    post {
      id
      title
      comments {
        items {
          id
          content
        }
      }
    }
  }
}
Many-To-Many Connections
You can implement many to many using two 1-M @connections, an @key, and a joining @model. For example:
type Post @model {
  id: ID!
  title: String!
  editors: [PostEditor] @connection(keyName: "byPost", fields: ["id"])
}

# Create a join model and disable queries as you don't need them
# and can query through Post.editors and User.posts
type PostEditor
  @model(queries: null)
  @key(name: "byPost", fields: ["postID", "editorID"])
  @key(name: "byEditor", fields: ["editorID", "postID"]) {
  id: ID!
  postID: ID!
  editorID: ID!
  post: Post! @connection(fields: ["postID"])
  editor: User! @connection(fields: ["editorID"])
}

type User @model {
  id: ID!
  username: String!
  posts: [PostEditor] @connection(keyName: "byEditor", fields: ["id"])
}
This case is a bidirectional many-to-many which is why two @key calls are needed on the PostEditor model.
You can first create a Post and a User, and then add a connection between them with by creating a PostEditor object as follows:
mutation CreateData {
    p1: createPost(input: { id: "P1", title: "Post 1" }) {
        id
    }
    p2: createPost(input: { id: "P2", title: "Post 2" }) {
        id
    }
    u1: createUser(input: { id: "U1", username: "user1" }) {
        id
    }
    u2: createUser(input: { id: "U2", username: "user2" }) {
        id
    }
}

mutation CreateLinks {
    p1u1: createPostEditor(input: { id: "P1U1", postID: "P1", editorID: "U1" }) {
        id
    }
    p1u2: createPostEditor(input: { id: "P1U2", postID: "P1", editorID: "U2" }) {
        id
    }
    p2u1: createPostEditor(input: { id: "P2U1", postID: "P2", editorID: "U1" }) {
        id
    }
}
Note that neither the User type nor the Post type have any identifiers of connected objects. The connection info is held entirely inside the PostEditor objects.
You can query a given user with their posts:
query GetUserWithPosts {
    getUser(id: "U1") {
        id
        username
        posts {
            items {
                post {
                    title
                }
            }
        }
    }
}
Also you can query a given post with the editors of that post and can list the posts of those editors, all in a single query:
query GetPostWithEditorsWithPosts {
    getPost(id: "P1") {
        id
        title
        editors {
            items {
                editor {
                    username
                    posts {
                        items {
                            post {
                                title
                            }
                        }
                    }
                }
            }
        }
    }
}
Alternative Definition
The above definition is the recommended way to create relationships between model types in your API. This involves defining index structures using @key and connection resolvers using @connection. There is an older parameterization of @connection that creates indices and connection resolvers that is still functional for backwards compatibility reasons. It is recommended to use @key and the new @connection via the fields argument.
directive @connection(name: String, keyField: String, sortField: String, limit: Int) on FIELD_DEFINITION
This parameterization is not compatible with @key. See the parameterization above to use @connection with indexes created by @key.
Usage
Relationships between data are specified by annotating fields on an @model object type with the @connection directive. You can use the keyField to specify what field should be used to partition the elements within the index and the sortField argument to specify how the records should be sorted.
Unnamed Connections
In the simplest case, you can define a one-to-one connection:
type Project @model {
    id: ID!
    name: String
    team: Team @connection
}
type Team @model {
    id: ID!
    name: String!
}
After it’s transformed, you can create projects with a team as follows:
mutation CreateProject {
    createProject(input: { name: "New Project", projectTeamId: "a-team-id"}) {
        id
        name
        team {
            id
            name
        }
    }
}
Note The Project.team resolver is configured to work with the defined connection.
Likewise, you can make a simple one-to-many connection as follows:
type Post @model {
    id: ID!
    title: String!
    comments: [Comment] @connection
}
type Comment @model {
    id: ID!
    content: String!
}
After it’s transformed, you can create comments with a post as follows:
mutation CreateCommentOnPost {
  createComment(input: { content: "A comment", postCommentsId: "a-post-id"}) {
    id
    content
  }
}
Note The postCommentsId field on the input may seem unusual. In the one-to-many case without a provided
nameargument there is only partial information to work with, which results in the unusual name. To fix this, provide a value for the@connection’s name argument and complete the bi-directional relationship by adding a corresponding@connectionfield to the Comment type.
Named Connections
The name argument specifies a name for the connection and it’s used to create bi-directional relationships that reference the same underlying foreign key.
For example, if you wanted your Post.comments
and Comment.post fields to refer to opposite sides of the same relationship,
you need to provide a name.
type Post @model {
  id: ID!
  title: String!
  comments: [Comment] @connection(name: "PostComments", sortField: "createdAt")
}
type Comment @model {
  id: ID!
  content: String!
  post: Post @connection(name: "PostComments", sortField: "createdAt")
  createdAt: String
}
After it’s transformed, create comments with a post as follows:
mutation CreateCommentOnPost {
  createComment(input: { content: "A comment", commentPostId: "a-post-id"}) {
    id
    content
    post {
      id
      title
      comments {
        id
        # and so on...
      }
    }
  }
}
When you query the connection, the comments will return sorted by their createdAt field.
query GetPostAndComments {
  getPost(id: "...") {
    id
    title
    comments {
      items {
        content
        createdAt
      }
    }
  }
}
Many-To-Many Connections
You can implement many to many using two 1-M @connections, an @key, and a joining @model. For example:
type Post @model {
  id: ID!
  title: String!
  editors: [PostEditor] @connection(name: "PostEditors")
}

# Create a join model and disable queries as you don't need them
# and can query through Post.editors and User.posts
type PostEditor @model(queries: null) {
  id: ID!
  post: Post! @connection(name: "PostEditors")
  editor: User! @connection(name: "UserEditors")
}

type User @model {
  id: ID!
  username: String!
  posts: [PostEditor] @connection(name: "UserEditors")
}
You can then create Posts & Users independently and join them in a many-to-many by creating PostEditor objects.
Limit
The default number of nested objects is 10. You can override this behavior by setting the limit argument. For example:
type Post @model {
  id: ID!
  title: String!
  comments: [Comment] @connection(limit: 50)
}

type Comment @model {
  id: ID!
  content: String!
}
Generates
In order to keep connection queries fast and efficient, the GraphQL transform manages global secondary indexes (GSIs) on the generated tables on your behalf. In the future we are investigating using adjacency lists along side GSIs for different use cases that are connection heavy.
Note After you have pushed a
@connectiondirective you should not try to change it. If you try to change it, the DynamoDB UpdateTable operation will fail. Should you need to change a@connection, you should add a new@connectionthat implements the new access pattern, update your application to use the new@connection, and then delete the old@connectionwhen it’s no longer needed.
@versioned
The @versioned directive adds object versioning and conflict resolution to a type. Do not use this directive when leveraging DataStore as the conflict detection and resolution features are automatically handled inside AppSync and are incompatible with the @versioned directive.
Definition
directive @versioned(versionField: String = "version", versionInput: String = "expectedVersion") on OBJECT
Usage
Add @versioned to a type that is also annotate with @model to enable object versioning and conflict detection for a type.
type Post @model @versioned {
  id: ID!
  title: String!
  version: Int!   # <- If not provided, it is added for you.
}
Creating a Post automatically sets the version to 1
mutation Create {
  createPost(input:{
    title:"Conflict detection in the cloud!"
  }) {
    id
    title
    version  # will be 1
  }
}
Updating a Post requires passing the “expectedVersion” which is the object’s last saved version
Note: When updating an object, the version number will automatically increment.
mutation Update($postId: ID!) {
  updatePost(
    input:{
      id: $postId,
      title: "Conflict detection in the cloud is great!",
      expectedVersion: 1
    }
  ) {
    id
    title
    version # will be 2
  }
}
Deleting a Post requires passing the “expectedVersion” which is the object’s last saved version
mutation Delete($postId: ID!) {
  deletePost(
    input: {
      id: $postId,
      expectedVersion: 2
    }
  ) {
    id
    title
    version
  }
}
Update and delete operations will fail if the expectedVersion does not match the version
stored in DynamoDB. You may change the default name of the version field on the type as well as the name
of the input field via the versionField and versionInput arguments on the @versioned directive.
Generates
The @versioned directive manipulates resolver mapping templates and will store a version field in versioned objects.
@searchable
The @searchable directive handles streaming the data of an @model object type to
Amazon Elasticsearch Service and configures search resolvers that search that information.
Note: Support for adding the
@searchabledirective does not yet provide automatic indexing for any existing data to Elasticsearch. View the feature request here.
Migration Warning
You might observe duplicate records on search operations, if you deployed your GraphQL schema using CLI version older than 4.14.1 and have thereafter updated your schema & deployed the changes with a CLI version between 4.14.1 - 4.16.1.
Please use this Python script to remove the duplicate records from your Elasticsearch cluster. This script indexes data from your DynamoDB Table to your Elasticsearch Cluster. View an example of how to call the script with the following parameters here.
Definition
# Streams data from DynamoDB to Elasticsearch and exposes search capabilities.
directive @searchable(queries: SearchableQueryMap) on OBJECT
input SearchableQueryMap { search: String }
Usage
Given the following schema an index is created for Post, if there are more types with @searchable the directive will create an index for it, and those posts in Amazon DynamoDB are automatically streamed to the post index in Amazon ElasticSearch via AWS Lambda and connect a searchQueryField resolver.
type Post @model @searchable {
  id: ID!
  title: String!
  createdAt: String!
  updatedAt: String!
  upvotes: Int
}
You may then create objects in DynamoDB that will be automatically streamed to lambda
using the normal createPost mutation.
mutation CreatePost {
  createPost(input: { title: "Stream me to Elasticsearch!" }) {
    id
    title
    createdAt
    updatedAt
    upvotes
  }
}
And then search for posts using a match query:
query SearchPosts {
  searchPost(filter: { title: { match: "Stream" }}) {
    items {
      id
      title
    }
  }
}
Searchable Types
There are multiple SearchableTypes generated in the schema, based on the datatype of the fields you specify in the Post type.
The filter parameter in the search query has a searchable type field that corresponds to the field listed in the Post type. For example, the title field of the filter object, has the following properties (containing the operators that are applicable to the string type):
eq- which uses the Elasticsearch keyword type to match for the exact term.ne- this is the inverse operation ofeq.matchPhrase- searches using the Elasticsearch’s Match Phrase Query to filter the documents in the search query.matchPhrasePrefix- This uses the Elasticsearch’s Match Phrase Prefix Query to filter the documents in the search query.multiMatch- Corresponds to the Elasticsearch Multi Match Query.exists- Corresponds to the Elasticsearch Exists Query.wildcard- Corresponds to the Elasticsearch Wildcard Query.regexp- Corresponds to the Elasticsearch Regexp Query.
For example, you can filter using the wildcard expression to search for posts using the following wildcard query:
query SearchPosts {
  searchPost(filter: { title: { wildcard: "S*Elasticsearch!" }}) {
    items {
      id
      title
    }
  }
}
The above query returns all documents whose title begins with S and ends with Elasticsearch!.
Moreover you can use the filter parameter to pass a nested and/or/not condition. By default, every operation in the filter properties is AND ed. You can use the or or not properties in the filter parameter of the search query to override this behavior. Each of these operators (and, or, not properties in the filter object) accepts an array of searchable types which are in turn joined by the corresponding operator. For example, consider the following search query:
query SearchPosts {
  searchPost(filter: {
    title: { wildcard: "S*" }
    or: [
      { createdAt: { eq: "08/20/2018" } },
      { updatedAt: { eq: "08/20/2018" } }
    ]
  }) {
    items {
      id
      title
    }
  }
}
Assuming you used the createPost mutation to create new posts with title, createdAt and updatedAt values, the above search query will return you a list of all Posts, whose title starts with S and have createdAt or updatedAt value as 08/20/2018.
Here is a complete list of searchable operations per GraphQL type supported as of today:
| GraphQL Type | Searchable Operation |
|---|---|
| String | ne, eq, match, matchPhrase, matchPhrasePrefix, multiMatch, exists, wildcard, regexp |
| Int | ne, gt, lt, gte, lte, eq, range |
| Float | ne, gt, lt, gte, lte, eq, range |
| Boolean | eq, ne |
Backfill your Elasticsearch Index from your DynamoDB Table
The following Python script creates an event stream of your DynamoDB records and sends them to your Elasticsearch Index. This will help you backfill your data should you choose to add @searchable to your @model types at a later time.
Example of calling the script
python3 ddb_to_ess.py
  # please use the region your table and elasticsearch domain reside in
  --rn 'us-west-2'
  # table name
  --tn 'Post-XXXX-dev'
  # lambda function arn
  --lf 'arn:aws:lambda:us-west-2:123456789xxx:function:DdbToEsFn-<api__id>-dev'
  # event source arn
  --esarn 'arn:aws:dynamodb:us-west-2:123456789xxx:table/Post-<api__id>-
  dev/stream/2019-20-03T00:00:00.350'
@predictions
The @predictions directive allows you to query an orchestration of AI/ML services such as Amazon Rekognition, Amazon Translate, and/or Amazon Polly.
Note: Support for adding the
@predictionsdirective uses the s3 storage bucket which is configured via the CLI. At the moment this directive works only with objects located withinpublic/.
Definition
The supported actions in this directive are included in the definition.
  directive @predictions(actions: [PredictionsActions!]!) on FIELD_DEFINITION
  enum PredictionsActions {
    identifyText # uses Amazon Rekognition to detect text
    identifyLabels # uses Amazon Rekognition to detect labels
    convertTextToSpeech # uses Amazon Polly in a lambda to output a presigned url to synthesized speech
    translateText # uses Amazon Translate to translate text from source to target langauge
  }
Usage
Given the following schema a query operation is defined which will do the following with the provided image.
- Identify text from the image
- Translate the text from that image
- Synthesize speech from the translated text.
type Query {
  speakTranslatedImageText: String @predictions(actions: [
    identifyText
    translateText
    convertTextToSpeech
  ])
}
An example of that query will look like:
query SpeakTranslatedImageText($input: SpeakTranslatedImageTextInput!) {
  speakTranslatedImageText(input: {
    identifyText: {
      key: "myimage.jpg"
    }
    translateText: {
      sourceLanguage: "en"
      targetLanguage: "es"
    }
    convertTextToSpeech: {
      voiceID: "Conchita"
    }
  })
}
A code example of this using the JS Library:
import React, { useState } from 'react';
import API, { graphqlOperation } from '@aws-amplify/api';
import Amplify, { Storage } from 'aws-amplify';
import awsconfig from './aws-exports';
import { speakTranslatedImageText } from './graphql/queries';

/* Configure Exports */
Amplify.configure(awsconfig);

function SpeakTranslatedImage() {
  const [ src, setSrc ] = useState("");
  const [ img, setImg ] = useState("");

  function putS3Image(event) {
    const file = event.target.files[0];
    Storage.put(file.name, file)
    .then (async (result) => {
      setSrc(await speakTranslatedImageTextOP(result.key))
      setImg(await Storage.get(result.key));
    })
    .catch(err => console.log(err));
  }

  return (
    <div className="Text">
      <div>
        <h3>Upload Image</h3>
        <input
              type = "file" accept='image/jpeg'
              onChange = {(event) => {
                putS3Image(event)
              }}
          />
        <br />
        { img && <img src = {img}></img>}
        { src &&
          <div> <audio id="audioPlayback" controls>
              <source id="audioSource" type="audio/mp3" src = {src}/>
          </audio> </div>
        }
      </div>
    </div>
  );
}

async function speakTranslatedImageTextOP(key) {
  const inputObj = {
    translateText: {
      sourceLanguage: "en", targetLanguage: "es" },
    identifyText: { key },
    convertTextToSpeech: { voiceID: "Conchita" }
  };
  const response = await API.graphql(
    graphqlOperation(speakTranslatedImageText, { input: inputObj }));
  return response.data.speakTranslatedImageText;
}
function App() {
  return (
    <div className="App">
        <h1>Speak Translated Image</h1>
        < SpeakTranslatedImage />
    </div>
  );
}
export default App;
How it works
From example schema above, @predictions will create resources to communicate with Amazon Rekognition, Translate and Polly.
For each action the following is created:
- IAM Policy for each service (e.g. Amazon Rekognition
detectTextPolicy) - An AppSync VTL function
- An AppSync DataSource
Finally a resolver is created for speakTranslatedImageText which is a pipeline resolver composed of AppSync functions which are defined by the action list provided in the directive.
Actions
Each of the actions described in the @predictions definition section can be used individually, as well as in a sequence. Sequence of actions supported today are as follows:
identifyText -> translateText -> convertTextToSpeechidentifyLabels -> translateText -> convertTextToSpeechtranslateText -> convertTextToSpeech
Action Resources
Data Access Patterns
In the DynamoDB documentation for modeling relational data in a NoSQL database, there is an in depth example of 17 access patterns from the First Steps for Modeling Relational Data in DynamoDB page.

In this example, you will learn how to support these data access patterns using GraphQL, AWS Amplify, and the GraphQL Transform library.
This example has the following types:
- Warehouse
- Product
- Inventory
- Employee
- AccountRepresentative
- Customer
- Product
Let’s have a look at the access patterns that we’ll be implementing in this tutorial:
- Look up employee details by employee ID
- Query employee details by employee name
- Find an employee’s phone number(s)
- Fine a customer’s phone number(s)
- Get orders for a given customer within a given date range
- Show all open orders within a given date range across all customers
- See all employees recently hired
- Find all employees working in a given warehouse
- Get all items on order for a given product
- Get current inventories for a given product at all warehouses
- Get customers by account representative
- Get orders by account representative and date
- Get all items on order for a given product
- Get all employees with a given job title
- Get inventory by product and warehouse
- Get total product inventory
- Get account representatives ranked by order total and sales period
The following schema introduces the required keys and connections so that we can support these access patterns:
type Order @model
  @key(name: "byCustomerByStatusByDate", fields: ["customerID", "status", "date"])
  @key(name: "byCustomerByDate", fields: ["customerID", "date"])
  @key(name: "byRepresentativebyDate", fields: ["accountRepresentativeID", "date"])
  @key(name: "byProduct", fields: ["productID", "id"])
{
  id: ID!
  customerID: ID!
  accountRepresentativeID: ID!
  productID: ID!
  status: String!
  amount: Int!
  date: String!
}

type Customer @model
  @key(name: "byRepresentative", fields: ["accountRepresentativeID", "id"]) {
  id: ID!
  name: String!
  phoneNumber: String
  accountRepresentativeID: ID!
  ordersByDate: [Order] @connection(keyName: "byCustomerByDate", fields: ["id"])
  ordersByStatusDate: [Order] @connection(keyName: "byCustomerByStatusByDate", fields: ["id"])
}

type Employee @model
  @key(name: "newHire", fields: ["newHire", "id"], queryField: "employeesNewHire")
  @key(name: "newHireByStartDate", fields: ["newHire", "startDate"], queryField: "employeesNewHireByStartDate")
  @key(name: "byName", fields: ["name", "id"], queryField: "employeeByName")
  @key(name: "byTitle", fields: ["jobTitle", "id"], queryField: "employeesByJobTitle")
  @key(name: "byWarehouse", fields: ["warehouseID", "id"]) {
  id: ID!
  name: String!
  startDate: String!
  phoneNumber: String!
  warehouseID: ID!
  jobTitle: String!
  newHire: String! # We have to use String type, because Boolean types cannot be sort keys
}

type Warehouse @model {
  id: ID!
  employees: [Employee] @connection(keyName: "byWarehouse", fields: ["id"])
}

type AccountRepresentative @model
  @key(name: "bySalesPeriodByOrderTotal", fields: ["salesPeriod", "orderTotal"], queryField: "repsByPeriodAndTotal") {
  id: ID!
  customers: [Customer] @connection(keyName: "byRepresentative", fields: ["id"])
  orders: [Order] @connection(keyName: "byRepresentativebyDate", fields: ["id"])
  orderTotal: Int
  salesPeriod: String
}

type Inventory @model
  @key(name: "byWarehouseID", fields: ["warehouseID"], queryField: "itemsByWarehouseID")
  @key(fields: ["productID", "warehouseID"]) {
  productID: ID!
  warehouseID: ID!
  inventoryAmount: Int!
}

type Product @model {
  id: ID!
  name: String!
  orders: [Order] @connection(keyName: "byProduct", fields: ["id"])
  inventories: [Inventory] @connection(fields: ["id"])
}
Now that we have the schema created, let’s create the items in the database that we will be operating against:
# first
mutation createWarehouse {
  createWarehouse(input: {id: "1"}) {
    id
  }
}

# second
mutation createEmployee {
  createEmployee(input: {
    id: "amanda"
    name: "Amanda",
    startDate: "2018-05-22",
    phoneNumber: "6015555555",
    warehouseID: "1",
    jobTitle: "Manager",
    newHire: "true"}
  ) {
    id
    jobTitle
    name
    newHire
    phoneNumber
    startDate
    warehouseID
  }
}

# third
mutation createAccountRepresentative {
  createAccountRepresentative(input: {
    id: "dabit"
    orderTotal: 400000
    salesPeriod: "January 2019"
  }) {
    id
    orderTotal
    salesPeriod
  }
}

# fourth
mutation createCustomer {
  createCustomer(input: {
    id: "jennifer_thomas"
    accountRepresentativeID: "dabit"
    name: "Jennifer Thomas"
    phoneNumber: "+16015555555"
  }) {
    id
    name
    accountRepresentativeID
    phoneNumber
  }
}

# fifth
mutation createProduct {
  createProduct(input: {
    id: "yeezyboost"
    name: "Yeezy Boost"
  }) {
    id
    name
  }
}

# sixth
mutation createInventory {
  createInventory(input: {
    productID: "yeezyboost"
    warehouseID: "1"
    inventoryAmount: 300
  }) {
    productID
    inventoryAmount
    warehouseID
  }
}

# seventh
mutation createOrder {
  createOrder(input: {
    amount: 300
    date: "2018-07-12"
    status: "pending"
    accountRepresentativeID: "dabit"
    customerID: "jennifer_thomas"
    productID: "yeezyboost"
  }) {
    id
    customerID
    accountRepresentativeID
    amount
    date
    customerID
    productID
  }
}
1. Look up employee details by employee ID:
This can simply be done by querying the employee model with an employee ID, no @key or @connection is needed to make this work.
query getEmployee($id: ID!) {
  getEmployee(id: $id) {
    id
    name
    phoneNumber
    startDate
    jobTitle
  }
}
2. Query employee details by employee name:
The @key byName on the Employee type makes this access-pattern feasible because under the covers an index is created and a query is used to match against the name field. We can use this query:
query employeeByName($name: String!) {
  employeeByName(name: $name) {
    items {
      id
      name
      phoneNumber
      startDate
      jobTitle
    }
  }
}
3. Find an Employee’s phone number: Either one of the previous queries would work to find an employee’s phone number as long as one has their ID or name.
4. Find a customer’s phone number: A similar query to those given above but on the Customer model would give you a customer’s phone number.
query getCustomer($customerID: ID!) {
  getCustomer(id: $customerID) {
    phoneNumber
  }
}
5. Get orders for a given customer within a given date range: There is a one-to-many relation that lets all the orders of a customer be queried.
This relationship is created by having the @key name byCustomerByDate on the Order model that is queried by the connection on the orders field of the Customer model.
A sort key with the date is used. What this means is that the GraphQL resolver can use predicates like Between to efficiently search the date range rather than scanning all records in the database and then filtering them out.
The query one would need to get the orders to a customer within a date range would be:
query getCustomerWithOrdersByDate($customerID: ID!) {
  getCustomer(id: $customerID) {
    ordersByDate(date: {
      between: [ "2018-01-22", "2020-10-11" ]
    }) {
      items {
        id
        amount
        productID
      }
    }
  }
}
6. Show all open orders within a given date range across all customers:
The @key byCustomerByStatusByDate enables you to run a query that would work for this access pattern.
In this example, a composite sort key (combination of two or more keys) with the status and date is used. What this means is that the unique identifier of a record in the database is created by concatenating these two fields (status and date) together, and then the GraphQL resolver can use predicates like Between or Contains to efficiently search the unique identifier for matches rather than scanning all records in the database and then filtering them out.
query getCustomerWithOrdersByStatusDate($customerID: ID!) {
  getCustomer(id: $customerID) {
    ordersByStatusDate (statusDate: {
      between: [
        { status: "pending" date:  "2018-01-22" },
        { status: "pending", date: "2020-10-11"}
      ]}) {
        items {
            id
            amount
            date
        }
    }
  }
}
7. See all employees hired recently:
Having ‘@key(name: “newHire”, fields: [“newHire”, “id”])’ on the Employee model allows one to query by whether an employee has been hired recently.
query employeesNewHire {
  employeesNewHire(newHire: "true") {
    items {
      id
      name
      phoneNumber
      startDate
      jobTitle
    }
  }
}
We can also query and have the results returned by start date by using the employeesNewHireByStartDate query:
query employeesNewHireByDate {
  employeesNewHireByStartDate(newHire: "true") {
    items {
      id
      name
      phoneNumber
      startDate
      jobTitle
    }
  }
}
8. Find all employees working in a given warehouse:
This needs a one to many relationship from warehouses to employees. As can be seen from the @connection in the Warehouse model, this connection uses the byWarehouse key on the Employee model. The relevant query would look like this:
query getWarehouse($warehouseID: ID!) {
  getWarehouse(id: $warehouseID) {
    id
    employees{
      items {
        id
        name
        startDate
        phoneNumber
        jobTitle
      }
    }
  }
}
9. Get all items on order for a given product: This access-pattern would use a one-to-many relation from products to orders. With this query we can get all orders of a given product:
query getProductOrders($productID: ID!) {
  getProduct(id: $productID) {
    id
    orders {
      items {
        id
        status
        amount
        date
      }
    }
  }
}
10. Get current inventories for a product at all warehouses:
The query needed to get the inventories of a product in all warehouses would be:
query getProductInventoryInfo($productID: ID!) {
  getProduct(id: $productID) {
    id
    inventories {
      items {
        warehouseID
        inventoryAmount
      }
    }
  }
}
11. Get customers by account representative: This uses a one-to-many connection between account representatives and customers:
The query needed would look like this:
query getCustomersForAccountRepresentative($representativeId: ID!) {
  getAccountRepresentative(id: $representativeId) {
    customers {
      items {
        id
        name
        phoneNumber
      }
    }
  }
}
12. Get orders by account representative and date:
As can be seen in the AccountRepresentative model this connection uses the byRepresentativebyDate field on the Order model to create the connection needed. The query needed would look like this:
query getOrdersForAccountRepresentative($representativeId: ID!) {
  getAccountRepresentative(id: $representativeId) {
    id
    orders(date: {
      between: [
         "2010-01-22", "2020-10-11"
      ]
    }) {
        items {
          id
          status
          amount
          date
        }
    }
  }
}
13. Get all items on order for a given product: This is the same as number 9.
14. Get all employees with a given job title:
Using the byTitle @key makes this access pattern quite easy.
query employeesByJobTitle {
  employeesByJobTitle(jobTitle: "Manager") {
    items {
      id
      name
      phoneNumber
      jobTitle
    }
  }
}
15. Get inventory by product by warehouse: Here having the inventories be held in a separate model is particularly useful since this model can have its own partition key and sort key such that the inventories themselves can be queried as is needed for this access-pattern.
A query on this model would look like this:
query inventoryByProductAndWarehouse($productID: ID!, $warehouseID: ID!) {
  getInventory(productID: $productID, warehouseID: $warehouseID) {
    productID
    warehouseID
    inventoryAmount
  }
}
We can also get all inventory from an individual warehouse by using the itemsByWarehouseID query created by the byWarehouseID key:
query byWarehouseId($warehouseID: ID!) {
  itemsByWarehouseID(warehouseID: $warehouseID) {
    items {
      inventoryAmount
      productID
    }
  }
}
16. Get total product inventory: How this would be done depends on the use case. If one just wants a list of all inventories in all warehouses, one could just run a list inventories on the Inventory model:
query listInventorys {
  listInventorys {
    items {
      productID
      warehouseID
      inventoryAmount
    }
  }
}
17. Get sales representatives ranked by order total and sales period:
It’s uncertain exactly what this means. My take is that the sales period is either a date range or maybe even a month or week. Therefore we can set the sales period as a string and query using the combination of salesPeriod and orderTotal. We can also set the sortDirection in order to get the return values from largest to smallest:
query repsByPeriodAndTotal {
  repsByPeriodAndTotal(
    sortDirection: DESC,
    salesPeriod: "January 2019",
    orderTotal: {
      ge: 1000
    }) {
    items {
      id
      orderTotal
    }
  }
}
Relational Databases
The Amplify CLI currently supports importing serverless Amazon Aurora MySQL 5.6 databases running in the us-east-1 region. The following instruction show how to create an Amazon Aurora Serverless database, import this database as a GraphQL data source and test it.
First, if you do not have an Amplify project with a GraphQL API create one using these simple commands.
amplify init
amplify add api
Go to the AWS RDS console and click “Create database”.
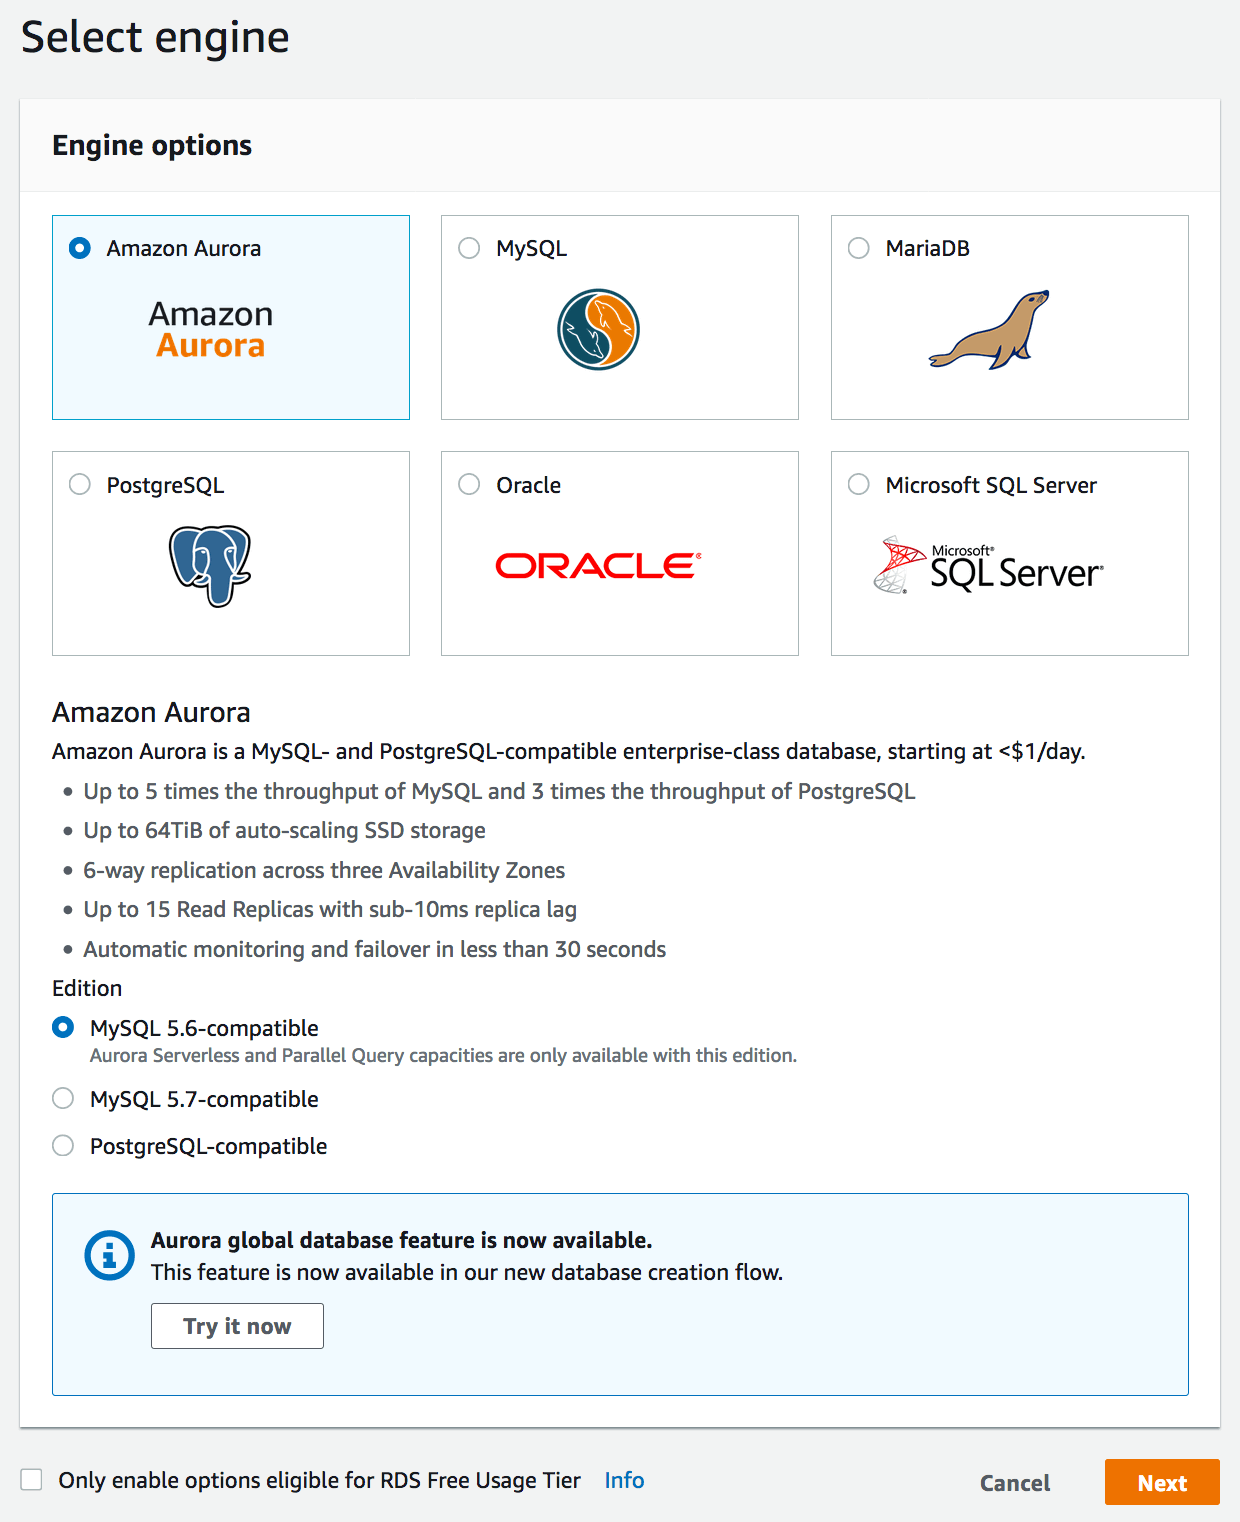
Select “Serverless” for the capacity type and fill in some information.
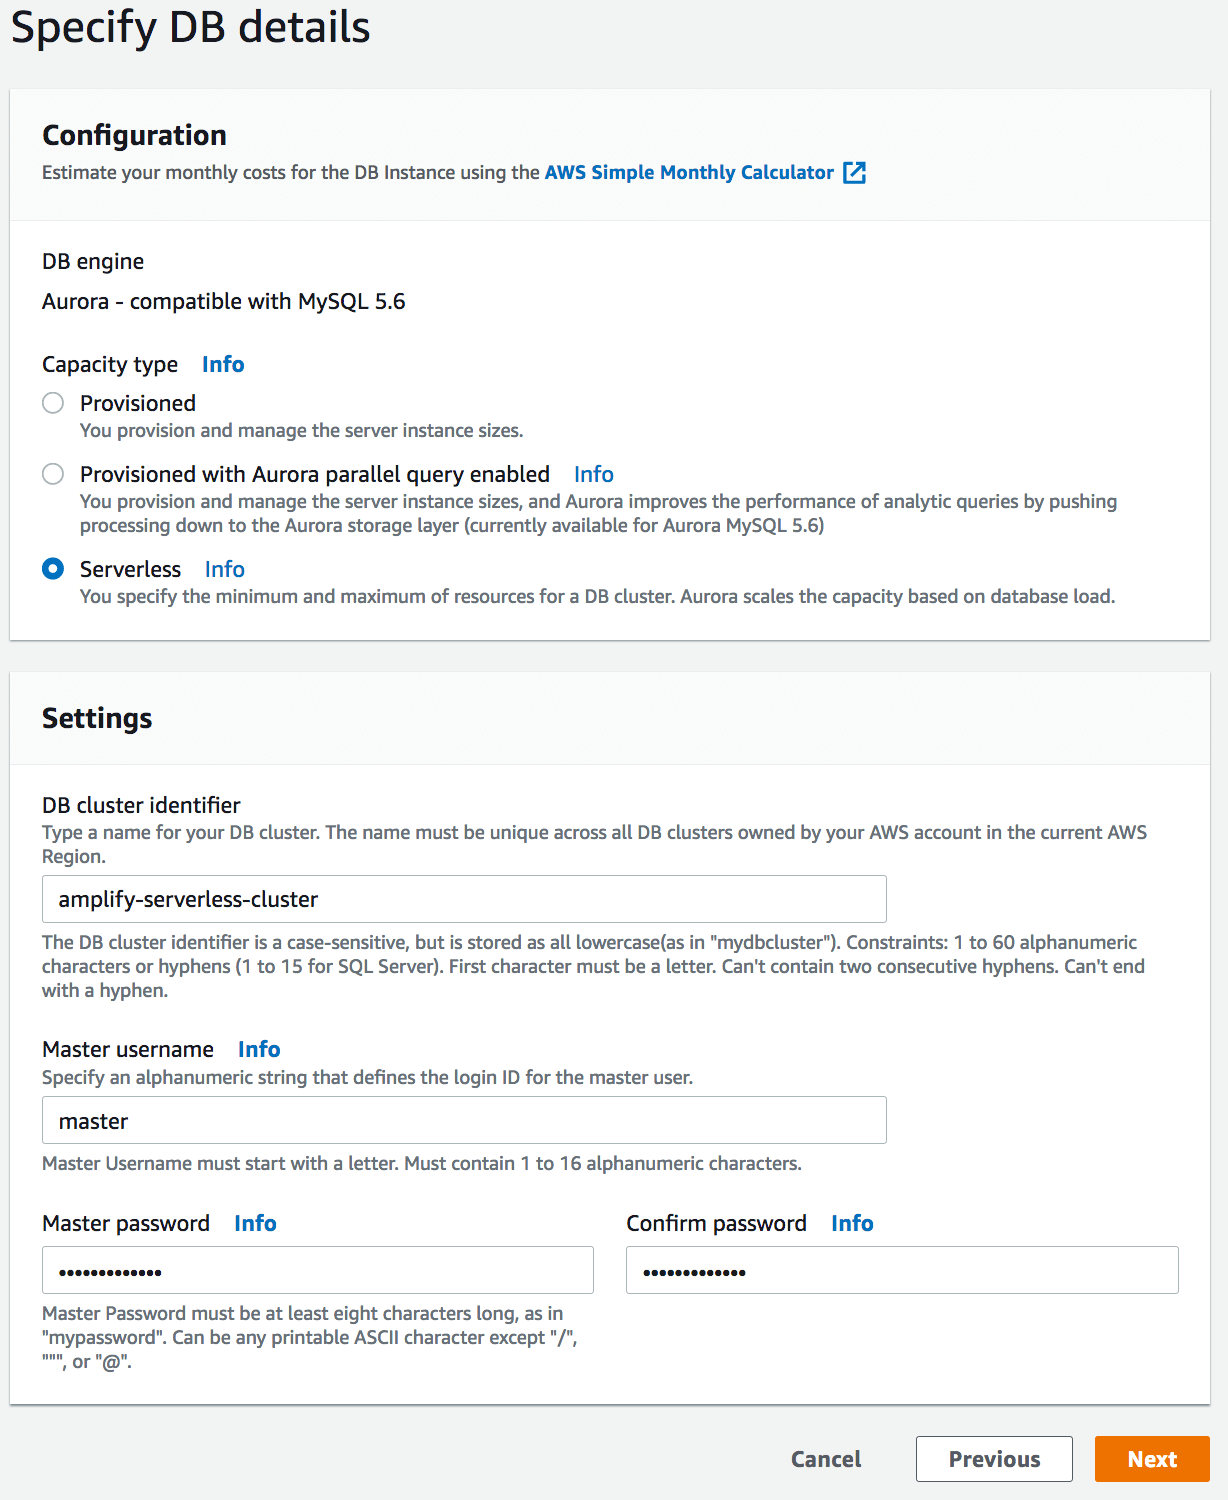
Click next and configure any advanced settings. Click “Create database”
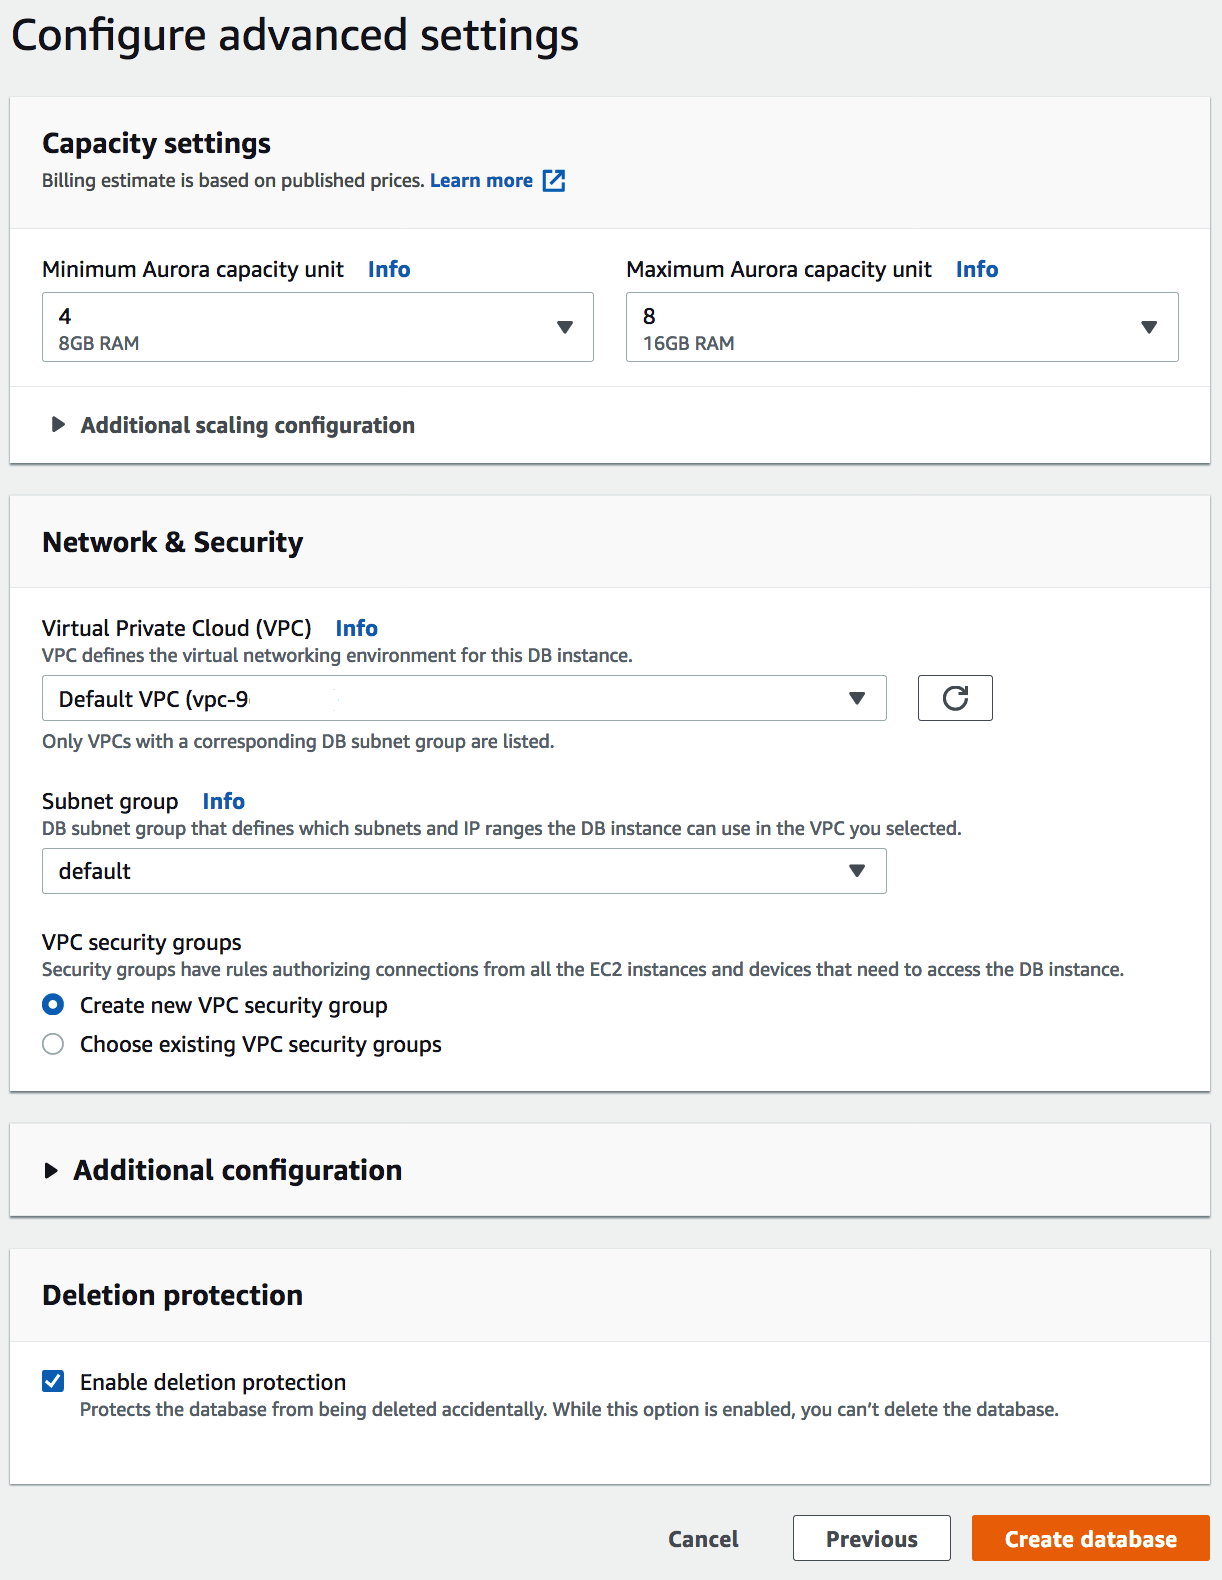
After creating the database, wait for the “Modify” button to become clickable. When ready, click “Modify” and scroll down to enable the “Data API”
Click continue, verify the changes and apply them immediately. Click “Modify cluster”
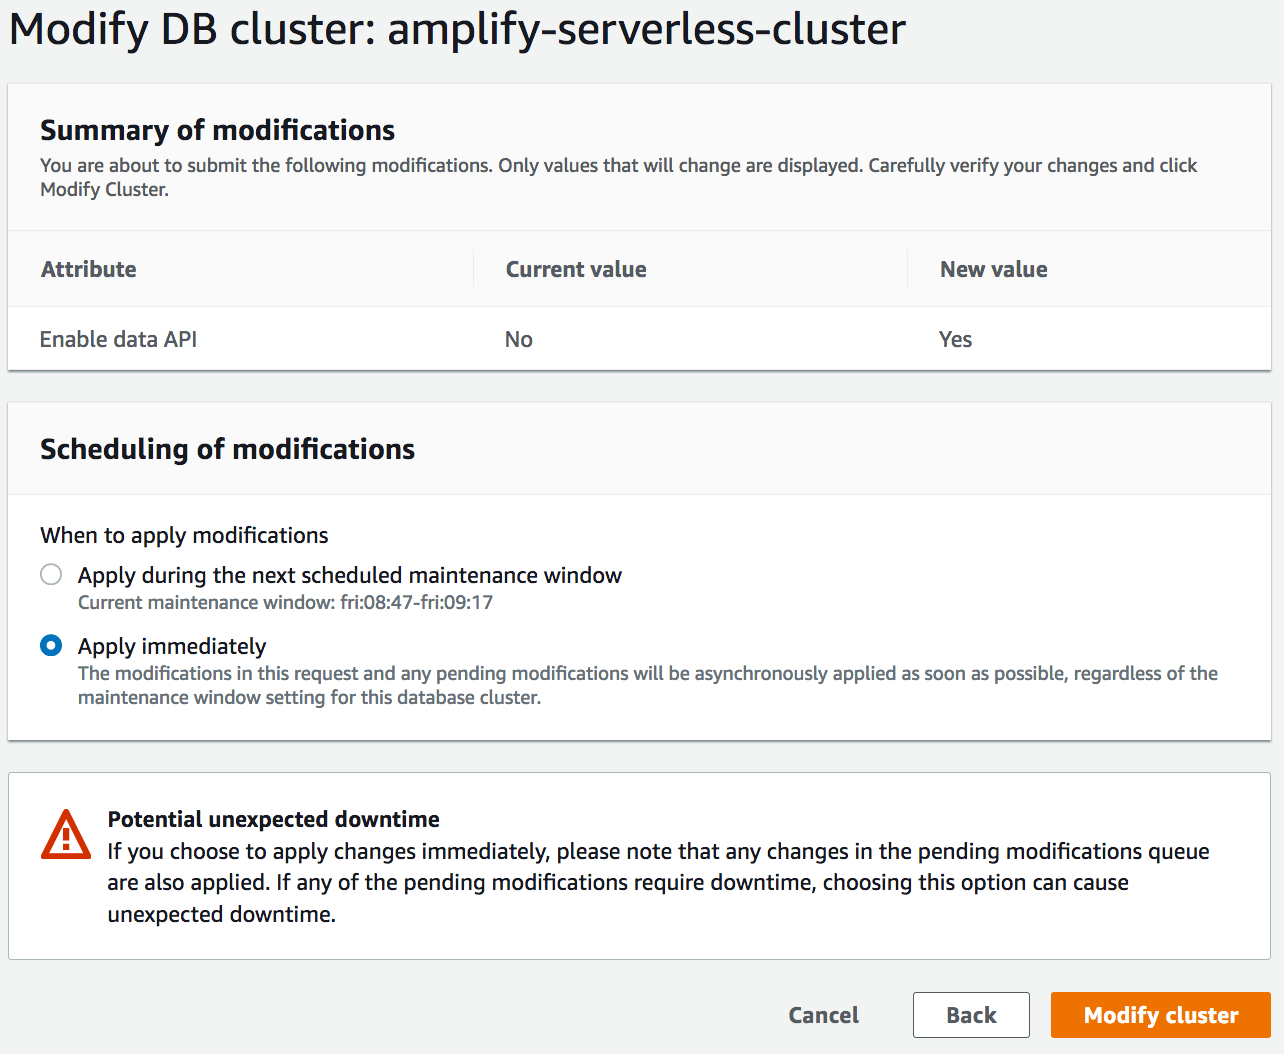
Next click on “Query Editor” in the left nav bar and fill in connection information when prompted.
After connecting, create a database and some tables.
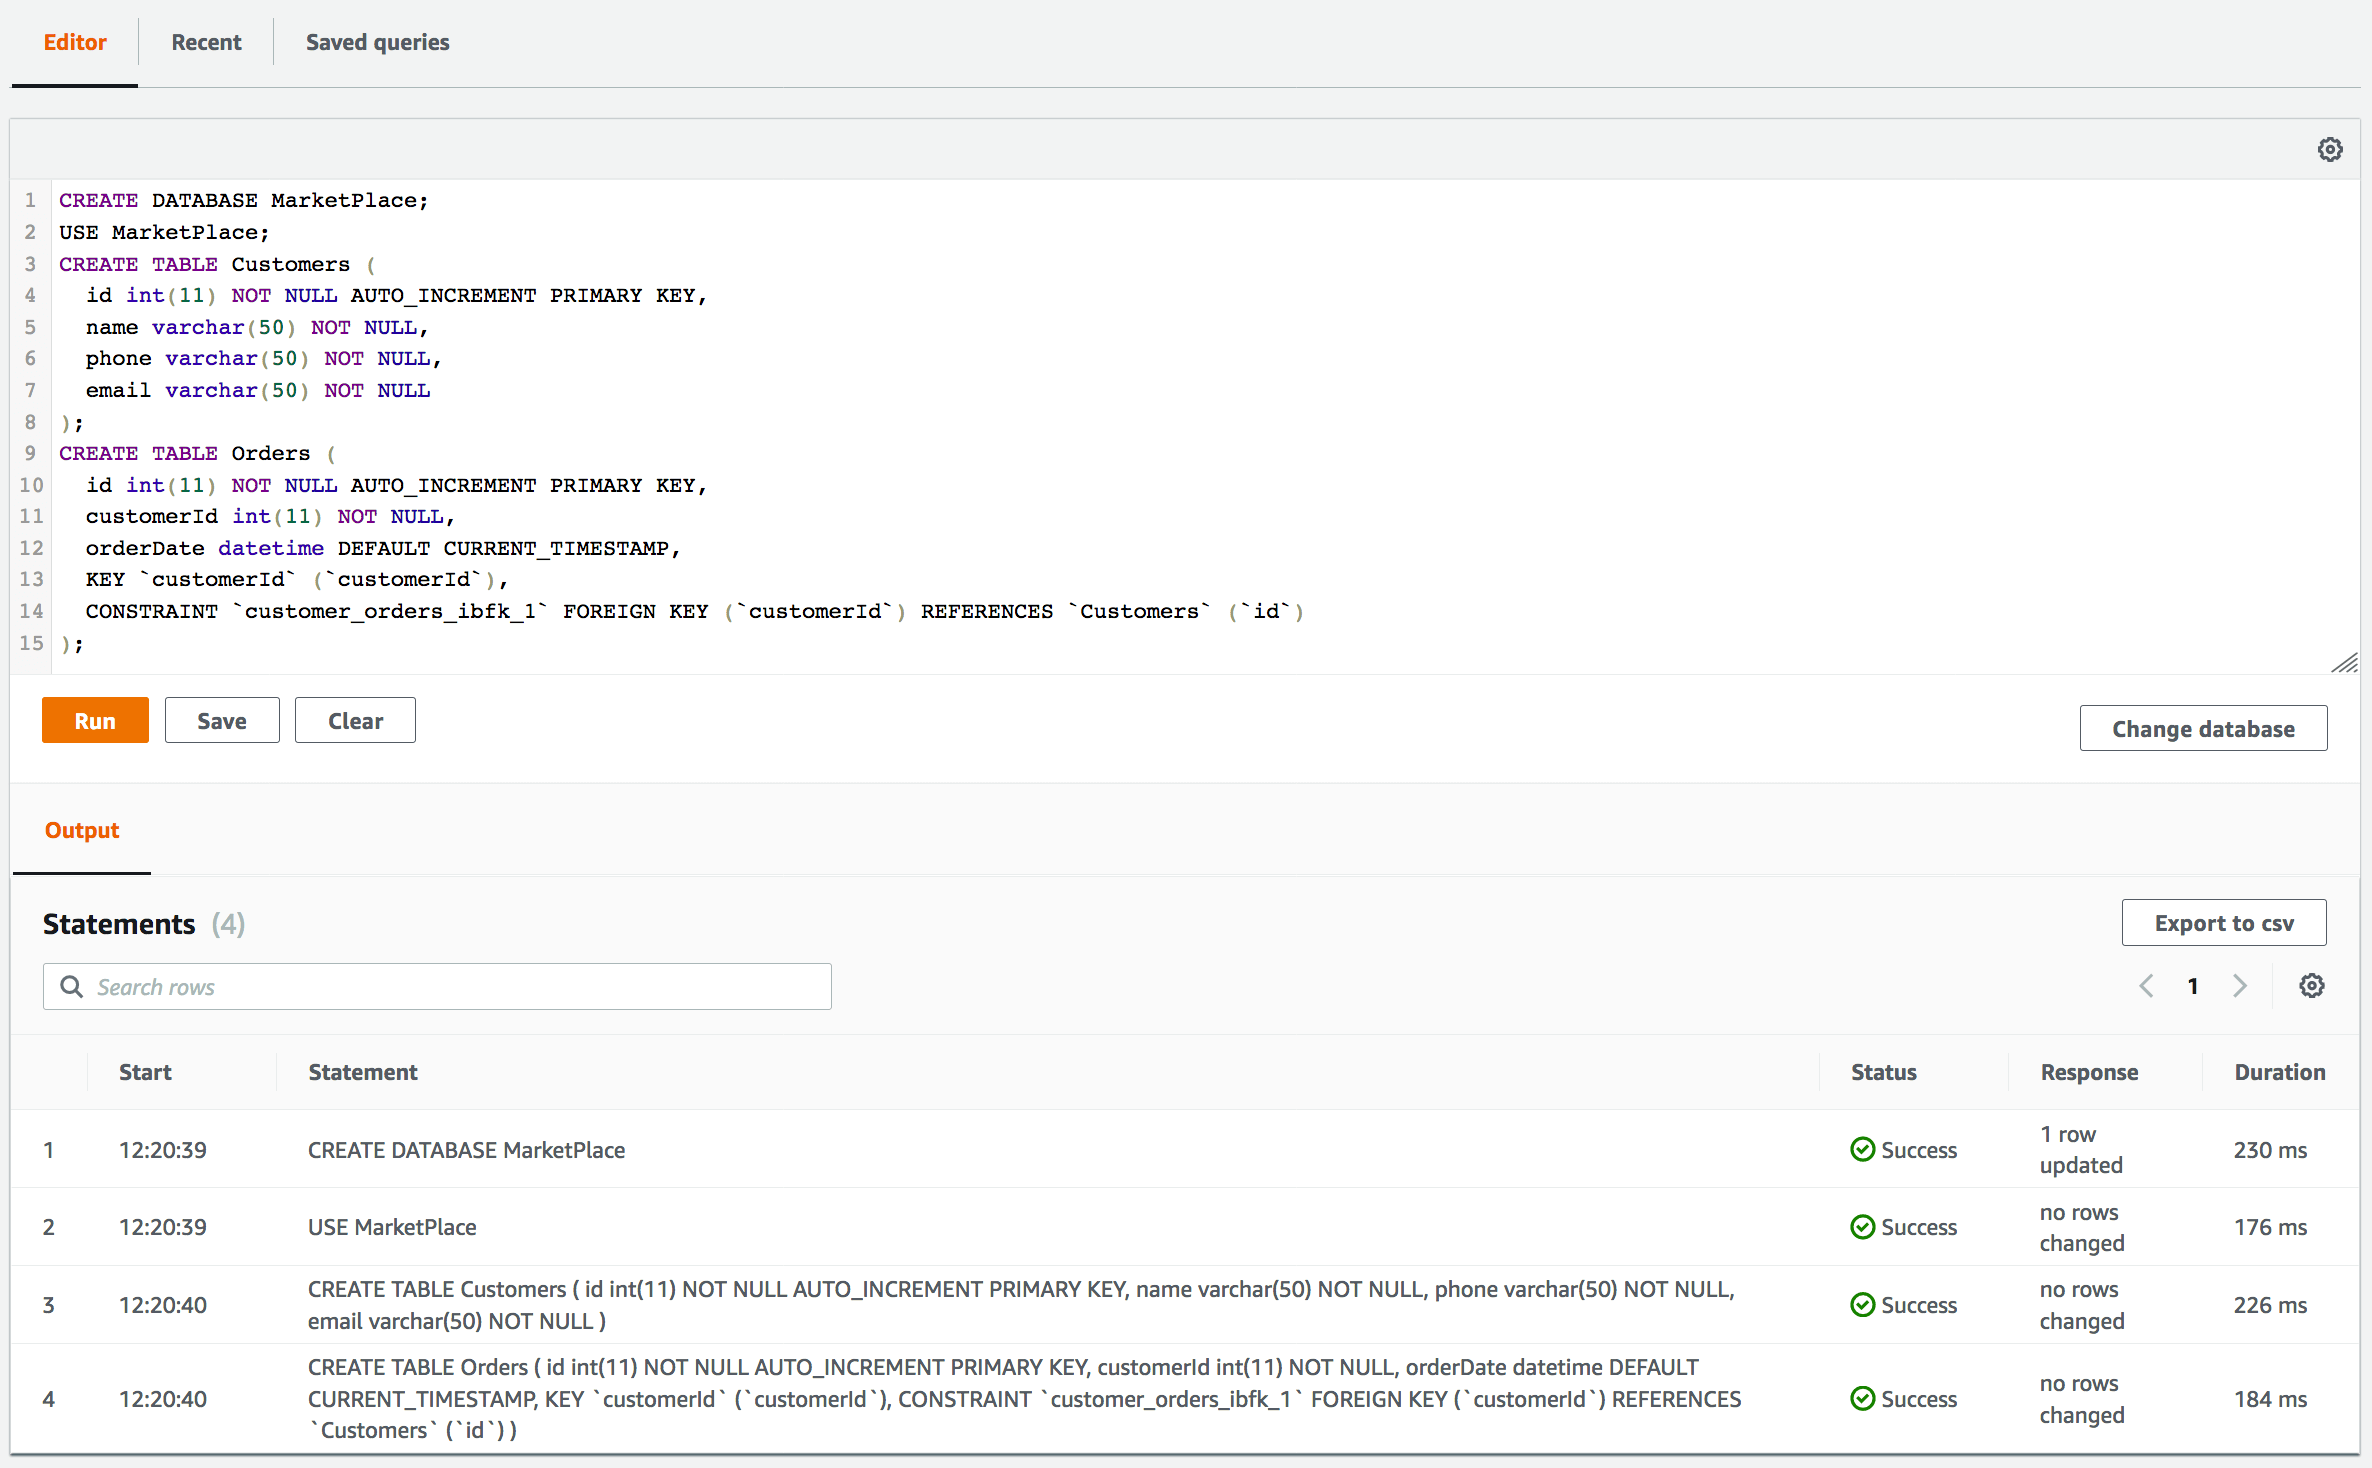
CREATE DATABASE MarketPlace;
USE MarketPlace;
CREATE TABLE Customers (
  id int(11) NOT NULL PRIMARY KEY,
  name varchar(50) NOT NULL,
  phone varchar(50) NOT NULL,
  email varchar(50) NOT NULL
);
CREATE TABLE Orders (
  id int(11) NOT NULL PRIMARY KEY,
  customerId int(11) NOT NULL,
  orderDate datetime DEFAULT CURRENT_TIMESTAMP,
  KEY `customerId` (`customerId`),
  CONSTRAINT `customer_orders_ibfk_1` FOREIGN KEY (`customerId`) REFERENCES `Customers` (`id`)
);
Return to your command line and run amplify api add-graphql-datasource from the root of your amplify project.

Push your project to AWS with amplify push.
Run amplify push to push your project to AWS. You can then open the AppSync console with amplify api console, to try interacting with your RDS database via your GraphQL API.
Interact with your SQL database from GraphQL
Your API is now configured to work with your serverless Amazon Aurora MySQL database. Try running a mutation to create a customer from the AppSync Console and then query it from the RDS Console to double check.
Create a customer:
mutation CreateCustomer {
  createCustomers(createCustomersInput: {
    id: 1,
    name: "Hello",
    phone: "111-222-3333",
    email: "customer1@mydomain.com"
  }) {
    id
    name
    phone
    email
  }
}
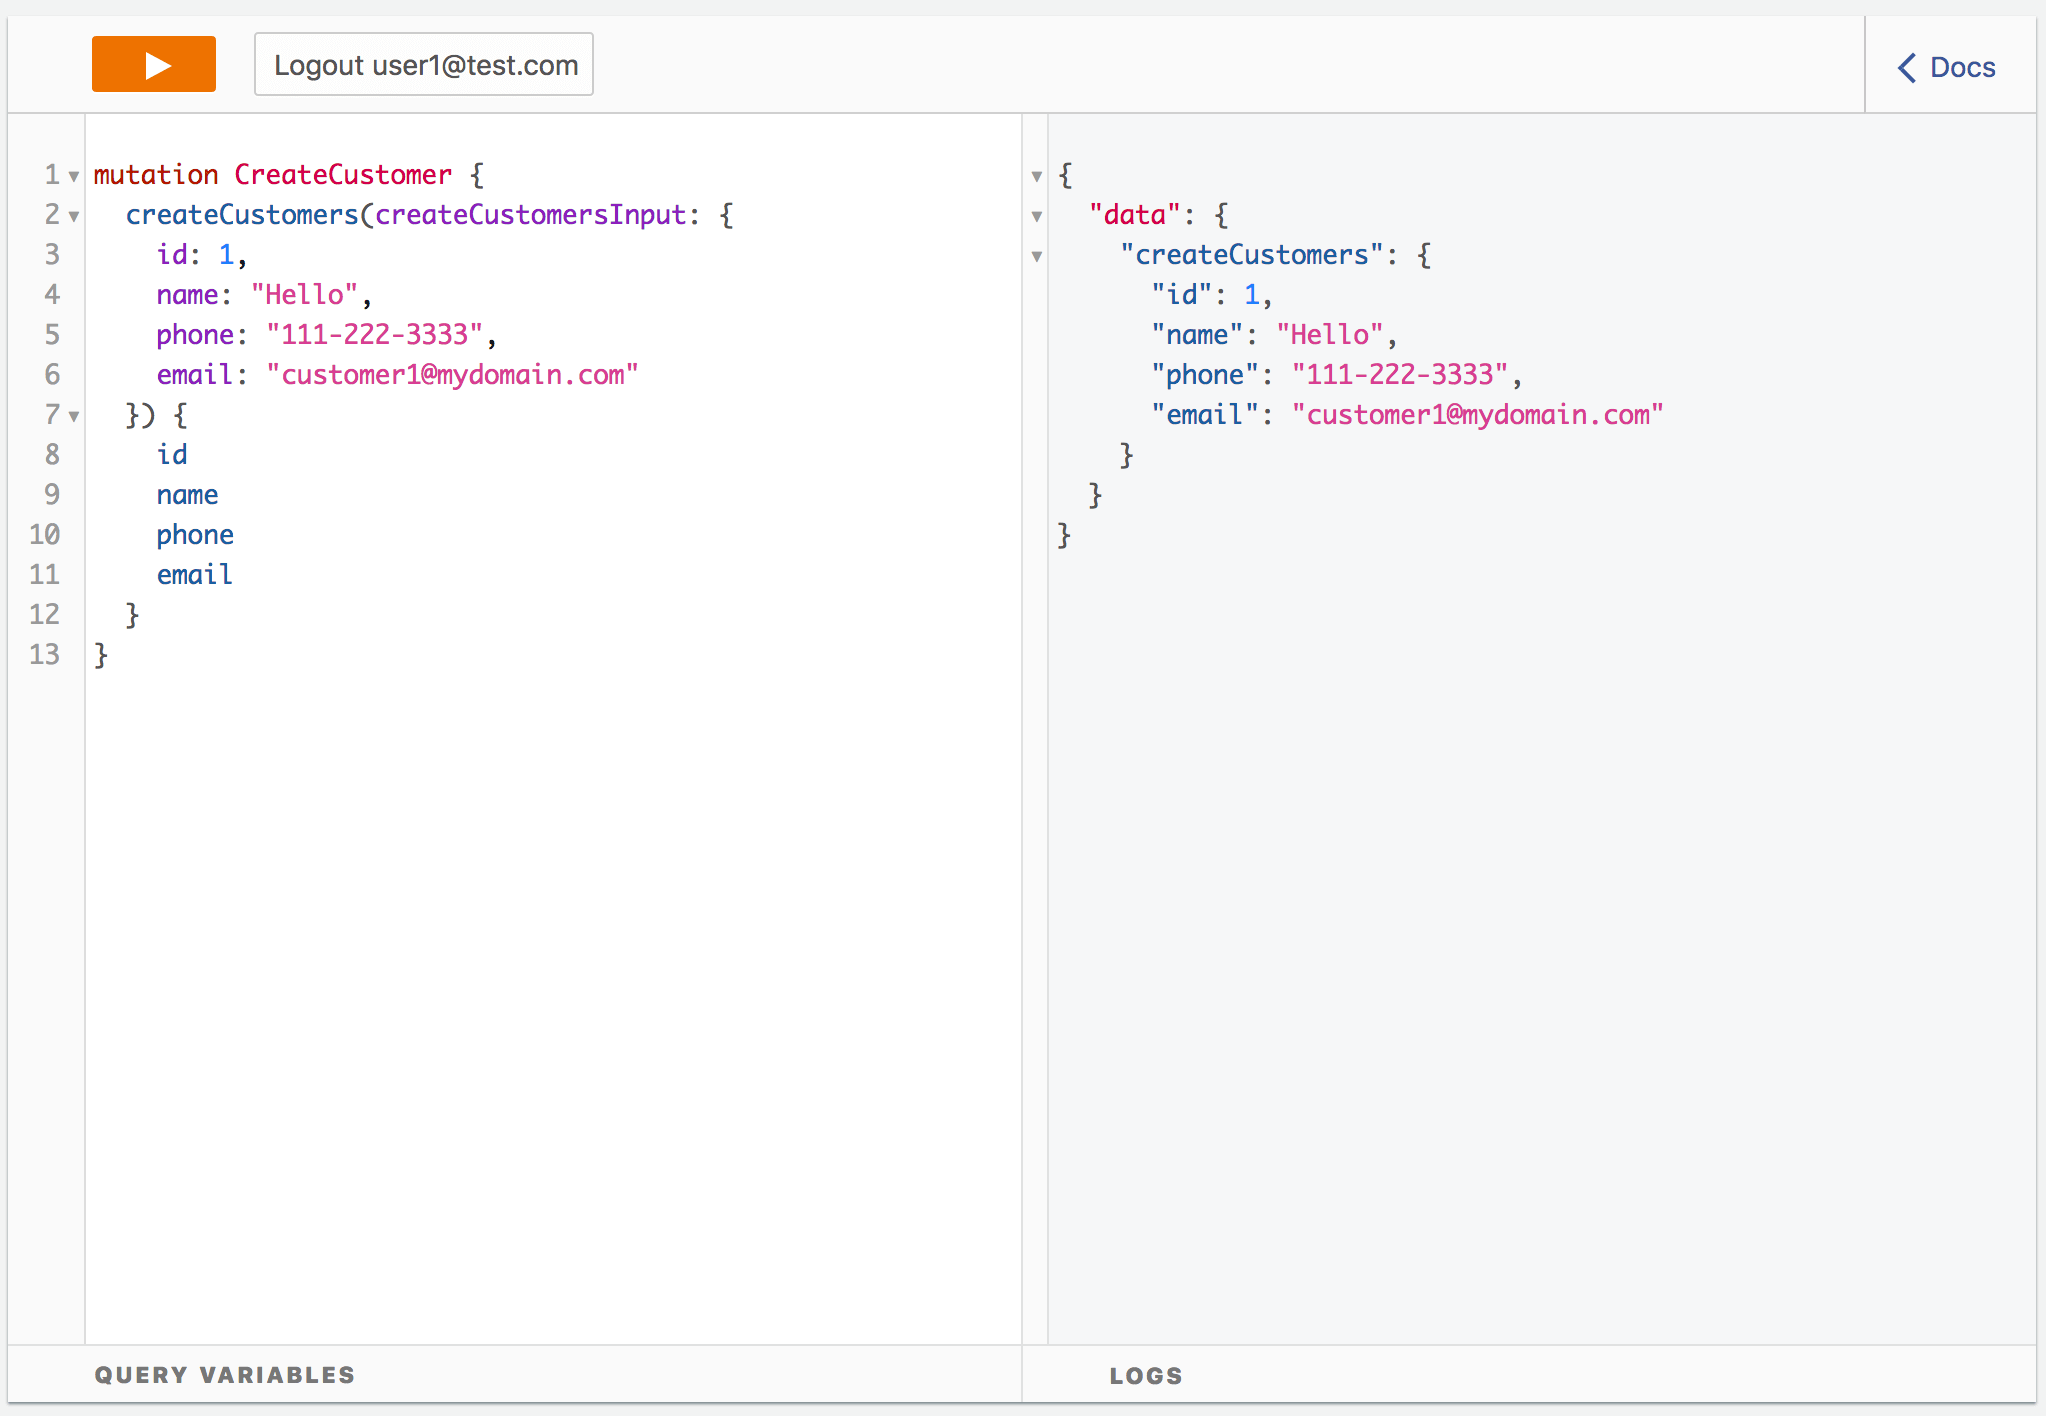
Then open the RDS console and run a simple select statement to see the new customer:
USE MarketPlace;
SELECT * FROM Customers;
How does this work?
The add-graphql-datasource will add a custom stack to your project that provides a basic set of functionality for working
with an existing data source. You can find the new stack in the stacks/ directory, a set of new resolvers in the resolvers/ directory, and will also find a few additions to your schema.graphql. You may edit details in the custom stack and/or resolver files without worry. You may run add-graphql-datasource again to update your project with changes in the database but be careful as these will overwrite any existing templates in the stacks/ or resolvers/ directories. When using multiple environment with the Amplify CLI, you will be asked to configure the data source once per environment.
S3 Objects
The GraphQL Transform, Amplify CLI, and Amplify Library make it simple to add complex object support with Amazon S3 to an application.
Basics
At a minimum the steps to add S3 Object support are as follows:
Create a Amazon S3 bucket to hold files via amplify add storage.
Create a user pool in Amazon Cognito User Pools via amplify add auth.
Create a GraphQL API via amplify add api and add the following type definition:
type S3Object {
  bucket: String!
  region: String!
  key: String!
}
Reference the S3Object type from some @model type:
type Picture @model @auth(rules: [{allow: owner}]) {
  id: ID!
  name: String
  owner: String

  # Reference the S3Object type from a field.
  file: S3Object
}
The GraphQL Transform handles creating the relevant input types and will store pointers to S3 objects in Amazon DynamoDB. The AppSync SDKs and Amplify library handle uploading the files to S3 transparently.
Run a mutation with s3 objects from your client app:
mutation ($input: CreatePictureInput!) {
  createPicture(input: $input) {
    id
    name
    visibility
    owner
    createdAt
    file {
      region
      bucket
      key
    }
  }
}
Codegen
Codegen helps you generate native code for iOS and Android, as well as the generation of types for Flow and TypeScript. It can also generate GraphQL statements(queries, mutations, and subscriptions) so that you don’t have to hand code them.
Codegen add workflow triggers automatically when an AppSync API is pushed to the cloud. You will be prompted if you want to configure codegen when an AppSync API is created and if you opt-in for codegen, subsequent pushes prompt you if they want to update the generated code after changes get pushed to the cloud.
When a project is configured to generate code with codegen, it stores all the configuration .graphqlconfig.yml file in the root folder of your project. When generating types, codegen uses GraphQL statements as input. It will generate only the types that are being used in the GraphQL statements.
Statement depth
In the below schema there are connections between Comment -> Post -> Blog -> Post -> Comments. When generating statements codegen has a default limit of 2 for depth traversal. But if you need to go deeper than 2 levels you can change the max-depth parameter either when setting up your codegen or by passing --max-depth parameter to codegen
type Blog @model {
  id: ID!
  name: String!
  posts: [Post] @connection(name: "BlogPosts")
}
type Post @model {
  id: ID!
  title: String!
  blog: Blog @connection(name: "BlogPosts")
  comments: [Comment] @connection(name: "PostComments")
}
type Comment @model {
  id: ID!
  content: String
  post: Post @connection(name: "PostComments")
}
query GetComment($id: ID!) {
  getComment(id: $id) { # depth level 1
    id
    content
    post { # depth level 2
      id
      title
      blog { # depth level 3
        id
        name
        posts { # depth level 4
          items { # depth level 5
            id
            title
          }
          nextToken
        }
      }
      comments { # depth level 3
        items { # depth level 4
          id
          content
          post { # depth level 5
            id
            title
          }
        }
        nextToken
      }
    }
  }
}
General Usage
amplify add codegen
$ amplify add codegen [--apiId <api-id>]
The amplify add codegen allows you to add AppSync API created using the AWS console. If you have your API is in a different region then that of your current region, the command asks you to choose the region. If you are adding codegen outside of an initialized amplify project, provide your introspection schema named schema.json in the same directory that you make the add codegen call from.
Note: If you use the –apiId flag to add an externally created AppSync API, such as one created in the AWS console, you will not be able to manage this API from the Amplify CLI with commands such as amplify api update when performing schema updates. You cannot add an external AppSync API when outside of an initialized project.
amplify configure codegen
$ amplify configure codegen
The amplify configure codegen command allows you to update the codegen configuration after it is added to your project. When outside of an initialized project, you can use this to update your project configuration as well as the codegen configuration.
amplify codegen statements
$ amplify codegen statements [--nodownload] [--max-depth <int>]
The amplify codegen statements command generates GraphQL statements(queries, mutation and subscription) based on your GraphQL schema. This command downloads introspection schema every time it is run but it can be forced to use previously downloaded introspection schema by passing --nodownload flag
amplify codegen types
$ amplify codegen types
The amplify codegen types [--nodownload] command generates GraphQL types for Flow and typescript and Swift class in an iOS project. This command downloads introspection schema every time it is run but it can be forced to use previously downloaded introspection schema by passing --nodownload flag
amplify codegen
$ amplify codegen [--max-depth <int>]
The amplify codegen [--nodownload] generates GraphQL statements and types. This command downloads introspection schema every time it is run but it can be forced to use previously downloaded introspection schema by passing --nodownload flag. If you are running codegen outside of an initialized amplify project, the introspection schema named schema.json must be in the same directory that you run amplify codegen from. This command will not download the introspection schema when outside of an amplify project - it will only use the introspection schema provided.
Workflows
The design of codegen functionality provides mechanisms to run at different points in your app development lifecycle, including when you create or update an API as well as independently when you want to just update the data fetching requirements of your app but leave your API alone. It additionally allows you to work in a team where the schema is updated or managed by another person. Finally, you can also include the codegen in your build process so that it runs automatically (such as from in Xcode).
Flow 1: Create API then automatically generate code
$amplify init
$amplify add api (select GraphQL)
$amplify push
You’ll see questions as before, but now it will also automatically ask you if you want to generate GraphQL statements and do codegen. It will also respect the ./app/src/main directory for Android projects. After the AppSync deployment finishes the Swift file will be automatically generated (Android you’ll need to kick off a Gradle Build step) and you can begin using in your app immediately.
Flow 2: Modify GraphQL schema, push, then automatically generate code
During development, you might wish to update your GraphQL schema and generated code as part of an iterative dev/test cycle. Modify & save your schema in ./amplify/backend/api/<apiname>/schema.graphql then run:
$amplify push
Each time you will be prompted to update the code in your API and also ask you if you want to run codegen again as well, including regeneration of the GraphQL statements from the new schema.
Flow 3: No API changes, just update GraphQL statements & generate code
One of the benefits of GraphQL is the client can define it’s data fetching requirements independently of the API. Amplify codegen supports this by allowing you to modify the selection set (e.g. add/remove fields inside the curly braces) for the GraphQL statements and running type generation again. This gives you fine-grained control over the network requests that your application is making. Modify your GraphQL statements (default in the ./graphql folder unless you changed it) then save the files and run:
$amplify codegen types
A new updated Swift file will be created (or run Gradle Build on Android for the same). You can then use the updates in your application code.
Flow 4: Shared schema, modified elsewhere (e.g. console or team workflows)
Suppose you are working in a team and the schema is updated either from the AWS AppSync console or on another system. Your types are now out of date because your GraphQL statement was generated off an outdated schema. The easiest way to resolve this is to regenerate your GraphQL statements, update them if necessary, and then generate your types again. Modify the schema in the console or on a separate system, then run:
$amplify codegen statements
$amplify codegen types
You should have newly generated GraphQL statements and Swift code that matches the schema updates. If you ran the second command your types will be updated as well. Alternatively, if you run amplify codegen alone it will perform both of these actions.
Flow 5: Introspection Schema outside of an initialized project
If you would like to generate statements and types without initializing an amplify project, you can do so by providing your introspection schema named schema.json in your project directory and adding codegen from the same directory. To download your introspection schema from an AppSync api, in the AppSync console go to the schema editor and under “Export schema” choose schema.json.
$amplify add codegen
Once codegen has been added you can update your introspection schema, then generate statements and types again without re-entering your project information.
$amplify codegen
You can update your project and codegen configuration if required.
$amplify configure codegen
$amplify codegen
iOS usage
This section will walk through the steps needed to take an iOS project written in Swift and add Amplify to it along with a GraphQL API using AWS AppSync. If you are a first time user, we recommend starting with a new Xcode project and a single View Controller.
Setup
After completing the Amplify Getting Started navigate in your terminal to an Xcode project directory and run the following:
$amplify init       ## Select iOS as your platform
$amplify add api    ## Select GraphQL, API key, "Single object with fields Todo application"
$amplify push       ## Sets up backend and prompts you for codegen, accept the defaults
The add api flow above will ask you some questions, like if you already have an annotated GraphQL schema. If this is your first time using the CLI select No and let it guide you through the default project “Single object with fields (e.g., “Todo” with ID, name, description)” as it will be used in the code generation examples below. Later on, you can always change it.
Since you added an API the amplify push process will automatically prompt you to enter the codegen process and walk through the configuration options. Accept the defaults and it will create a file named API.swift in your root directory (unless you choose to name it differently) as well as a directory called graphql with your documents. You also will have an awsconfiguration.json file that the AppSync client will use for initialization.
Next, modify your Podfile with a dependency of the AWS AppSync SDK:
target 'PostsApp' do
  use_frameworks!
  pod 'AWSAppSync', ' ~> 2.9.0'
end
Run pod install from your terminal and open up the *.xcworkspace Xcode project. Add the API.swift and awsconfiguration.json files to your project (File->Add Files to ..->Add) and then build your project ensuring there are no issues.
Initialize the AppSync client
Inside your application delegate is the best place to initialize the AppSync client. The AWSAppSyncServiceConfig represents the configuration information present in awsconfiguration.json file. By default, the information under the Default section will be used. You will need to create an AWSAppSyncClientConfiguration and AWSAppSyncClient like below:
import AWSAppSync

@UIApplicationMain
class AppDelegate: UIResponder, UIApplicationDelegate {

    var appSyncClient: AWSAppSyncClient?

    func application(_ application: UIApplication, didFinishLaunchingWithOptions launchOptions: [UIApplication.LaunchOptionsKey: Any]?) -> Bool {

        do {
            // You can choose your database location if you wish, or use the default
            let cacheConfiguration = try AWSAppSyncCacheConfiguration()

            // AppSync configuration & client initialization
            let appSyncConfig = try AWSAppSyncClientConfiguration(appSyncServiceConfig: AWSAppSyncServiceConfig(), cacheConfiguration: cacheConfiguration)
            appSyncClient = try AWSAppSyncClient(appSyncConfig: appSyncConfig)
        } catch {
            print("Error initializing appsync client. \(error)")
        }
        // other methods
        return true
  }
Next, in your application code where you wish to use the AppSync client, such in a Todos class which is bound to your View Controller, you need to reference this in the viewDidLoad() lifecycle method:
import AWSAppSync

class Todos: UIViewController{
  //Reference AppSync client
  var appSyncClient: AWSAppSyncClient?

  override func viewDidLoad() {
      super.viewDidLoad()
      //Reference AppSync client from App Delegate
      let appDelegate = UIApplication.shared.delegate as! AppDelegate
      appSyncClient = appDelegate.appSyncClient
  }
}
Queries
Now that the backend is configured, you can run a GraphQL query. The syntax is appSyncClient?.fetch(query: <NAME>Query() {(result, error)}) where <NAME> comes from the GraphQL statements that amplify codegen types created. For example, if you have a ListTodos query your code will look like the following:
//Run a query
appSyncClient?.fetch(query: ListTodosQuery())  { (result, error) in
  if error != nil {
    print(error?.localizedDescription ?? "")
      return
  }
    result?.data?.listTodos?.items!.forEach { print(($0?.name)! + " " + ($0?.description)!) }
}
Optionally, you can set a cache policy on the query like so:
appSyncClient?.fetch(query: ListTodosQuery(), cachePolicy: .returnCacheDataAndFetch) { (result, error) in
returnCacheDataAndFetch will pull results from the local cache first before retrieving data over the network. This gives a snappy UX as well as offline support.
Mutations
For adding data now you will need to run a GraphQL mutation. The syntax appSyncClient?.perform(mutation: <NAME>Mutation() {(result, error)}) where <NAME> comes from the GraphQL statements that amplify codegen types created. However, most GraphQL schemas organize mutations with an input type for maintainability, which is what the Amplify CLI does as well. Therefore you’ll pass this as a parameter called input as in the example below:
let mutationInput = CreateTodoInput(name: "Use AppSync", description:"Realtime and Offline")

appSyncClient?.perform(mutation: CreateTodoMutation(input: mutationInput)) { (result, error) in
  if let error = error as? AWSAppSyncClientError {
    print("Error occurred: \(error.localizedDescription )")
  }
  if let resultError = result?.errors {
    print("Error saving the item on server: \(resultError)")
    return
  }
}
Subscriptions
Finally it’s time to setup a subscription to realtime data. The syntax appSyncClient?.subscribe(subscription: <NAME>Subscription() {(result, transaction, error)}) where <NAME> comes from the GraphQL statements that amplify codegen types created.
// Subscription notifications will only be delivered as long as this is retained
var subscriptionWatcher: Cancellable?

//In your app code
do {
  subscriptionWatcher = try appSyncClient?.subscribe(subscription: OnCreateTodoSubscription(), resultHandler: { (result, transaction, error) in
    if let result = result {
      print(result.data!.onCreateTodo!.name + " " + result.data!.onCreateTodo!.description!)
    } else if let error = error {
      print(error.localizedDescription)
    }
  })
} catch {
  print("Error starting subscription.")
}
Subscriptions can also take input types like mutations, in which case they will be subscribing to particular events based on the input. Learn more about Subscription arguments in AppSync here.
Complete Sample
AppDelegate.swift
import UIKit
import AWSAppSync

@UIApplicationMain
class AppDelegate: UIResponder, UIApplicationDelegate {

    var window: UIWindow?
    var appSyncClient: AWSAppSyncClient?

    func application(_ application: UIApplication, didFinishLaunchingWithOptions launchOptions: [UIApplication.LaunchOptionsKey: Any]?) -> Bool {
        do {
            // You can choose your database location if you wish, or use the default
            let cacheConfiguration = try AWSAppSyncCacheConfiguration()

            // AppSync configuration & client initialization
            let appSyncConfig = try AWSAppSyncClientConfiguration(appSyncServiceConfig: AWSAppSyncServiceConfig(), cacheConfiguration: cacheConfiguration)
            appSyncClient = try AWSAppSyncClient(appSyncConfig: appSyncConfig)
        } catch {
            print("Error initializing appsync client. \(error)")
        }
        return true
    }
}
ViewController.swift
import UIKit
import AWSAppSync

class ViewController: UIViewController {

    var appSyncClient: AWSAppSyncClient?

    // Subscription notifications will only be delivered as long as this is retained
    var subscriptionWatcher: Cancellable?

    override func viewDidLoad() {
        super.viewDidLoad()
        let appDelegate = UIApplication.shared.delegate as! AppDelegate
        appSyncClient = appDelegate.appSyncClient

        // Note: each of these are asynchronous calls. Attempting to query the results of `runMutation` immediately
        // after calling it probably won't work--instead, invoke the query in the mutation's result handler
        runMutation()
        runQuery()
        subscribe()
    }

    func subscribe() {
        do {
            subscriptionWatcher = try appSyncClient?.subscribe(subscription: OnCreateTodoSubscription()) {
                // The subscription watcher's result block retains a strong reference to the result handler block.
                // Make sure to capture `self` weakly if you use it
                // [weak self]
                (result, transaction, error) in
                if let result = result {
                    print(result.data!.onCreateTodo!.name + " " + result.data!.onCreateTodo!.description!)
                    // Update the UI, as in:
                    //    self?.doSomethingInTheUIWithSubscriptionResults(result)
                    // By default, `subscribe` will invoke its subscription callbacks on the main queue, so there
                    // is no need to dispatch to the main queue.
                } else if let error = error {
                    print(error.localizedDescription)
                }
            }
        } catch {
            print("Error starting subscription.")
        }
    }

    func runMutation(){
        let mutationInput = CreateTodoInput(name: "Use AppSync", description:"Realtime and Offline")
        appSyncClient?.perform(mutation: CreateTodoMutation(input: mutationInput)) { (result, error) in
            if let error = error as? AWSAppSyncClientError {
                print("Error occurred: \(error.localizedDescription )")
            }
            if let resultError = result?.errors {
                print("Error saving the item on server: \(resultError)")
                return
            }
            // The server and the local cache are now updated with the results of the mutation
        }
    }

    func runQuery(){
        appSyncClient?.fetch(query: ListTodosQuery()) {(result, error) in
            if error != nil {
                print(error?.localizedDescription ?? "")
                return
            }
            result?.data?.listTodos?.items!.forEach { print(($0?.name)! + " " + ($0?.description)!) }
        }
    }
}
Android usage
This section will walk through the steps needed to take an Android Studio project written in Java and add Amplify to it along with a GraphQL API using AWS AppSync. If you are a first time user, we recommend starting with a new Android Studio project and a single Activity class.
Setup
After completing the Amplify Getting Started navigate in your terminal to an Android Studio project directory and run the following:
$amplify init       ## Select iOS as your platform
$amplify add api    ## Select GraphQL, API key, "Single object with fields Todo application"
$amplify push       ## Sets up backend and prompts you for codegen, accept the defaults
The add api flow above will ask you some questions, like if you already have an annotated GraphQL schema. If this is your first time using the CLI select No and let it guide you through the default project “Single object with fields (e.g., “Todo” with ID, name, description)” as it will be used in the code generation examples below. Later on, you can always change it.
Since you added an API the amplify push process will automatically enter the codegen process and prompt you for configuration. Accept the defaults and it will create a file named awsconfiguration.json in the ./app/src/main/res/raw directory that the AppSync client will use for initialization. To finish off the build process there are Gradle and permission updates needed.
First, in the project’s build.gradle, add the following dependency in the build script:
classpath 'com.amazonaws:aws-android-sdk-appsync-gradle-plugin:2.6.+'
Next, in the app’s build.gradle add in a plugin of apply plugin: 'com.amazonaws.appsync' and a dependency of implementation 'com.amazonaws:aws-android-sdk-appsync:2.6.+'. For example:
apply plugin: 'com.android.application'
apply plugin: 'com.amazonaws.appsync'
android {
    // Typical items
}
dependencies {
    // Typical dependencies
    implementation 'com.amazonaws:aws-android-sdk-appsync:2.6.+'
    implementation 'org.eclipse.paho:org.eclipse.paho.client.mqttv3:1.2.0'
    implementation 'org.eclipse.paho:org.eclipse.paho.android.service:1.1.1'
}
Finally, update your AndroidManifest.xml with updates to <uses-permissions>for network calls and offline state. Also add a <service> entry under <application> for MqttService for subscriptions:
<uses-permission android:name="android.permission.INTERNET"/>
<uses-permission android:name="android.permission.ACCESS_NETWORK_STATE"/>
<uses-permission android:name="android.permission.WAKE_LOCK" />
<uses-permission android:name="android.permission.READ_PHONE_STATE" />
<uses-permission android:name="android.permission.WRITE_EXTERNAL_STORAGE"/>
<uses-permission android:name="android.permission.READ_EXTERNAL_STORAGE"/>

        <!--other code-->

    <application
        android:allowBackup="true"
        android:icon="@mipmap/ic_launcher"
        android:label="@string/app_name"
        android:roundIcon="@mipmap/ic_launcher_round"
        android:supportsRtl="true"
        android:theme="@style/AppTheme">

        <service android:name="org.eclipse.paho.android.service.MqttService" />

        <!--other code-->
    </application>
Build your project ensuring there are no issues.
Initialize the AppSync client
Inside your application code, such as the onCreate() lifecycle method of your activity class, you can initialize the AppSync client using an instance of AWSConfiguration() in the AWSAppSyncClient builder. This reads configuration information present in the awsconfiguration.json file. By default, the information under the Default section will be used.
    private AWSAppSyncClient mAWSAppSyncClient;

    @Override
    protected void onCreate(Bundle savedInstanceState) {
        super.onCreate(savedInstanceState);
        setContentView(R.layout.activity_main);
        mAWSAppSyncClient = AWSAppSyncClient.builder()
                .context(getApplicationContext())
                .awsConfiguration(new AWSConfiguration(getApplicationContext()))
                .build();
    }
Queries
Now that the backend is configured, you can run a GraphQL query. The syntax of the callback is GraphQLCall.Callback<{NAME>Query.Data> where {NAME} comes from the GraphQL statements that amplify codegen types created. You will invoke this from an instance of the AppSync client with a similar syntax of .query(<NAME>Query.builder().build()). For example, if you have a ListTodos query your code will look like the following:
    public void query(){
        mAWSAppSyncClient.query(ListTodosQuery.builder().build())
                .responseFetcher(AppSyncResponseFetchers.CACHE_AND_NETWORK)
                .enqueue(todosCallback);
    }

    private GraphQLCall.Callback<ListTodosQuery.Data> todosCallback = new GraphQLCall.Callback<ListTodosQuery.Data>() {
        @Override
        public void onResponse(@Nonnull Response<ListTodosQuery.Data> response) {
            Log.i("Results", response.data().listTodos().items().toString());
        }

        @Override
        public void onFailure(@Nonnull ApolloException e) {
            Log.e("ERROR", e.toString());
        }
    };
You can optionally change the cache policy on AppSyncResponseFetchers but we recommend leaving CACHE_AND_NETWORK as it will pull results from the local cache first before retrieving data over the network. This gives a snappy UX as well as offline support.
Mutations
For adding data now you will need to run a GraphQL mutation. The syntax of the callback is GraphQLCall.Callback<{NAME}Mutation.Data> where {NAME} comes from the GraphQL statements that amplify codegen types created. However, most GraphQL schemas organize mutations with an input type for maintainability, which is what the Amplify CLI does as well. Therefore you’ll pass this as a parameter called input created with a second builder. You will invoke this from an instance of the AppSync client with a similar syntax of .mutate({NAME}Mutation.builder().input({Name}Input).build()) like so:
public void mutation(){
    CreateTodoInput createTodoInput = CreateTodoInput.builder().
        name("Use AppSync").
        description("Realtime and Offline").
        build();

    mAWSAppSyncClient.mutate(CreateTodoMutation.builder().input(createTodoInput).build())
        .enqueue(mutationCallback);
}

private GraphQLCall.Callback<CreateTodoMutation.Data> mutationCallback = new GraphQLCall.Callback<CreateTodoMutation.Data>() {
    @Override
    public void onResponse(@Nonnull Response<CreateTodoMutation.Data> response) {
        Log.i("Results", "Added Todo");
    }

    @Override
    public void onFailure(@Nonnull ApolloException e) {
        Log.e("Error", e.toString());
    }
};
Subscriptions
Finally, it’s time to set up a subscription to real-time data. The callback is just AppSyncSubscriptionCall.Callback and you invoke it with a client .subscribe() call and pass in a builder with the syntax of {NAME}Subscription.builder() where {NAME} comes from the GraphQL statements that amplify codegen types created. Note that the Amplify GraphQL transformer has a common nomenclature of putting the word On in front of a subscription like the below example:
private AppSyncSubscriptionCall subscriptionWatcher;

    private void subscribe(){
        OnCreateTodoSubscription subscription = OnCreateTodoSubscription.builder().build();
        subscriptionWatcher = mAWSAppSyncClient.subscribe(subscription);
        subscriptionWatcher.execute(subCallback);
    }

    private AppSyncSubscriptionCall.Callback subCallback = new AppSyncSubscriptionCall.Callback() {
        @Override
        public void onResponse(@Nonnull Response response) {
            Log.i("Response", response.data().toString());
        }

        @Override
        public void onFailure(@Nonnull ApolloException e) {
            Log.e("Error", e.toString());
        }

        @Override
        public void onCompleted() {
            Log.i("Completed", "Subscription completed");
        }
    };
Subscriptions can also take input types like mutations, in which case they will be subscribing to particular events based on the input. Learn more about Subscription arguments in AppSync here.
Complete Sample
MainActivity.java
import android.util.Log;
import com.amazonaws.mobile.config.AWSConfiguration;
import com.amazonaws.mobileconnectors.appsync.AWSAppSyncClient;
import com.amazonaws.mobileconnectors.appsync.AppSyncSubscriptionCall;
import com.amazonaws.mobileconnectors.appsync.fetcher.AppSyncResponseFetchers;
import com.apollographql.apollo.GraphQLCall;
import com.apollographql.apollo.api.Response;
import com.apollographql.apollo.exception.ApolloException;
import javax.annotation.Nonnull;
import amazonaws.demo.todo.CreateTodoMutation;
import amazonaws.demo.todo.ListTodosQuery;
import amazonaws.demo.todo.OnCreateTodoSubscription;
import amazonaws.demo.todo.type.CreateTodoInput;

public class MainActivity extends AppCompatActivity {

    private AWSAppSyncClient mAWSAppSyncClient;
    private AppSyncSubscriptionCall subscriptionWatcher;

    @Override
    protected void onCreate(Bundle savedInstanceState) {
        super.onCreate(savedInstanceState);
        setContentView(R.layout.activity_main);
        mAWSAppSyncClient = AWSAppSyncClient.builder()
                .context(getApplicationContext())
                .awsConfiguration(new AWSConfiguration(getApplicationContext()))
                .build();
        query();
        mutation();
        subscribe();
    }

    private void subscribe(){
        OnCreateTodoSubscription subscription = OnCreateTodoSubscription.builder().build();
        subscriptionWatcher = mAWSAppSyncClient.subscribe(subscription);
        subscriptionWatcher.execute(subCallback);
    }

    private AppSyncSubscriptionCall.Callback subCallback = new AppSyncSubscriptionCall.Callback() {
        @Override
        public void onResponse(@Nonnull Response response) {
            Log.i("Response", response.data().toString());
        }

        @Override
        public void onFailure(@Nonnull ApolloException e) {
            Log.e("Error", e.toString());
        }

        @Override
        public void onCompleted() {
            Log.i("Completed", "Subscription completed");
        }
    };

    public void query(){
        mAWSAppSyncClient.query(ListTodosQuery.builder().build())
                .responseFetcher(AppSyncResponseFetchers.CACHE_AND_NETWORK)
                .enqueue(todosCallback);
    }

    private GraphQLCall.Callback<ListTodosQuery.Data> todosCallback = new GraphQLCall.Callback<ListTodosQuery.Data>() {
        @Override
        public void onResponse(@Nonnull Response<ListTodosQuery.Data> response) {
            Log.i("Results", response.data().listTodos().items().toString());
        }

        @Override
        public void onFailure(@Nonnull ApolloException e) {
            Log.e("ERROR", e.toString());
        }
    };

    public void mutation(){

        CreateTodoInput createTodoInput = CreateTodoInput.builder().
                name("Use AppSync").
                description("Realtime and Offline").
                build();

        mAWSAppSyncClient.mutate(CreateTodoMutation.builder().input(createTodoInput).build())
                .enqueue(mutationCallback);

    }

    private GraphQLCall.Callback<CreateTodoMutation.Data> mutationCallback = new GraphQLCall.Callback<CreateTodoMutation.Data>() {
        @Override
        public void onResponse(@Nonnull Response<CreateTodoMutation.Data> response) {
            Log.i("Results", "Added Todo");
        }

        @Override
        public void onFailure(@Nonnull ApolloException e) {
            Log.e("Error", e.toString());
        }
    };
}
API Category Project Structure
At a high level, the transform libraries take a schema defined in the GraphQL Schema Definition Language (SDL) and converts it into a set of AWS CloudFormation templates and other assets that are deployed as part of amplify push. The full set of assets uploaded can be found at amplify/backend/api/YOUR-API-NAME/build.
When creating APIs, you will make changes to the other files and directories in the amplify/backend/api/YOUR-API-NAME/ directory but you should not manually change anything in the build directory. The build directory will be overwritten the next time you run amplify push or amplify api gql-compile. Here is an overview of the API directory:
- resolvers/
| # Store any resolver templates written in vtl here. E.G.
|-- Query.ping.req.vtl
|-- Query.ping.res.vtl
|
- stacks/
| # Create custom resources with CloudFormation stacks that will be deployed as part of `amplify push`.
|-- CustomResources.json
|
- parameters.json
| # Tweak certain behaviors with custom CloudFormation parameters.
|
- schema.graphql
| # Write your GraphQL schema in SDL
- schema/
| # Optionally break up your schema into many files. You must remove schema.graphql to use this.
|-- Query.graphql
|-- Post.graphql
Overwriting Resolvers
Let’s say you have a simple schema.graphql…
type Todo @model {
  id: ID!
  name: String!
  description: String
}
and you want to change the behavior of request mapping template for the Query.getTodo resolver that will be generated when the project compiles. To do this you would create a file named Query.getTodo.req.vtl in the resolvers directory of your API project. The next time you run amplify push or amplify api gql-compile, your resolver template will be used instead of the auto-generated template. You may similarly create a Query.getTodo.res.vtl file to change the behavior of the resolver’s response mapping template.
Custom Resolvers
Add a custom resolver that targets a DynamoDB table from @model
This is useful if you want to write a more specific query against a DynamoDB table that was created by @model. For example, assume you had this schema with two @model types and a pair of @connection directives.
type Todo @model {
  id: ID!
  name: String!
  description: String
  comments: [Comment] @connection(name: "TodoComments")
}
type Comment @model {
  id: ID!
  content: String
  todo: Todo @connection(name: "TodoComments")
}
This schema will generate resolvers for Query.getTodo, Query.listTodos, Query.getComment, and Query.listComments at the top level as well as for Todo.comments, and Comment.todo to implement the @connection. Under the hood, the transform will create a global secondary index on the Comment table in DynamoDB but it will not generate a top level query field that queries the GSI because you can fetch the comments for a given todo object via the Query.getTodo.comments query path. If you want to fetch all comments for a todo object via a top level query field i.e. Query.commentsForTodo then do the following:
- Add the desired field to your schema.graphql.
// ... Todo and Comment types from above

type CommentConnection {
  items: [Comment]
  nextToken: String
}
type Query {
  commentsForTodo(todoId: ID!, limit: Int, nextToken: String): CommentConnection
}
- Add a resolver resource to a stack in the stacks/ directory.
{
  // ... The rest of the template
  "Resources": {
    "QueryCommentsForTodoResolver": {
      "Type": "AWS::AppSync::Resolver",
      "Properties": {
        "ApiId": {
          "Ref": "AppSyncApiId"
        },
        "DataSourceName": "CommentTable",
        "TypeName": "Query",
        "FieldName": "commentsForTodo",
        "RequestMappingTemplateS3Location": {
          "Fn::Sub": [
            "s3://${S3DeploymentBucket}/${S3DeploymentRootKey}/resolvers/Query.commentsForTodo.req.vtl",
            {
              "S3DeploymentBucket": {
                "Ref": "S3DeploymentBucket"
              },
              "S3DeploymentRootKey": {
                "Ref": "S3DeploymentRootKey"
              }
            }
          ]
        },
        "ResponseMappingTemplateS3Location": {
          "Fn::Sub": [
            "s3://${S3DeploymentBucket}/${S3DeploymentRootKey}/resolvers/Query.commentsForTodo.res.vtl",
            {
              "S3DeploymentBucket": {
                "Ref": "S3DeploymentBucket"
              },
              "S3DeploymentRootKey": {
                "Ref": "S3DeploymentRootKey"
              }
            }
          ]
        }
      }
    }
  }
}
- Write the resolver templates.
## Query.commentsForTodo.req.vtl **

#set( $limit = $util.defaultIfNull($context.args.limit, 10) )
{
  "version": "2017-02-28",
  "operation": "Query",
  "query": {
    "expression": "#connectionAttribute = :connectionAttribute",
    "expressionNames": {
        "#connectionAttribute": "commentTodoId"
    },
    "expressionValues": {
        ":connectionAttribute": {
            "S": "$context.args.todoId"
        }
    }
  },
  "scanIndexForward": true,
  "limit": $limit,
  "nextToken": #if( $context.args.nextToken ) "$context.args.nextToken" #else null #end,
  "index": "gsi-TodoComments"
}
## Query.commentsForTodo.res.vtl **

$util.toJson($ctx.result)
Add a custom resolver that targets an AWS Lambda function
Velocity is useful as a fast, secure environment to run arbitrary code but when it comes to writing complex business logic you can just as easily call out to an AWS lambda function. Here is how:
-
First create a function by running
amplify add function. The rest of the example assumes you created a function named “echofunction” via theamplify add functioncommand. If you already have a function then you may skip this step. -
Add a field to your schema.graphql that will invoke the AWS Lambda function.
type Query {
  echo(msg: String): String
}
- Add the function as an AppSync data source in the stack’s Resources block.
"EchoLambdaDataSource": {
  "Type": "AWS::AppSync::DataSource",
  "Properties": {
    "ApiId": {
      "Ref": "AppSyncApiId"
    },
    "Name": "EchoFunction",
    "Type": "AWS_LAMBDA",
    "ServiceRoleArn": {
      "Fn::GetAtt": [
        "EchoLambdaDataSourceRole",
        "Arn"
      ]
    },
    "LambdaConfig": {
      "LambdaFunctionArn": {
        "Fn::Sub": [
          "arn:aws:lambda:${AWS::Region}:${AWS::AccountId}:function:echofunction-${env}",
          { "env": { "Ref": "env" } }
        ]
      }
    }
  }
}
- Create an AWS IAM role that allows AppSync to invoke the lambda function on your behalf to the stack’s Resources block.
"EchoLambdaDataSourceRole": {
  "Type": "AWS::IAM::Role",
  "Properties": {
    "RoleName": {
      "Fn::Sub": [
        "EchoLambdaDataSourceRole-${env}",
        { "env": { "Ref": "env" } }
      ]
    },
    "AssumeRolePolicyDocument": {
      "Version": "2012-10-17",
      "Statement": [
        {
          "Effect": "Allow",
          "Principal": {
            "Service": "appsync.amazonaws.com"
          },
          "Action": "sts:AssumeRole"
        }
      ]
    },
    "Policies": [
      {
        "PolicyName": "InvokeLambdaFunction",
        "PolicyDocument": {
          "Version": "2012-10-17",
          "Statement": [
            {
              "Effect": "Allow",
              "Action": [
                "lambda:invokeFunction"
              ],
              "Resource": [
                {
                  "Fn::Sub": [
                    "arn:aws:lambda:${AWS::Region}:${AWS::AccountId}:function:echofunction-${env}",
                    { "env": { "Ref": "env" } }
                  ]
                }
              ]
            }
          ]
        }
      }
    ]
  }
}
- Create an AppSync resolver in the stack’s Resources block.
"QueryEchoResolver": {
  "Type": "AWS::AppSync::Resolver",
  "Properties": {
    "ApiId": {
      "Ref": "AppSyncApiId"
    },
    "DataSourceName": {
      "Fn::GetAtt": [
        "EchoLambdaDataSource",
        "Name"
      ]
    },
    "TypeName": "Query",
    "FieldName": "echo",
    "RequestMappingTemplateS3Location": {
      "Fn::Sub": [
        "s3://${S3DeploymentBucket}/${S3DeploymentRootKey}/resolvers/Query.echo.req.vtl",
        {
          "S3DeploymentBucket": {
            "Ref": "S3DeploymentBucket"
          },
          "S3DeploymentRootKey": {
            "Ref": "S3DeploymentRootKey"
          }
        }
      ]
    },
    "ResponseMappingTemplateS3Location": {
      "Fn::Sub": [
        "s3://${S3DeploymentBucket}/${S3DeploymentRootKey}/resolvers/Query.echo.res.vtl",
        {
          "S3DeploymentBucket": {
            "Ref": "S3DeploymentBucket"
          },
          "S3DeploymentRootKey": {
            "Ref": "S3DeploymentRootKey"
          }
        }
      ]
    }
  }
}
- Create the resolver templates in the project’s resolvers directory.
resolvers/Query.echo.req.vtl
{
    "version": "2017-02-28",
    "operation": "Invoke",
    "payload": {
        "type": "Query",
        "field": "echo",
        "arguments": $utils.toJson($context.arguments),
        "identity": $utils.toJson($context.identity),
        "source": $utils.toJson($context.source)
    }
}
resolvers/Query.echo.res.vtl
$util.toJson($ctx.result)
After running amplify push open the AppSync console with amplify api console and test your API with this simple query:
query {
  echo(msg:"Hello, world!")
}
Add a custom geolocation search resolver that targets an Elasticsearch domain created by @searchable
To add a geolocation search capabilities to an API add the @searchable directive to an @model type.
type Todo @model @searchable {
  id: ID!
  name: String!
  description: String
  comments: [Todo] @connection(name: "TodoComments")
}
The next time you run amplify push, an Amazon Elasticsearch domain will be created and configured such that data automatically streams from DynamoDB into Elasticsearch. The @searchable directive on the Todo type will generate a Query.searchTodos query field and resolver but it is not uncommon to want more specific search capabilities. You can write a custom search resolver by following these steps:
- Add the relevant location and search fields to the schema.
type Location {
  lat: Float
  lon: Float
}
input LocationInput {
  lat: Float
  lon: Float
}
type Todo @model @searchable {
  id: ID!
  name: String!
  description: String
  comments: [Todo] @connection(name: "TodoComments")
  location: Location
}
type Query {
  nearbyTodos(location: LocationInput!, km: Int): TodoConnection
}
- Create the resolver record in the stack’s Resources block.
"QueryNearbyTodos": {
    "Type": "AWS::AppSync::Resolver",
    "Properties": {
        "ApiId": {
            "Ref": "AppSyncApiId"
        },
        "DataSourceName": "ElasticSearchDomain",
        "TypeName": "Query",
        "FieldName": "nearbyTodos",
        "RequestMappingTemplateS3Location": {
            "Fn::Sub": [
                "s3://${S3DeploymentBucket}/${S3DeploymentRootKey}/resolvers/Query.nearbyTodos.req.vtl",
                {
                    "S3DeploymentBucket": {
                        "Ref": "S3DeploymentBucket"
                    },
                    "S3DeploymentRootKey": {
                        "Ref": "S3DeploymentRootKey"
                    }
                }
            ]
        },
        "ResponseMappingTemplateS3Location": {
            "Fn::Sub": [
                "s3://${S3DeploymentBucket}/${S3DeploymentRootKey}/resolvers/Query.nearbyTodos.res.vtl",
                {
                    "S3DeploymentBucket": {
                        "Ref": "S3DeploymentBucket"
                    },
                    "S3DeploymentRootKey": {
                        "Ref": "S3DeploymentRootKey"
                    }
                }
            ]
        }
    }
}
- Write the resolver templates.
## Query.nearbyTodos.req.vtl
## Objects of type Todo will be stored in the /todo index

#set( $indexPath = "/todo/doc/_search" )
#set( $distance = $util.defaultIfNull($ctx.args.km, 200) )
{
    "version": "2017-02-28",
    "operation": "GET",
    "path": "$indexPath.toLowerCase()",
    "params": {
        "body": {
            "query": {
                "bool" : {
                    "must" : {
                        "match_all" : {}
                    },
                    "filter" : {
                        "geo_distance" : {
                            "distance" : "${distance}km",
                            "location" : $util.toJson($ctx.args.location)
                        }
                    }
                }
            }
        }
    }
}
## Query.nearbyTodos.res.vtl

#set( $items = [] )
#foreach( $entry in $context.result.hits.hits )
  #if( !$foreach.hasNext )
    #set( $nextToken = "$entry.sort.get(0)" )
  #end
  $util.qr($items.add($entry.get("_source")))
#end
$util.toJson({
  "items": $items,
  "total": $ctx.result.hits.total,
  "nextToken": $nextToken
})
- Run
amplify push
Amazon Elasticsearch domains can take a while to deploy. Take this time to read up on Elasticsearch to see what capabilities you are about to unlock.
Getting Started with Elasticsearch
- After the update is complete but before creating any objects, update your Elasticsearch index mapping.
An index mapping tells Elasticsearch how it should treat the data that you are trying to store. By default, if we create an object with field "location": { "lat": 40, "lon": -40 }, Elasticsearch will treat that data as an object type when in reality we want it to be treated as a geo_point. You use the mapping APIs to tell Elasticsearch how to do this.
Make sure you tell Elasticsearch that your location field is a geo_point before creating objects in the index because otherwise you will need delete the index and try again. Go to the Amazon Elasticsearch Console and find the Elasticsearch domain that contains this environment’s GraphQL API ID. Click on it and open the kibana link. To get kibana to show up you need to install a browser extension such as AWS Agent and configure it with your AWS profile’s public key and secret so the browser can sign your requests to kibana for security reasons. Once you have kibana open, click the “Dev Tools” tab on the left and run the commands below using the in browser console.
# Create the /todo index if it does not exist
PUT /todo

# Tell Elasticsearch that the location field is a geo_point
PUT /todo/_mapping/doc
{
    "properties": {
        "location": {
            "type": "geo_point"
        }
    }
}
- Use your API to create objects and immediately search them.
After updating the Elasticsearch index mapping, open the AWS AppSync console with amplify api console and try out these queries.
mutation CreateTodo {
  createTodo(input:{
    name: "Todo 1",
    description: "The first thing to do",
    location: {
      lat:43.476446,
      lon:-110.767786
    }
  }) {
    id
    name
    location {
      lat
      lon
    }
    description
  }
}

query NearbyTodos {
  nearbyTodos(location: {
    lat: 43.476546,
    lon: -110.768786
  }, km: 200) {
    items {
      id
      name
      location {
        lat
        lon
      }
    }
  }
}
When you run Mutation.createTodo, the data will automatically be streamed via AWS Lambda into Elasticsearch such that it nearly immediately available via Query.nearbyTodos.
Configurable Parameters
Much of the behavior of the GraphQL Transform logic is configured by passing arguments to the directives in the GraphQL SDL definition. However, certain other things are configured by passing parameters to the CloudFormation template itself. This provides escape hatches without leaking too many implementation details into the SDL definition. You can pass values to these parameters by adding them to the parameters.json file in the API directory of your amplify project.
AppSyncApiName
Override the name of the generated AppSync API
{
  "AppSyncApiName": "AppSyncAPI"
}
CreateAPIKey
CreateAPIKey takes value of either 1 or 0.
It give you the mechanism to rotate the API Key, in scenarios such as to handle API Key expiration.
Follow these two steps when you need to rotate an API Key
- Delete the existing API key by setting
CreateAPIKeyto0in theamplify/backend/api/<apiName>/parameters.jsonfile and executeamplify push. - Create a new API key by setting
CreateAPIKeyto1in theamplify/backend/api/<apiName>/parameters.jsonfile and executeamplify push.
Delete the existing API Key
{
  "CreateAPIKey": 0
}
Create new API Key
{
  "CreateAPIKey": 1
}
APIKeyExpirationEpoch
Resets the API Key to expire 1 week after the next amplify push
{
  "APIKeyExpirationEpoch": 0
}
Do not create an API key
{
  "APIKeyExpirationEpoch": -1
}
Set a custom API key expiration date
{
  "APIKeyExpirationEpoch": 1544745428
}
The value specified is the expiration date in seconds since Epoch
DynamoDBBillingMode
Set the DynamoDB billing mode for the API. One of “PROVISIONED” or “PAY_PER_REQUEST”.
{
  "DynamoDBBillingMode": "PAY_PER_REQUEST"
}
DynamoDBModelTableReadIOPS
Override the default read IOPS provisioned for each @model table
Only valid if the “DynamoDBBillingMode” is set to “PROVISIONED”
{
  "DynamoDBModelTableReadIOPS": 5
}
DynamoDBModelTableWriteIOPS
Override the default write IOPS provisioned for each @model table
Only valid if the “DynamoDBBillingMode” is set to “PROVISIONED”
{
  "DynamoDBModelTableWriteIOPS": 5
}
ElasticsearchStreamingFunctionName
Override the name of the AWS Lambda searchable streaming function
{
  "ElasticsearchStreamingFunctionName": "CustomFunctionName"
}
ElasticsearchInstanceCount
Override the number of instances launched into the Elasticsearch domain created by @searchable
{
  "ElasticsearchInstanceCount": 1
}
ElasticsearchInstanceType
Override the type of instance launched into the Elasticsearch domain created by @searchable
{
  "ElasticsearchInstanceType": "t2.small.elasticsearch"
}
ElasticsearchEBSVolumeGB
Override the amount of disk space allocated to each instance in the Elasticsearch domain created by @searchable
{
  "ElasticsearchEBSVolumeGB": 10
}
Examples
Simple Todo
type Todo @model {
  id: ID!
  name: String!
  description: String
}
Blog
type Blog @model {
  id: ID!
  name: String!
  posts: [Post] @connection(name: "BlogPosts")
}
type Post @model {
  id: ID!
  title: String!
  blog: Blog @connection(name: "BlogPosts")
  comments: [Comment] @connection(name: "PostComments")
}
type Comment @model {
  id: ID!
  content: String
  post: Post @connection(name: "PostComments")
}
Blog Queries
# Create a blog. Remember the returned id.
# Provide the returned id as the "blogId" variable.
mutation CreateBlog {
  createBlog(input: {
    name: "My New Blog!"
  }) {
    id
    name
  }
}

# Create a post and associate it with the blog via the "postBlogId" input field.
# Provide the returned id as the "postId" variable.
mutation CreatePost($blogId:ID!) {
  createPost(input:{title:"My Post!", postBlogId: $blogId}) {
    id
    title
    blog {
      id
      name
    }
  }
}

# Create a comment and associate it with the post via the "commentPostId" input field.
mutation CreateComment($postId:ID!) {
  createComment(input:{content:"A comment!", commentPostId:$postId}) {
    id
    content
    post {
      id
      title
      blog {
        id
        name
      }
    }
  }
}

# Get a blog, its posts, and its posts comments.
query GetBlog($blogId:ID!) {
  getBlog(id:$blogId) {
    id
    name
    posts(filter: {
      title: {
        eq: "My Post!"
      }
    }) {
      items {
        id
        title
        comments {
          items {
            id
            content
          }
        }
      }
    }
  }
}

# List all blogs, their posts, and their posts comments.
query ListBlogs {
  listBlogs { # Try adding: listBlog(filter: { name: { eq: "My New Blog!" } })
    items {
      id
      name
      posts { # or try adding: posts(filter: { title: { eq: "My Post!" } })
        items {
          id
          title
          comments { # and so on ...
            items {
              id
              content
            }
          }
        }
      }
    }
  }
}
Task App
Note: To use the @auth directive, the API must be configured to use Amazon Cognito user pools.
type Task
  @model
  @auth(rules: [
      {allow: groups, groups: ["Managers"], mutations: [create, update, delete], queries: null},
      {allow: groups, groups: ["Employees"], mutations: null, queries: [get, list]}
    ])
{
  id: ID!
  title: String!
  description: String
  status: String
}
type PrivateNote
  @model
  @auth(rules: [{allow: owner}])
{
  id: ID!
  content: String!
}
Task Queries
# Create a task. Only allowed if a manager.
mutation CreateTask {
  createTask(input:{
    title:"A task",
    description:"A task description",
    status: "pending"
  }) {
    id
    title
    description
  }
}

# Get a task. Allowed if an employee.
query GetTask($taskId:ID!) {
  getTask(id:$taskId) {
    id
    title
    description
  }
}

# Automatically inject the username as owner attribute.
mutation CreatePrivateNote {
  createPrivateNote(input:{content:"A private note of user 1"}) {
    id
    content
  }
}

# Unauthorized error if not owner.
query GetPrivateNote($privateNoteId:ID!) {
  getPrivateNote(id:$privateNoteId) {
    id
    content
  }
}

# Return only my own private notes.
query ListPrivateNote {
  listPrivateNote {
    items {
      id
      content
    }
  }
}
Conflict Detection
type Note @model @versioned {
  id: ID!
  content: String!
  version: Int! # You can leave this out. Validation fails if this is not a int like type (Int/BigInt) and is always coerced to non-null.
}
Conflict Detection Queries
mutation Create {
  createNote(input:{
    content:"A note"
  }) {
    id
    content
    version
  }
}

mutation Update($noteId: ID!) {
  updateNote(input:{
    id: $noteId,
    content:"A second version",
    expectedVersion: 1
  }) {
    id
    content
    version
  }
}

mutation Delete($noteId: ID!) {
  deleteNote(input:{
    id: $noteId,
    expectedVersion: 2
  }) {
    id
    content
    version
  }
}
Common Patterns for the API Category
The Amplify CLI exposes the GraphQL Transform libraries to help create APIs with common patterns and best practices baked in but it also provides number of escape hatches for those situations where you might need a bit more control. Here are a few common use cases you might find useful.
Filter Subscriptions by model fields and/or relations
In multi-tenant scenarios, subscribed clients may not always want to receive every change for a model type. These are useful features for limiting the objects that are returned by a client subscription. It is crucial to remember that subscriptions can only filter by what fields are returned from the mutation query. Keep in mind, these two methods can be used together to create truly robust filtering options.
Consider this simple schema for our examples:
type Todo @model {
  id: ID!
  name: String!
  description: String
  comments: [Comment] @connection(name: "TodoComments")
}
type Comment @model {
  id: ID!
  content: String
  todo: Todo @connection(name: "TodoComments")
}
Filtering by type fields
This is the simpler method of filtering subscriptions, as it requires one less change to the model than filtering on relations.
- Add the subscriptions argument on the @model directive, telling Amplify to not generate subscriptions for your Comment type.
type Comment @model(subscriptions: null) {
  id: ID!
  content: String
  todo: Todo @connection(name: "TodoComments")
}
-
Run
amplify pushat this point, as running it after adding the Subscription type will throw an error, claiming you cannot have two Subscription definitions in your schema. -
After the push, you will need to add the Subscription type to your schema, including whichever scalar Comment fields you wish to use for filtering (content in this case):
type Subscription {
  onCreateComment(content: String): Comment @aws_subscribe(mutations: ["createComment"])
  onUpdateComment(id: ID, content: String): Comment @aws_subscribe(mutations: ["updateComment"])
  onDeleteComment(id: ID, content: String): Comment @aws_subscribe(mutations: ["deleteComment"])
}
Filtering by related (@connection designated) type
This is useful when you need to filter by what Todo objects the Comments are connected to. You will need to augment your schema slightly to enable this.
- Add the subscriptions argument on the @model directive, telling Amplify to not generate subscriptions for your Comment type. Also, just as importantly, we will be utilizing an auto-generated column from DynamoDB by adding
commentTodoIdto our Comment model:
type Comment @model(subscriptions: null) {
  id: ID!
  content: String
  todo: Todo @connection(name: "TodoComments")
  commentTodoId: String # This references the commentTodoId field in DynamoDB
}
-
You should run
amplify pushat this point, as running it after adding the Subscription type will throw an error, claiming you cannot have two Subscription definitions in your schema. -
After the push, you will need to add the Subscription type to your schema, including the
commentTodoIdas an optional argument:
type Subscription {
  onCreateComment(commentTodoId: String): Comment @aws_subscribe(mutations: "createComment")
  onUpdateComment(id: ID, commentTodoId: String): Comment @aws_subscribe(mutations: "updateComment")
  onDeleteComment(id: ID, commentTodoId: String): Comment @aws_subscribe(mutations: "deleteComment")
}
The next time you run amplify push or amplify api gql-compile, your subscriptions will allow an id and/or commentTodoId argument on a Comment subscription. As long as your mutation on the Comment type returns the specified argument field from its query, AppSync filters which subscription events will be pushed to your subscribed client.