

Note This guide shows how to build an app using AWS Mobile SDK for Android and the Amplify CLI toolchain. To use our new, preview developer experience with new Amplify Libraries for Android, click here.
Analytics
Collecting analytics data for your app can be accomplished with Amazon Pinpoint or Amazon Kinesis.
Using Amazon Pinpoint
Amazon Pinpoint is a fully managed AWS service that you can use to engage with your customers across multiple messaging channels using analytics captured from the device. You can send push notifications, emails, or text messages (SMS), depending on the purpose of your campaign. Features include:
Audience Segments - You can define dynamic segments based on data that’s reported by your application, such as operating system or mobile device type. You can also import static segments that you define outside of Amazon Pinpoint.
Messaging Campaigns - A campaign sends tailored messages on a schedule that you define. You can create campaigns that send mobile push, email, or SMS messages. To experiment with alternative campaign strategies, set up your campaign as an A/B test, and analyze the results with Amazon Pinpoint analytics.
Transactional Messages - Keep your customers informed by sending transactional mobile push and SMS messages—such as new account activation messages, order confirmations, and password reset notifications—to specific users.
Analyze User Behavior - You can view trends about your users’ level of engagement, purchase activity, and demographics. You can monitor your message traffic with metrics for messages sent and opened. Through the Amazon Pinpoint API, your application can report custom data, which Amazon Pinpoint makes available for analysis.
The Amplify CLI helps setup and configure Pinpoint within your application and connect with the AWS Mobile SDK.
Prerequisite: Install and configure the Amplify CLI
Recommendation: Complete the Getting Started guide
Set Up Your Backend
-
Use the CLI to add analytics to your cloud-enabled backend and app.
In a terminal window, navigate to your project folder (the folder that typically contains your project level
build.gradle), and add the SDK to your app.$ cd ./YOUR_PROJECT_FOLDER $ amplify add analytics -
When configuration for analytics is complete, a message appears confirming that you have configured local CLI metadata for this category. You can confirm this by viewing status.
$ amplify status | Category | Resource name | Operation | Provider plugin | | --------- | --------------- | --------- | ----------------- | | Auth | cognitoabcd0123 | Create | awscloudformation | | Analytics | yourprojectname | Create | awscloudformation | -
To create your backend AWS resources run the following:
$ amplify push
Update your IAM Policy:
The Amazon Pinpoint service requires permissions defined in an IAM policy to use the submitEvents API. If you are using long-term AWS credentials attached to an Amazon IAM user, attach the following policies to the role of that IAM user. If you are using temporary AWS credentials vended by Amazon Cognito Identity Pools, then attach the following policies to the Unauthenticated and/or Authenticated IAM roles of your Cognito Identity Pool. The role you attach the policies to depends on the scope of your application. For example, if you only want events submitted when users login, attach to the authenticated role. Similarly, if you want events submitted regardless of authentication state, attach the policy to the unauthenticated role. For more information on Cognito Identities authenticated/unauthenticated roles see here.
{
    "Version": "2012-10-17",
    "Statement": [
        {
            "Effect": "Allow",
            "Action": [
                "mobiletargeting:UpdateEndpoint",
                "mobiletargeting:PutEvents"
            ],
            "Resource": [
                "arn:aws:mobiletargeting:*:${accountID}:apps/${appId}*"
            ]
        }
    ]
}
Connect to Your Backend
Use the following steps to add analytics to your mobile app and monitor the results through Amazon Pinpoint.
Add Analytics
- Set up AWS Mobile SDK components by including the following libraries in your
app/build.gradledependencies list.
dependencies {
  implementation 'com.amazonaws:aws-android-sdk-pinpoint:2.15.+'
  implementation ('com.amazonaws:aws-android-sdk-mobile-client:2.15.+@aar') { transitive = true }
}
aws-android-sdk-pinpointlibrary enables sending analytics to Amazon Pinpoint.aws-android-sdk-mobile-clientlibrary gives access to the AWS credentials provider and configurations.
-
Add required permissions to your app manifest.
The AWS Mobile SDK requires the
INTERNETandACCESS_NETWORK_STATEpermissions. These are defined in theAndroidManifest.xmlfile.<uses-permission android:name="android.permission.INTERNET"/> <uses-permission android:name="android.permission.ACCESS_NETWORK_STATE"/> -
Add calls to capture session starts and stops. A session is one use of an app by the user. A session begins when an app is launched (or brought to the foreground), and ends when the app is terminated (or goes to the background). To accommodate for brief interruptions, like a text message, an inactivity period of up to 5 seconds is not counted as a new session.
Total daily sessionsshows the number of sessions your app has each day.Average sessions per daily active usershows the mean number of sessions per user per day.The following are typical places where you can instrument your app session start and stop:
-
Start a session in the
Application.onCreate()method. -
Start a session in the
onCreate()method of the app’s first activity. -
Start or stop a session in the ActivityLifecycleCallbacks class.
The following example shows how to start a session in the
OnCreateevent ofMainActivity.import android.support.v7.app.AppCompatActivity; import android.os.Bundle; import com.amazonaws.mobileconnectors.pinpoint.PinpointManager; import com.amazonaws.mobileconnectors.pinpoint.PinpointConfiguration; import com.amazonaws.mobile.client.AWSMobileClient; import com.amazonaws.mobile.config.AWSConfiguration; import com.amazonaws.mobile.client.UserStateDetails; import com.amazonaws.mobile.client.Callback; import android.content.Context; public class MainActivity extends AppCompatActivity { private static final String TAG = MainActivity.class.getSimpleName(); public static PinpointManager pinpointManager; public static PinpointManager getPinpointManager(final Context applicationContext) { if (pinpointManager == null) { // Initialize the AWS Mobile Client final AWSConfiguration awsConfig = new AWSConfiguration(applicationContext); AWSMobileClient.getInstance().initialize(applicationContext, awsConfig, new Callback<UserStateDetails>() { @Override public void onResult(UserStateDetails userStateDetails) { Log.i("INIT", userStateDetails.getUserState().toString()); } @Override public void onError(Exception e) { Log.e("INIT", "Initialization error.", e); } }); PinpointConfiguration pinpointConfig = new PinpointConfiguration( applicationContext, AWSMobileClient.getInstance(), awsConfig); pinpointManager = new PinpointManager(pinpointConfig); } return pinpointManager; } @Override protected void onCreate(Bundle savedInstanceState) { super.onCreate(savedInstanceState); setContentView(R.layout.activity_main); final PinpointManager pinpointManager = getPinpointManager(getApplicationContext()); pinpointManager.getSessionClient().startSession(); } }To stop the session, use
stopSession()andsubmitEvents()at the last point in the session you want to capture. In this example, we are using a single Activity, so the session will stop when the MainActivity is destroyed.onDestroy()is usually called when the back button is pressed while in the activity.@Override protected void onDestroy() { super.onDestroy(); pinpointManager.getSessionClient().stopSession(); pinpointManager.getAnalyticsClient().submitEvents(); } -
Monitor Analytics
Build and run your app to see usage metrics in Amazon Pinpoint. When you run the previous code samples, the console shows a logged Session.
-
To see visualizations of the analytics coming from your app, open your project in the Amazon Pinpoint console by running the following:
$ amplify console analytics -
Choose
Analyticsfrom the icons on the left of the console, and view the graphs of your app’s usage. It may take up to 15 minutes for metrics to become visible.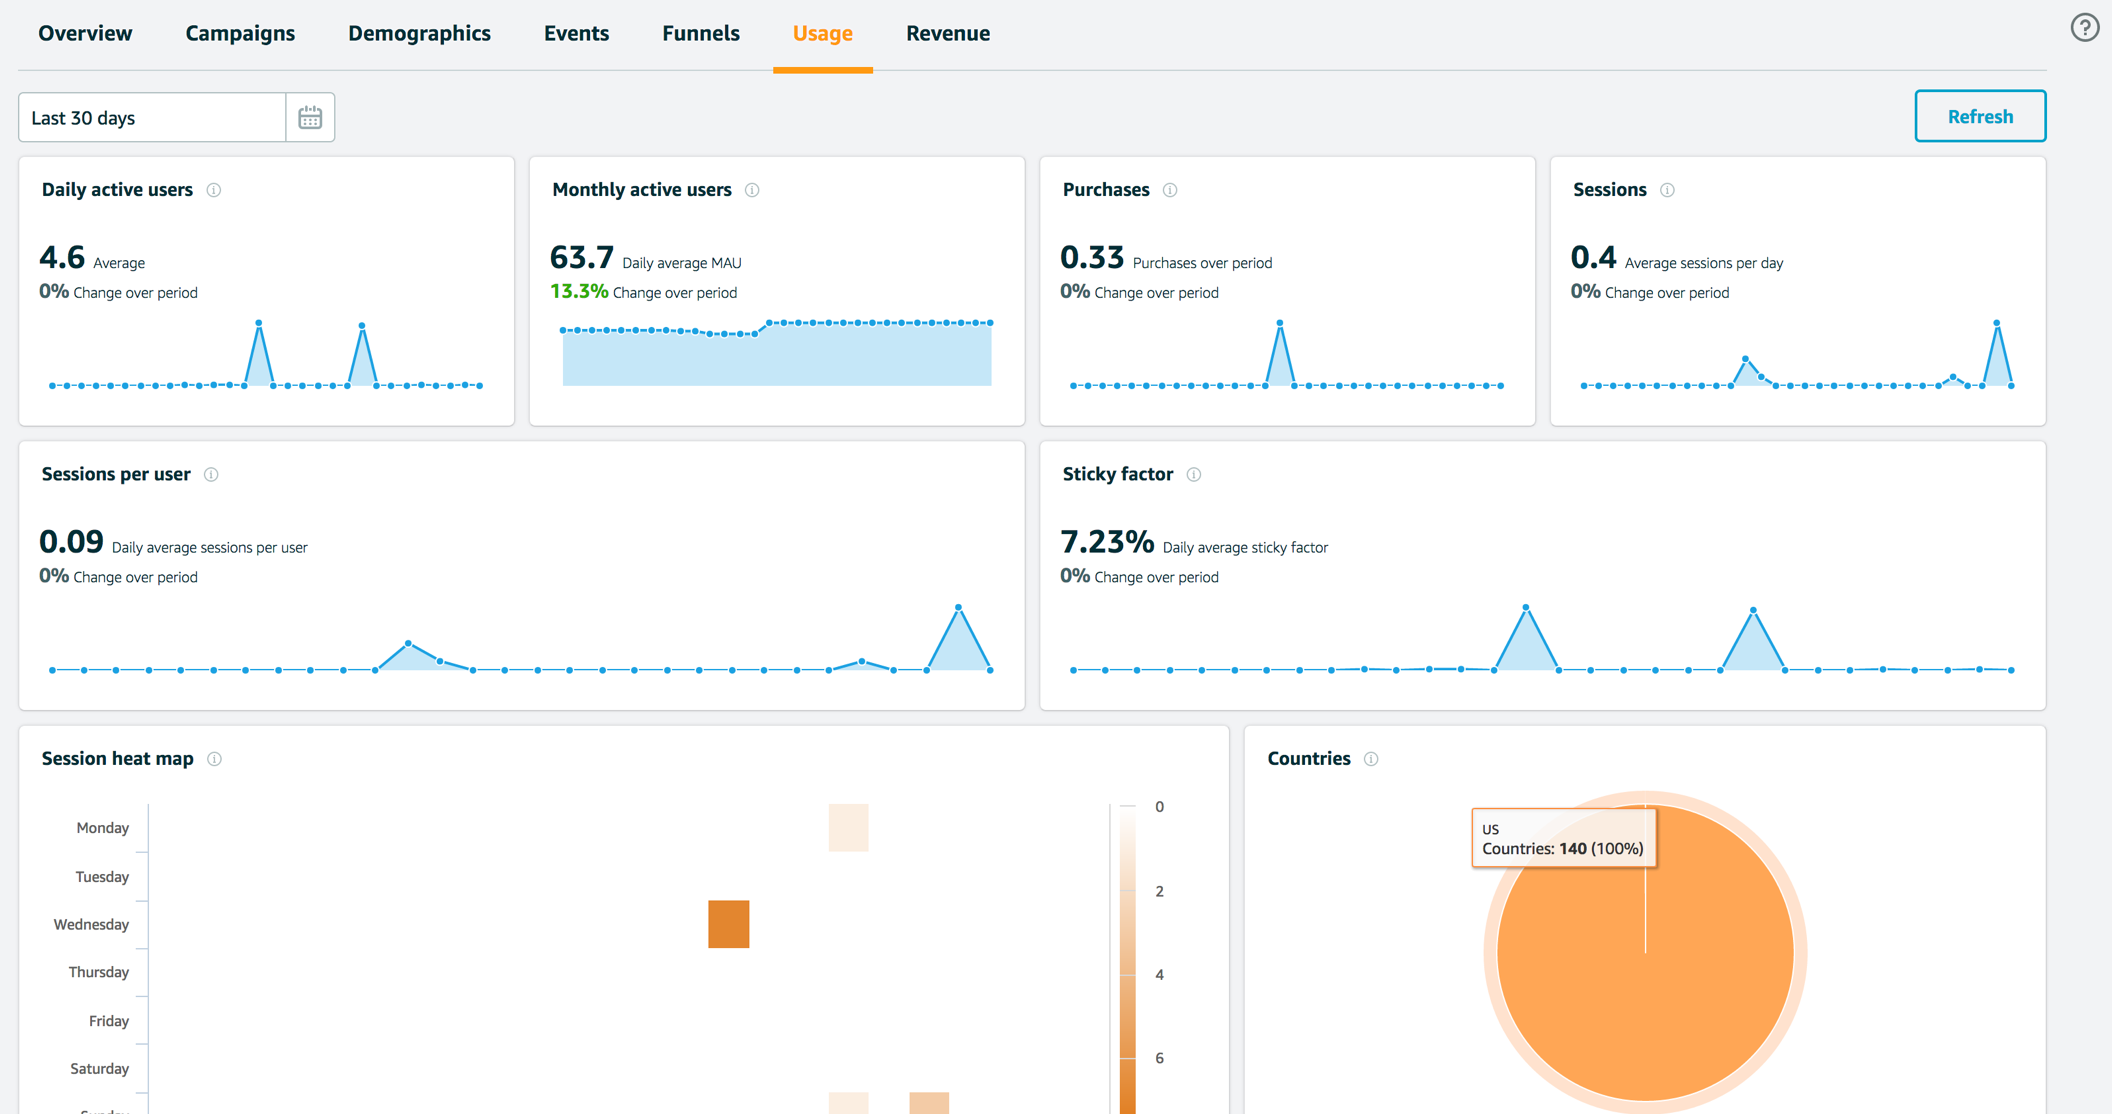
Analytics events can be grouped into segments, and you can engage your users more deeply by tying their app usage behavior to Push Notification, email, or SMS messaging campaigns. Read more about this in the messaging section or click here to learn more about Amazon Pinpoint.
Enable Custom App Analytics
Instrument your code to capture app usage event information, including attributes you define. Use graphs of your custom usage event data in the Amazon Pinpoint console. Visualize how your users’ behavior aligns with a model you design using Amazon Pinpoint Funnel Analytics, or use stream the data for deeper analysis.
Use the following steps to implement Amazon Pinpoint custom analytics for your app.
import com.amazonaws.mobileconnectors.pinpoint.analytics.AnalyticsEvent;

/**
* Call this method to log a custom event to the analytics client.
*/
public void logEvent() {
   final AnalyticsEvent event =
       pinpointManager.getAnalyticsClient().createEvent("EventName")
           .withAttribute("DemoAttribute1", "DemoAttributeValue1")
           .withAttribute("DemoAttribute2", "DemoAttributeValue2")
           .withMetric("DemoMetric1", Math.random());

   pinpointManager.getAnalyticsClient().recordEvent(event);
}
Build, run, and use your app. Then, view your custom events on the Events tab of the Amazon Pinpoint console (choose Analytics>Events). Look for the name of your event in the Events menu.
Enable Revenue Analytics
Amazon Pinpoint supports the collection of monetization event data. Use the following steps to place and design analytics related to purchases through your app.
import com.amazonaws.mobileconnectors.pinpoint.analytics.monetization.AmazonMonetizationEventBuilder;

/**
* Call this method to log a monetized event to the analytics client.
*/
public void logMonetizationEvent() {
    final AnalyticsEvent event =
       AmazonMonetizationEventBuilder.create(pinpointManager.getAnalyticsClient())
           .withCurrency("USD")
           .withItemPrice(10.00)
           .withProductId("DEMO_PRODUCT_ID")
           .withQuantity(1.0)
           .withProductId("DEMO_TRANSACTION_ID").build();
    pinpointManager.getAnalyticsClient().recordEvent(event);
}
Reporting Events in Your Application
You can use the AWS Android SDK for Pinpoint to report usage data, or events, to Amazon Pinpoint. You can report events to capture information such as session times, users’ purchasing behavior, sign-in attempts, or any custom event type that you need.
After your application reports events, you can view analytics in the Amazon Pinpoint console. The charts on the Analytics page provide metrics for many aspects of user behavior. For more information, see Chart Reference for Amazon Pinpoint Analytics in the Amazon Pinpoint User Guide.
To analyze and store your event data outside of Amazon Pinpoint, you can configure Amazon Pinpoint to stream the data to Amazon Kinesis. For more information, see Streaming Amazon Pinpoint Events to Kinesis.
By using the PinpointManager in AWS Android SDK for Pinpoint, you can call the Amazon Pinpoint API to report the following types of events:
Session events
Indicate when and how often users open and close your app.
After your application reports session events, use the Analytics page in the Amazon Pinpoint console to view charts for Sessions, Daily active endpoints, 7-day retention rate, and more.
import com.amazonaws.mobileconnectors.pinpoint.analytics.SessionClient;

/**
 * Call this method to start and stop a session and submit events recorded
 * in the current session.
 */
public void logSession() {
    SessionClient sessionClient = pinpointManager.getSessionClient();
    sessionClient.startSession();
    sessionClient.stopSession();
    pinpointManager.getAnalyticsClient().submitEvents();
}
Custom events
Are nonstandard events that you define by assigning a custom event type. You can add custom attributes and metrics to a custom event.
On the Analytics page in the console, the Events tab displays metrics for all custom events that are reported by your app. Use graphs of your custom usage event data in the Amazon Pinpoint console. Visualize how your users’ behavior aligns with a model you design using Amazon Pinpoint Funnel Analytics, or use stream the data for deeper analysis.
Use the following steps to implement Amazon Pinpoint custom analytics for your app.
import com.amazonaws.mobileconnectors.pinpoint.analytics.AnalyticsEvent;

/**
* Call this method to log a custom event to the analytics client.
*/
public void logEvent() {
   final AnalyticsEvent event =
       pinpointManager.getAnalyticsClient().createEvent("EventName")
           .withAttribute("DemoAttribute1", "DemoAttributeValue1")
           .withAttribute("DemoAttribute2", "DemoAttributeValue2")
           .withMetric("DemoMetric1", Math.random());
   pinpointManager.getAnalyticsClient().recordEvent(event);
   pinpointManager.getAnalyticsClient().submitEvents();
}
Build, run, and use your app. Then, view your custom events on the Events tab of the Amazon Pinpoint console (choose Analytics>Events). Look for the name of your event in the Events menu.
Monetization events
Report the revenue that’s generated by your application and the number of items that are purchased by users.
On the Analytics page, the Revenue tab displays charts for Revenue, Paying users, Units sold, and more.
Use the following steps to implement Amazon Pinpoint monetization analytics for your app.
import com.amazonaws.mobileconnectors.pinpoint.analytics.monetization.AmazonMonetizationEventBuilder;

/**
* Call this method to log a monetized event to the analytics client.
*/
public void logMonetizationEvent() {
    final AnalyticsEvent event =
       AmazonMonetizationEventBuilder.create(pinpointManager.getAnalyticsClient())
           .withCurrency("USD")
           .withItemPrice(10.00)
           .withProductId("DEMO_PRODUCT_ID")
           .withQuantity(1.0)
           .withProductId("DEMO_TRANSACTION_ID").build();
    pinpointManager.getAnalyticsClient().recordEvent(event);
    pinpointManager.getAnalyticsClient().submitEvents();
}
Authentication events
Indicate how frequently users authenticate with your application.
On the Analytics page, the Users tab displays charts for Sign-ins, Sign-ups, and Authentication failures.
To learn how frequently users authenticate with your app, update your application code so that Amazon Pinpoint receives the following standard event types for authentication:
_userauth.sign_in_userauth.sign_up_userauth.auth_fail
You can report authentication events by doing either of the following:
Managing user sign-up and sign-in with Amazon Cognito user pools
Amazon Cognito user pools are user directories that make it easier to add sign-up and sign-in to your app. As users authenticate with your app, Amazon Cognito reports authentication events to Amazon Pinpoint. For more information, see Using Amazon Pinpoint Analytics with Amazon Cognito User Pools in the Amazon Cognito Developer Guide. Also update awsconfiguration.json by adding the pinpoint appid under CognitoUserPool.
	"CognitoUserPool": {
        "Default": {
            "PoolId": "<poolid>",
            "AppClientId": "<appclientid>",
            "AppClientSecret": "<appclientsecret>",
            "Region": "<region>",
            "PinpointAppId": "<pinpointappid>"
        }
    }
Reporting authentication events by using the Amazon Pinpoint client that’s provided by the AWS Mobile SDK for Android.
If you don’t want to use Amazon Cognito user pools, you can use the Amazon Pinpoint client to record and submit authentication events, as shown in the following examples. In these examples, the event type is set to _userauth.sign_in, but you can substitute any authentication event type.
import com.amazonaws.mobileconnectors.pinpoint.analytics.AnalyticsEvent;

/**
* Call this method to log an authentication event to the analytics client.
*/
public void logAuthenticationEvent() {
   final AnalyticsEvent event =
       pinpointManager.getAnalyticsClient().createEvent("_userauth.sign_in");
   pinpointManager.getAnalyticsClient().recordEvent(event);
   pinpointManager.getAnalyticsClient().submitEvents();
}
Event Ingestion Limits
The limits applicable to the ingestion of events using the AWS Android SDK for Pinpoint and the Amazon Pinpoint Events API can be found here.
Managing Sessions in Your Application
As users engage with your app, it reports information about app sessions to Amazon Pinpoint, such as session start times, session end times, and events that occur during sessions. To report this information from an Android application, your app must include methods that handle events as your app enters the foreground and the background on the user’s Android device.
Example Lifecycle Manager
The following example class, AbstractApplicationLifeCycleHelper, implements the Application.ActivityLifecycleCallbacks interface to track when the application enters the foreground or background, among other states. Add this class to your app, or use it as an example for how to update your code:
package com.amazonaws.mobile.util;

import android.app.Activity;
import android.app.Application;
import android.content.BroadcastReceiver;
import android.content.Context;
import android.content.Intent;
import android.content.IntentFilter;
import android.os.Bundle;
import android.util.Log;

import java.util.WeakHashMap;

/**
 * Aids in determining when your application has entered or left the foreground.
 * The constructor registers to receive Activity lifecycle events and also registers a
 * broadcast receiver to handle the screen being turned off.  Abstract methods are
 * provided to handle when the application enters the background or foreground.
 * Any activity lifecycle callbacks can easily be overriden if additional handling
 * is needed. Just be sure to call through to the super method so that this class
 * will still behave as intended.
 **/
public abstract class AbstractApplicationLifeCycleHelper implements Application.ActivityLifecycleCallbacks {
    private static final String LOG_TAG = AbstractApplicationLifeCycleHelper.class.getSimpleName();
    private static final String ACTION_SCREEN_OFF = "android.intent.action.SCREEN_OFF";
    private boolean inForeground = false;
    /** Tracks the lifecycle of activities that have not stopped (including those restarted). */
    private WeakHashMap<Activity, String> activityLifecycleStateMap = new WeakHashMap<>();

    /**
     * Constructor. Registers to receive activity lifecycle events.
     * @param application The Android Application class.
     */
    public AbstractApplicationLifeCycleHelper(final Application application) {
        application.registerActivityLifecycleCallbacks(this);
        final ScreenOffReceiver screenOffReceiver = new ScreenOffReceiver();
        application.registerReceiver(screenOffReceiver, new IntentFilter(ACTION_SCREEN_OFF));
    }

    @Override
    public void onActivityCreated(final Activity activity, final Bundle bundle) {
        Log.d(LOG_TAG, "onActivityCreated " + activity.getLocalClassName());
        handleOnCreateOrOnStartToHandleApplicationEnteredForeground();
        activityLifecycleStateMap.put(activity, "created");
    }

    @Override
    public void onActivityStarted(final Activity activity) {
        Log.d(LOG_TAG, "onActivityStarted " + activity.getLocalClassName());
        handleOnCreateOrOnStartToHandleApplicationEnteredForeground();
        activityLifecycleStateMap.put(activity, "started");
    }

    @Override
    public void onActivityResumed(final Activity activity) {
        Log.d(LOG_TAG, "onActivityResumed " + activity.getLocalClassName());
        activityLifecycleStateMap.put(activity, "resumed");
    }

    @Override
    public void onActivityPaused(final Activity activity) {
        Log.d(LOG_TAG, "onActivityPaused " + activity.getLocalClassName());
        activityLifecycleStateMap.put(activity, "paused");
    }

    @Override
    public void onActivityStopped(final Activity activity) {
        Log.d(LOG_TAG, "onActivityStopped " + activity.getLocalClassName());
        // When the activity is stopped, we remove it from the lifecycle state map since we
        // no longer consider it keeping a session alive.
        activityLifecycleStateMap.remove(activity);
    }

    @Override
    public void onActivitySaveInstanceState(final Activity activity, final Bundle outState) {
        Log.d(LOG_TAG, "onActivitySaveInstanceState " + activity.getLocalClassName());
    }

    @Override
    public void onActivityDestroyed(final Activity activity) {
        Log.d(LOG_TAG, "onActivityDestroyed " + activity.getLocalClassName());
        // Activity should not be in the activityLifecycleStateMap any longer.
        if (activityLifecycleStateMap.containsKey(activity)) {
            Log.wtf(LOG_TAG, "Destroyed activity present in activityLifecycleMap!?");
            activityLifecycleStateMap.remove(activity);
        }
    }

    /**
     * Call this method when your Application trims memory.
     * @param level the level passed through from Application.onTrimMemory().
     */
    public void handleOnTrimMemory(final int level) {
        Log.d(LOG_TAG, "onTrimMemory " + level);
        // If no activities are running and the app has gone into the background.
        if (level >= Application.TRIM_MEMORY_UI_HIDDEN) {
            checkForApplicationEnteredBackground();
        }
    }

    class ScreenOffReceiver extends BroadcastReceiver {
        @Override
        public void onReceive(Context context, Intent intent) {
            checkForApplicationEnteredBackground();
        }
    }

    /**
     * Called back when your application enters the Foreground.
     */
    protected abstract void applicationEnteredForeground();

    /**
     * Called back when your application enters the Background.
     */
    protected abstract void applicationEnteredBackground();

    /**
     * Called from onActivityCreated and onActivityStarted to handle when the application enters
     * the foreground.
     */
    private void handleOnCreateOrOnStartToHandleApplicationEnteredForeground() {
        // if nothing is in the activity lifecycle map indicating that we are likely in the background, and the flag
        // indicates we are indeed in the background.
        if (activityLifecycleStateMap.size() == 0 && !inForeground) {
            inForeground = true;
            // Since this is called when an activity has started, we now know the app has entered the foreground.
            applicationEnteredForeground();
        }
    }

    private void checkForApplicationEnteredBackground() {
        ThreadUtils.runOnUiThread(new Runnable() {
            @Override
            public void run() {
                // If the App is in the foreground and there are no longer any activities that have not been stopped.
                if ((activityLifecycleStateMap.size() == 0) && inForeground) {
                    inForeground = false;
                    applicationEnteredBackground();
                }
            }
        });
    }
}
Reporting Session Events
After you include the AbstractApplicationLifeCycleHelper class, implement the two abstract methods, applicationEnteredForeground and applicationEnteredBackground, in the Application class. These methods enable your app to report the following information to Amazon Pinpoint:
-
Session start times (when the app enters the foreground).
-
Session end times (when the app enters the background).
-
The events that occur during the app session, such as monetization events. This information is reported when the app enters the background.
The following example shows how to implement applicationEnteredForeground and applicationEnteredBackground. It also shows how to call handleOnTrimMemory from inside the onTrimMemory function of the Application class:
import com.amazonaws.mobileconnectors.pinpoint.PinpointConfiguration;
import com.amazonaws.mobileconnectors.pinpoint.PinpointManager;

public class Application extends MultiDexApplication {
    public static PinpointManager pinpointManager;
    private AbstractApplicationLifeCycleHelper applicationLifeCycleHelper;

    @Override
    public void onCreate() {
        super.onCreate();

        // . . .

        // The Helper registers itself to receive application lifecycle events when it is constructed.
        // A reference is kept here in order to pass through the onTrimMemory() call from
        // the Application class to properly track when the application enters the background.
        applicationLifeCycleHelper = new AbstractApplicationLifeCycleHelper(this) {
            @Override
            protected void applicationEnteredForeground() {
                Application.pinpointManager.getSessionClient().startSession();
                // handle any events that should occur when your app has come to the foreground...
            }

            @Override
            protected void applicationEnteredBackground() {
                Log.d(LOG_TAG, "Detected application has entered the background.");
                Application.pinpointManager.getSessionClient().stopSession();
                Application.pinpointManager.getAnalyticsClient().submitEvents();
                // handle any events that should occur when your app has gone into the background...
            }
        };
    }

    private void updateGCMToken() {
        try {
            final String gcmToken = InstanceID.getInstance(this).getToken(
                    "YOUR_SENDER_ID",
                    GoogleCloudMessaging.INSTANCE_ID_SCOPE
            );
            Application.pinpointManager.getNotificationClient().registerGCMDeviceToken(gcmToken);
        } catch (IOException e) {
            e.printStackTrace();
        }
    }

    @Override
    public void onTrimMemory(final int level) {
        Log.d(LOG_TAG, "onTrimMemory " + level);
        applicationLifeCycleHelper.handleOnTrimMemory(level);
        super.onTrimMemory(level);
    }

}
You’ve updated your Android app to report session information. Now, when users open and close your app, you can see session metrics in the Amazon Pinpoint console, including those shown by the Sessions and Session heat map charts.
Registering Endpoints in Your Application
When a user starts a session (for example, by launching your mobile app), your mobile or web application can automatically register (or update) an endpoint with Amazon Pinpoint. The endpoint represents the device that the user starts the session with. It includes attributes that describe the device, and it can also include custom attributes that you define. Endpoints can also represent other methods of communicating with customers, such as email addresses or mobile phone numbers.
After your application registers endpoints, you can segment your audience based on endpoint attributes. You can then engage these segments with tailored messaging campaigns. You can also use the Analytics page in the Amazon Pinpoint console to view charts about endpoint registration and activity, such as New endpoints and Daily active endpoints.
You can assign a single user ID to multiple endpoints. A user ID represents a single user, while each endpoint that is assigned the user ID represents one of the user’s devices. After you assign user IDs to your endpoints, you can view charts about user activity in the console, such as Daily active users and Monthly active users.
Adding Custom Endpoint Attributes
After you initialize the Amazon Pinpoint client in your application, you can add custom attributes to endpoints.
import com.amazonaws.mobileconnectors.pinpoint.analytics.AnalyticsEvent;

public void addCustomEndpointAttribute() {
    // Add a custom attribute to the endpoint
    TargetingClient targetingClient = pinpointManager.getTargetingClient();
    String[] interests = new String[] {"science", "politics", "travel"};
    targetingClient.addAttribute("interests", Arrays.asList(interests));
    targetingClient.updateEndpointProfile();
    Log.d(TAG, "Updated custom attributes for endpoint: " +
            targetingClient.currentEndpoint().getEndpointId());
}
Assigning User IDs to Endpoints
Assign user IDs to endpoints by doing either of the following:
Manage user sign-up and sign-in with Amazon Cognito user pools. Use the Amazon Pinpoint client to assign user IDs without using Amazon Cognito user pools. Amazon Cognito user pools are user directories that make it easier to add sign-up and sign-in to your app. When the AWS Mobile SDKs for iOS and Android register an endpoint with Amazon Pinpoint, Amazon Cognito automatically assigns a user ID from the user pool. For more information, see Using Amazon Pinpoint Analytics with Amazon Cognito User Pools in the Amazon Cognito Developer Guide.
If you don’t want to use Amazon Cognito user pools, you can use the Amazon Pinpoint client in your application to assign user IDs to endpoints.
import com.amazonaws.mobileconnectors.pinpoint.targeting.TargetingClient;
import com.amazonaws.mobileconnectors.pinpoint.targeting.endpointProfile.EndpointProfileUser;
import com.amazonaws.mobileconnectors.pinpoint.targeting.endpointProfile.EndpointProfile;

public void assignUserIdToEndpoint() {
    TargetingClient targetingClient = pinpointManager.getTargetingClient();
    EndpointProfile endpointProfile = targetingClient.currentEndpoint();
    EndpointProfileUser endpointProfileUser = new EndpointProfileUser();
    endpointProfileUser.setUserId("UserIdValue");
    endpointProfile.setUser(endpointProfileUser);
    targetingClient.updateEndpointProfile(endpointProfile);
    Log.d(TAG, "Assigned user ID " + endpointProfileUser.getUserId() +
            " to endpoint " + endpointProfile.getEndpointId());
}
Endpoint Limits
The limits applicable to the endpoints using the AWS Android SDK for Pinpoint and the Amazon Pinpoint Endpoint API can be found here.
Using Amazon Kinesis
The two classes KinesisRecorder and KinesisFirehoseRecorder allow you to interface with Amazon Kinesis and Amazon Kinesis Firehose to stream analytics data for real-time processing.
What is Amazon Kinesis?
Amazon Kinesis is a fully managed service for real-time processing of streaming data at massive scale. Amazon Kinesis can collect and process hundreds of terabytes of data per hour from hundreds of thousands of sources, so you can write applications that process information in real-time. With Amazon Kinesis applications, you can build real-time dashboards, capture exceptions and generate alerts, drive recommendations, and make other real-time business or operational decisions. You can also easily send data to other services such as Amazon Simple Storage Service, Amazon DynamoDB, and Amazon Redshift.
The Amazon Kinesis KinesisRecorder client lets you store your Kinesis requests on disk and then send them all at once using the [PutRecords] (https://docs.aws.amazon.com/kinesis/latest/APIReference/API_PutRecords.html) API call of Kinesis. This is useful because many mobile applications that use Amazon Kinesis will create multiple requests per second. Sending an individual request under PutRecord action could adversely impact battery life. Moreover, the requests could be lost if the device goes offline. Thus, using the high-level Amazon Kinesis client for batching can preserve both battery life and data.
What is Amazon Kinesis Firehose?
Amazon Kinesis Firehose is a fully managed service for delivering real-time streaming data to destinations such as Amazon Simple Storage Service (Amazon S3) and Amazon Redshift. With Firehose, you do not need to write any applications or manage any resources. You configure your data producers to send data to Firehose and it automatically delivers the data to the destination that you specified.
The Amazon Kinesis Firehose KinesisFirehoseRecorder client lets you store your Kinesis Firehose requests on disk and then send them using the [PutRecordBatch] (https://docs.aws.amazon.com/firehose/latest/APIReference/API_PutRecordBatch.html) API call of Kinesis Firehose.
For more information about Amazon Kinesis Firehose, see Amazon Kinesis Firehose.
Integrating Amazon Kinesis and Amazon Kinesis Firehose
Set up AWS Mobile SDK components by including the following libraries in your app/build.gradle dependencies list.
dependencies {
  implementation 'com.amazonaws:aws-android-sdk-kinesis:2.15.+'
  implementation ('com.amazonaws:aws-android-sdk-mobile-client:2.15.+@aar') { transitive = true }
}
aws-android-sdk-kinesislibrary enables sending analytics to Amazon Kinesis.aws-android-sdk-mobile-clientlibrary gives access to the AWS credentials provider and configurations.
Add the following imports to the main activity of your app.
import com.amazonaws.mobileconnectors.kinesis.kinesisrecorder.*;
import com.amazonaws.mobile.client.AWSMobileClient;
import com.amazonaws.regions.Regions;
To use Amazon Kinesis in an application, you must set the correct permissions. The following IAM policy allows the user to submit records to a specific Amazon Kinesis stream, which is identified by ARN.
{
    "Statement": [{
        "Effect": "Allow",
        "Action": "kinesis:PutRecords",
        "Resource": "arn:aws:kinesis:us-west-2:111122223333:stream/mystream"
    }]
}
The following IAM policy allows the user to submit records to a specific Amazon Kinesis Firehose stream.
{
    "Statement": [{
        "Effect": "Allow",
        "Action": "firehose:PutRecordBatch",
        "Resource": "arn:aws:firehose:us-west-2:111122223333:deliverystream/mystream"
    }]
}
This policy should be applied to roles assigned to the Amazon Cognito identity pool, but you need to replace the Resource value with the correct ARN for your Amazon Kinesis or Amazon Kinesis Firehose stream. You can apply policies at the IAM console. To learn more about IAM policies, see Using IAM.
To learn more about Amazon Kinesis-specific policies, see Controlling Access to Amazon Kinesis Resources with IAM.
To learn more about Amazon Kinesis Firehose policies, see Controlling Access with Amazon Kinesis Firehose.
Working with the API
You can use AWSMobileClient to setup the Cognito credentials that are required to authenticate your requests with Amazon Kinesis.
AWSMobileClient.getInstance().initialize(getApplicationContext(), new Callback<UserStateDetails>() {
        @Override
        public void onResult(UserStateDetails userStateDetails) {
            Log.i("INIT", userStateDetails.getUserState().toString());
        }

        @Override
        public void onError(Exception e) {
            Log.e("INIT", "Initialization error.", e);
        }
    }
);
Once you have credentials, you can use KinesisRecorder with Amazon Kinesis. The following snippet creates a directory and instantiates the KinesisRecorder client:
String kinesisDirectory = "YOUR_UNIQUE_DIRECTORY";
KinesisRecorder recorder = new KinesisRecorder(
    myActivity.getDir(kinesisDirectory, 0),
    Regions.<YOUR-AWS-REGION>,
    AWSMobileClient.getInstance()
);

// KinesisRecorder uses synchronous calls, so you shouldn't call KinesisRecorder methods on the main thread.
To use KinesisFirehoseRecorder, you need to pass the object in a directory where streaming data is saved. We recommend you use an app private directory because the data is not encrypted.
KinesisFirehoseRecorder firehoseRecorder = new KinesisFirehoseRecorder(
    context.getCachedDir(),
    Regions.<YOUR-AWS-REGION>,
    AWSMobileClient.getInstance());
Configure Kinesis:
You can configure KinesisRecorder or KinesisFirehoseRecorder through their properties:
You can configure the maximum allowed storage via the withMaxStorageSize() method of KinesisRecorderConfig.
You can retrieve the same information by getting the KinesisRecorderConfig object for the recorder and calling getMaxStorageSize():
KinesisRecorderConfig kinesisRecorderConfig = recorder.getKinesisRecorderConfig();
Long maxStorageSize = kinesisRecorderConfig.getMaxStorageSize();
// Do something with maxStorageSize
To check the number of bytes currently stored in the directory passed in to the KinesisRecoder constructor, call getDiskBytesUsed():
Long bytesUsed = recorder.getDiskBytesUsed();
// Do something with bytesUsed
To see how much space the KinesisRecorder client is allowed to use, you can call getDiskByteLimit().
Long byteLimit = recorder.getDiskByteLimit();
// Do something with byteLimit
With KinesisRecorder created and configured, you can use saveRecord() to save records and then send them in a batch.
recorder.saveRecord(
	"MyData".getBytes(),
	"MyStreamName");
recorder.submitAllRecords();
For the saveRecord() request above to work, you would have to have created a stream named MyStreamName. You can create new streams in the Amazon Kinesis console.
If submitAllRecords() is called while the app is online, requests will be sent and removed from the disk. If submitAllRecords() is called while the app is offline, requests will be kept on disk until submitAllRecords() is called while online. This applies even if you lose your internet connection midway through a submit. So if you save ten requests, call submitAllRecords(), send five, and then lose the Internet connection, you have five requests left on disk. These remaining five will be sent the next time submitAllRecords() is invoked online.
Here is a similar snippet for Amazon Kinesis Firehose:
// Start to save data, either a String or a byte array
firehoseRecorder.saveRecord("Hello world!\n");
firehoseRecorder.saveRecord("Streaming data to Amazon S3 via Amazon Kinesis Firehose is easy.\n");

// Send previously saved data to Amazon Kinesis Firehose
// Note: submitAllRecords() makes network calls, so wrap it in an AsyncTask.
new AsyncTask<Void, Void, Void>() {
   @Override
   protected Void doInBackground(Void... v) {
       try {
           firehoseRecorder.submitAllRecords();
       } catch (AmazonClientException ace) {
           // handle error
       }
   }
}.execute();
To learn more about working with Amazon Kinesis, see the Amazon Kinesis Developer Resources.
To learn more about the Amazon Kinesis classes, see the class reference for KinesisRecorder.
To learn more about the Kinesis Firehose classes, see the class reference for KinesisFirehoseRecorder.