

Social Provider Setup
Before adding a social provider to an Amplify project, you must first create go to that provider and configure an application identifier as outlined below.
Facebook Instructions
- Create a developer account with Facebook
- Sign In with your Facebook credentials.
- From the My Apps menu, choose Add New App.
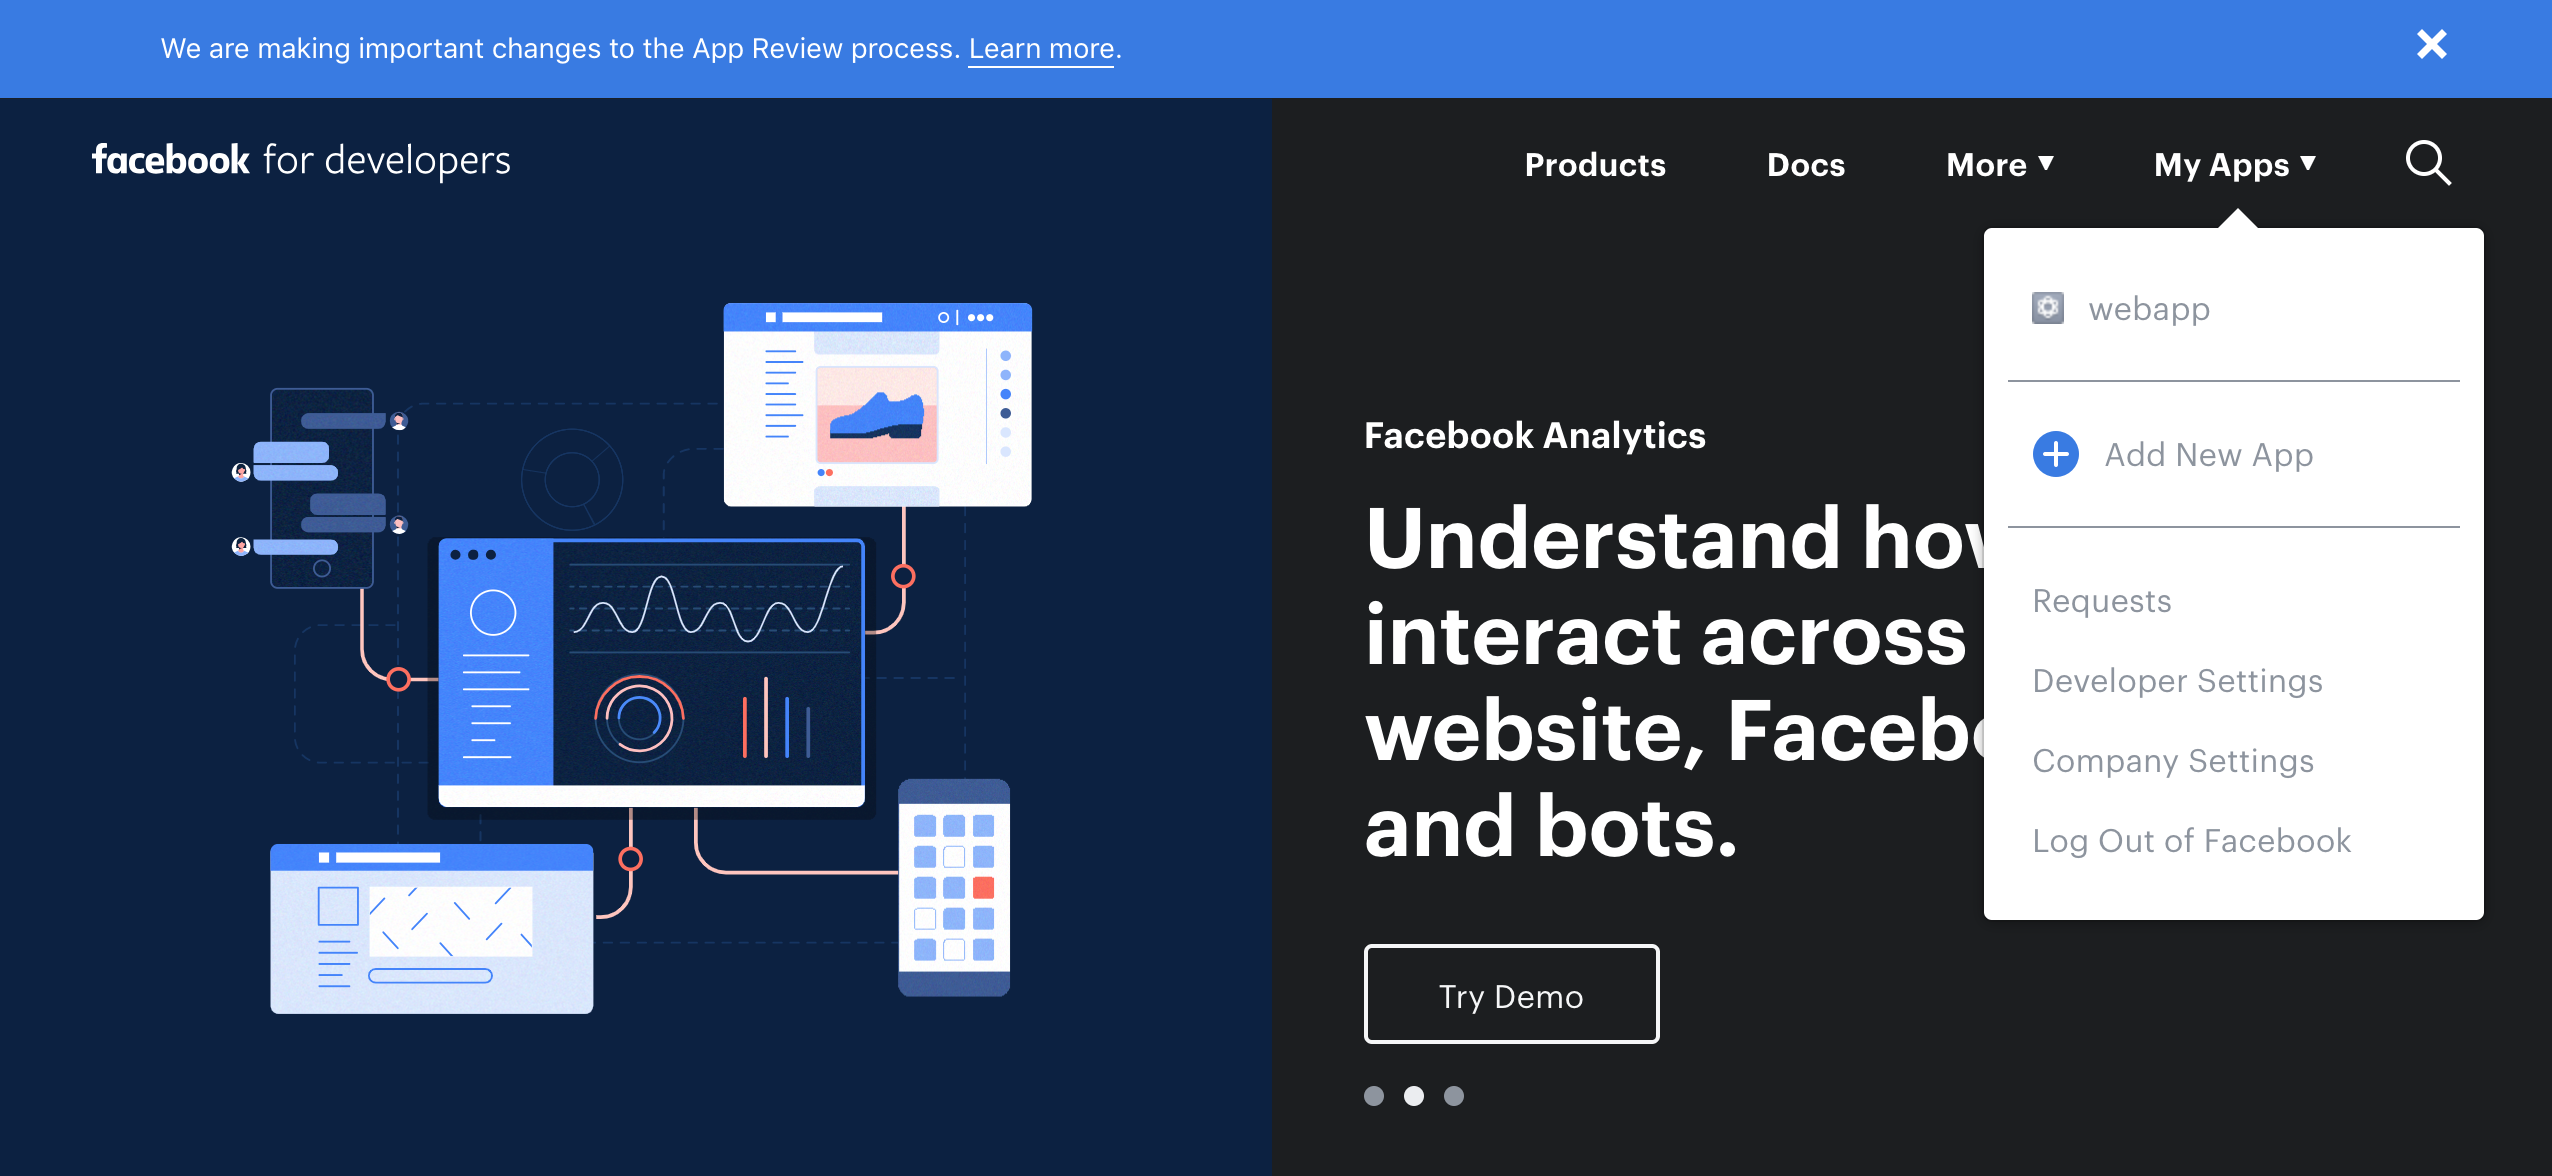
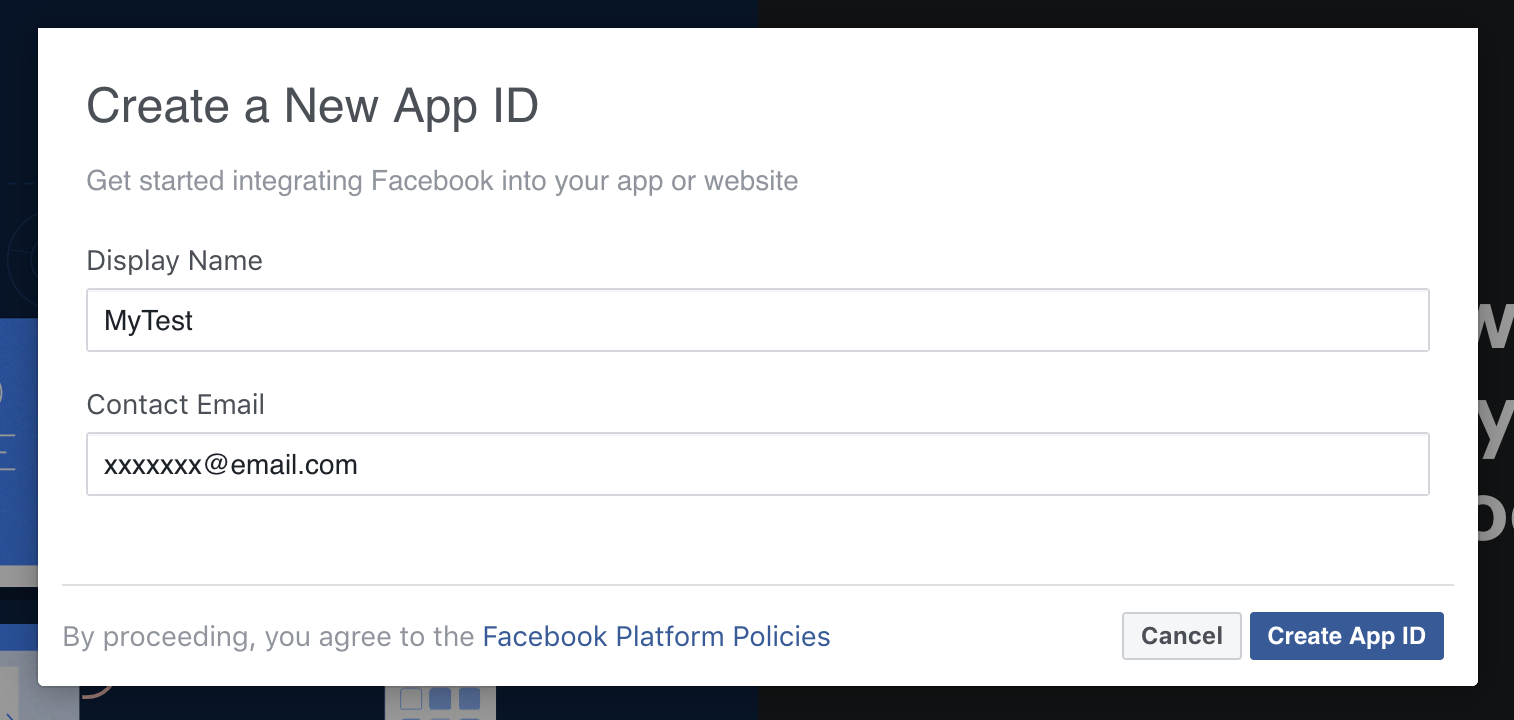
- Give your Facebook app a name and choose Create App ID.
- On the left navigation bar, choose Settings and then Basic.
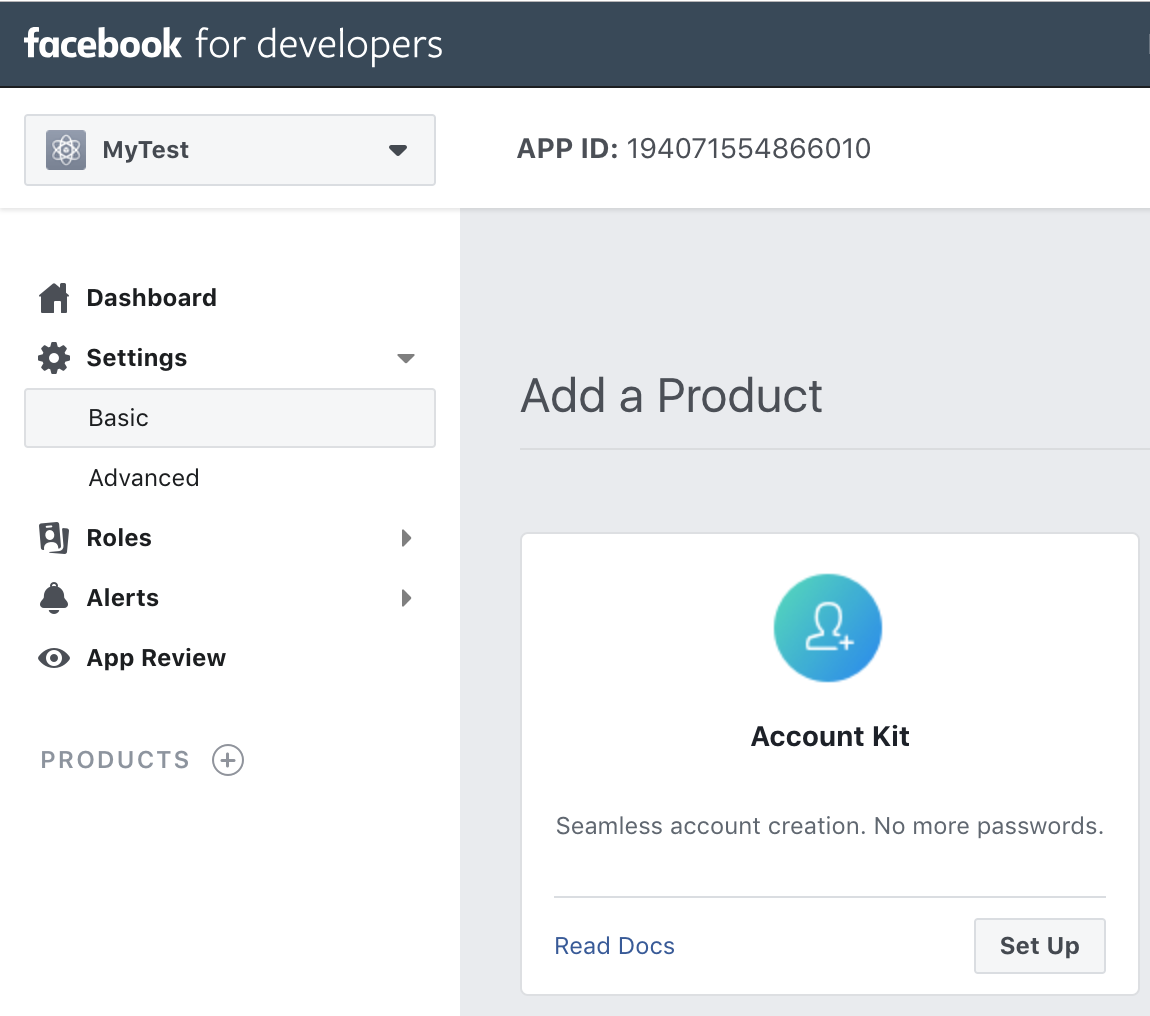
- Note the App ID and the App Secret. You will use them in the next section in the CLI flow.
Google Sign-In Instructions
- Go to the Google developer console.
- On the left navigation bar, choose Credentials.
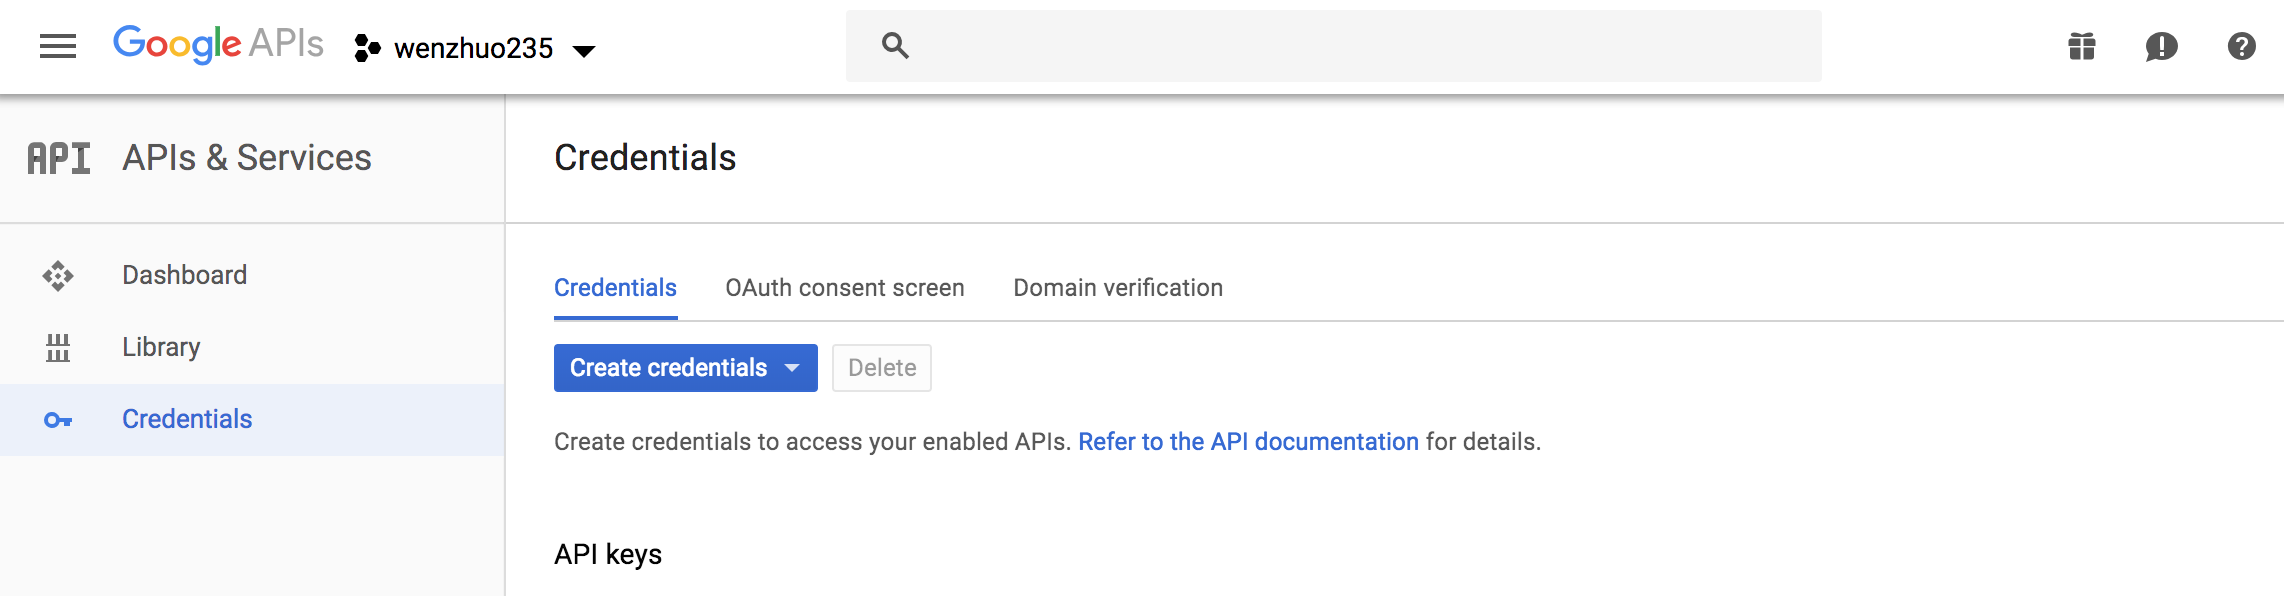
- Create your OAuth2.0 credentials by choosing OAuth client ID from the Create credentials drop-down list.
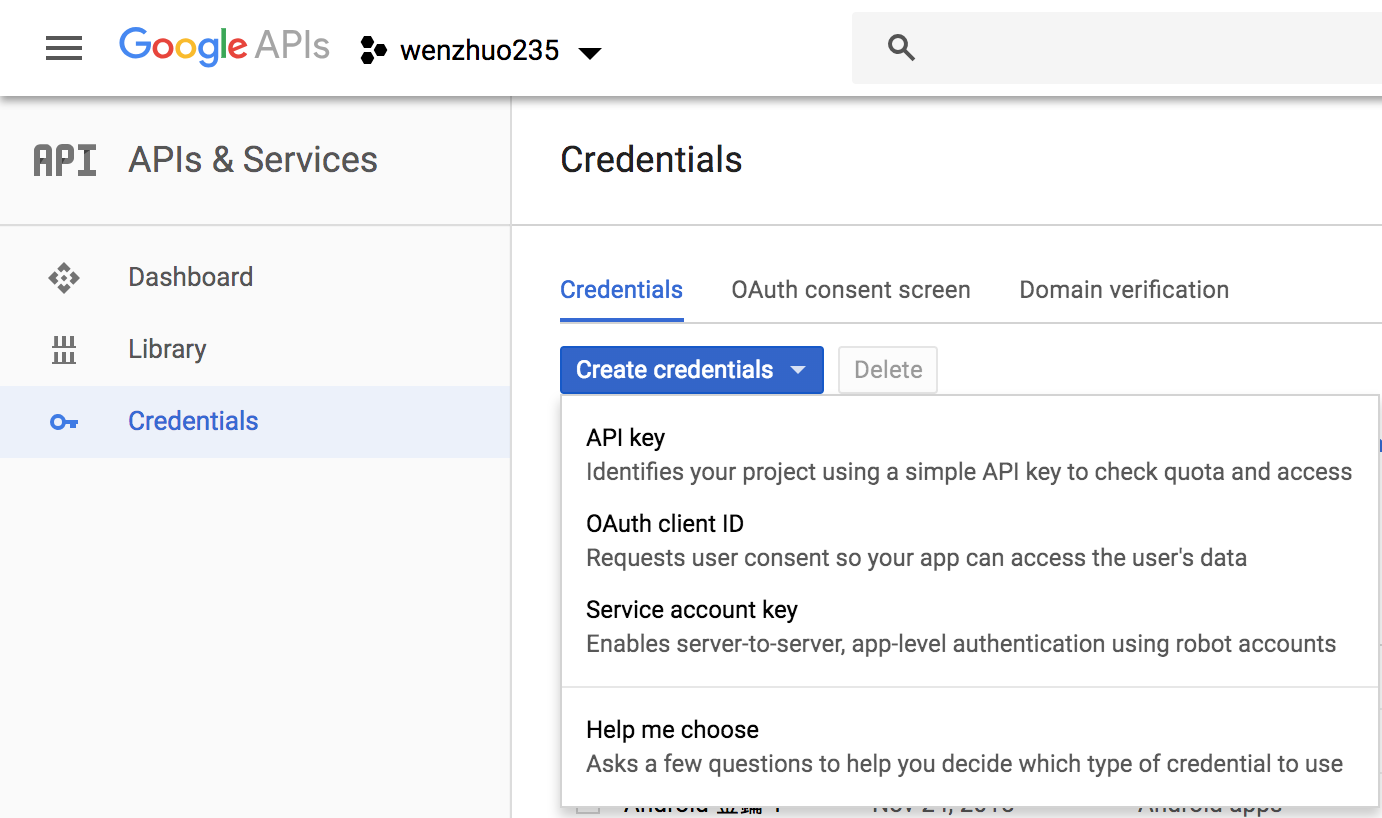
- Choose Web application.
- Click Create twice.
- Note the OAuth client ID and client secret. You will need them for the next section in the CLI flow.
- Choose OK.
Amazon Login Instructions
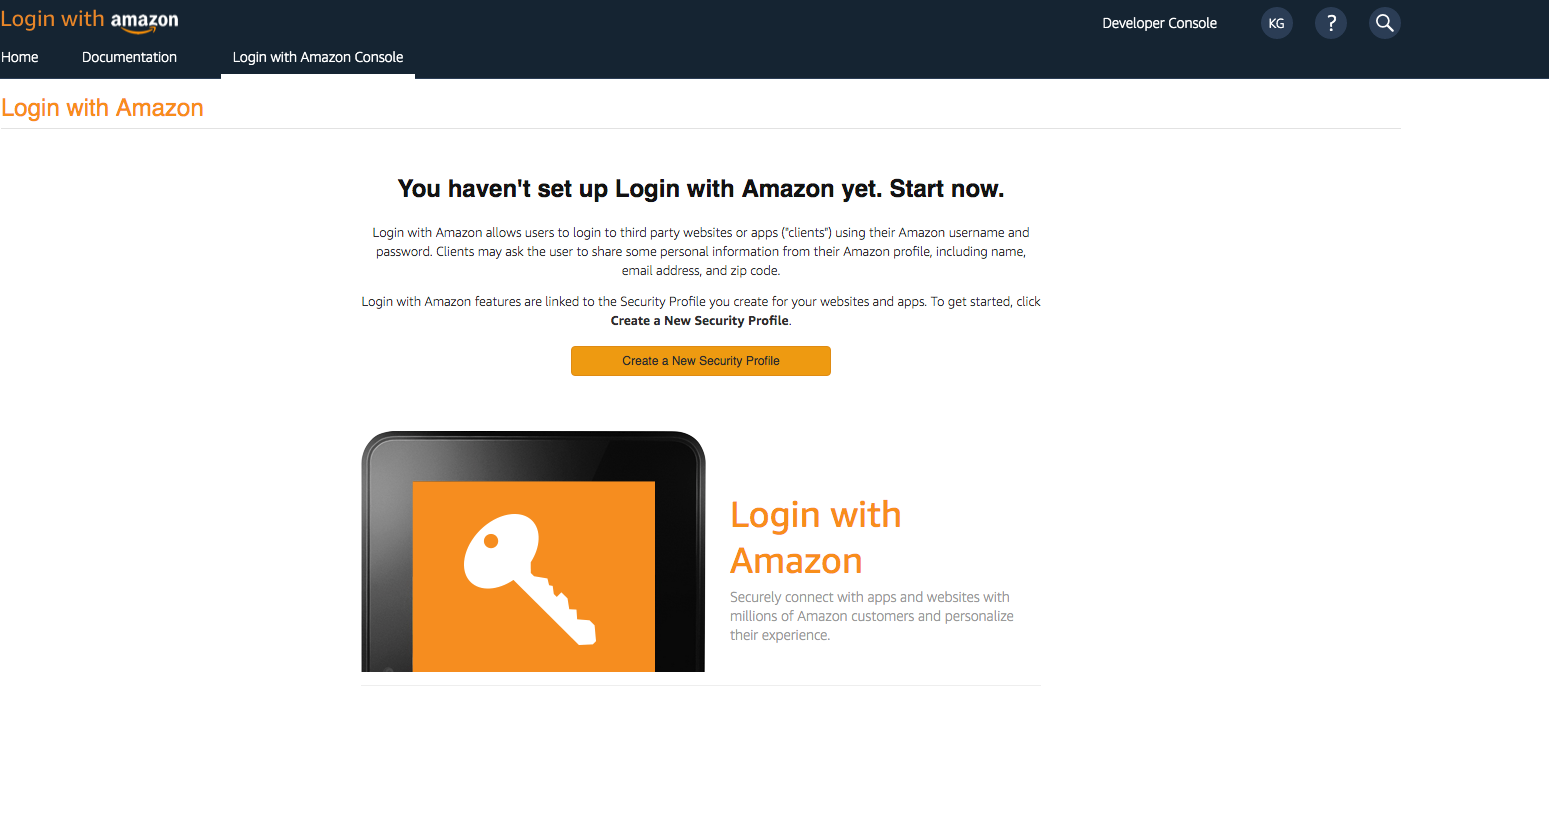
- Create a developer account with Amazon.
- Sign in with your Amazon credentials.
- You need to create an Amazon security profile to receive the Amazon client ID and client secret. Choose Create a Security Profile.
- Type in a Security Profile Name, a Security Profile Description, and a Consent Privacy Notice URL.
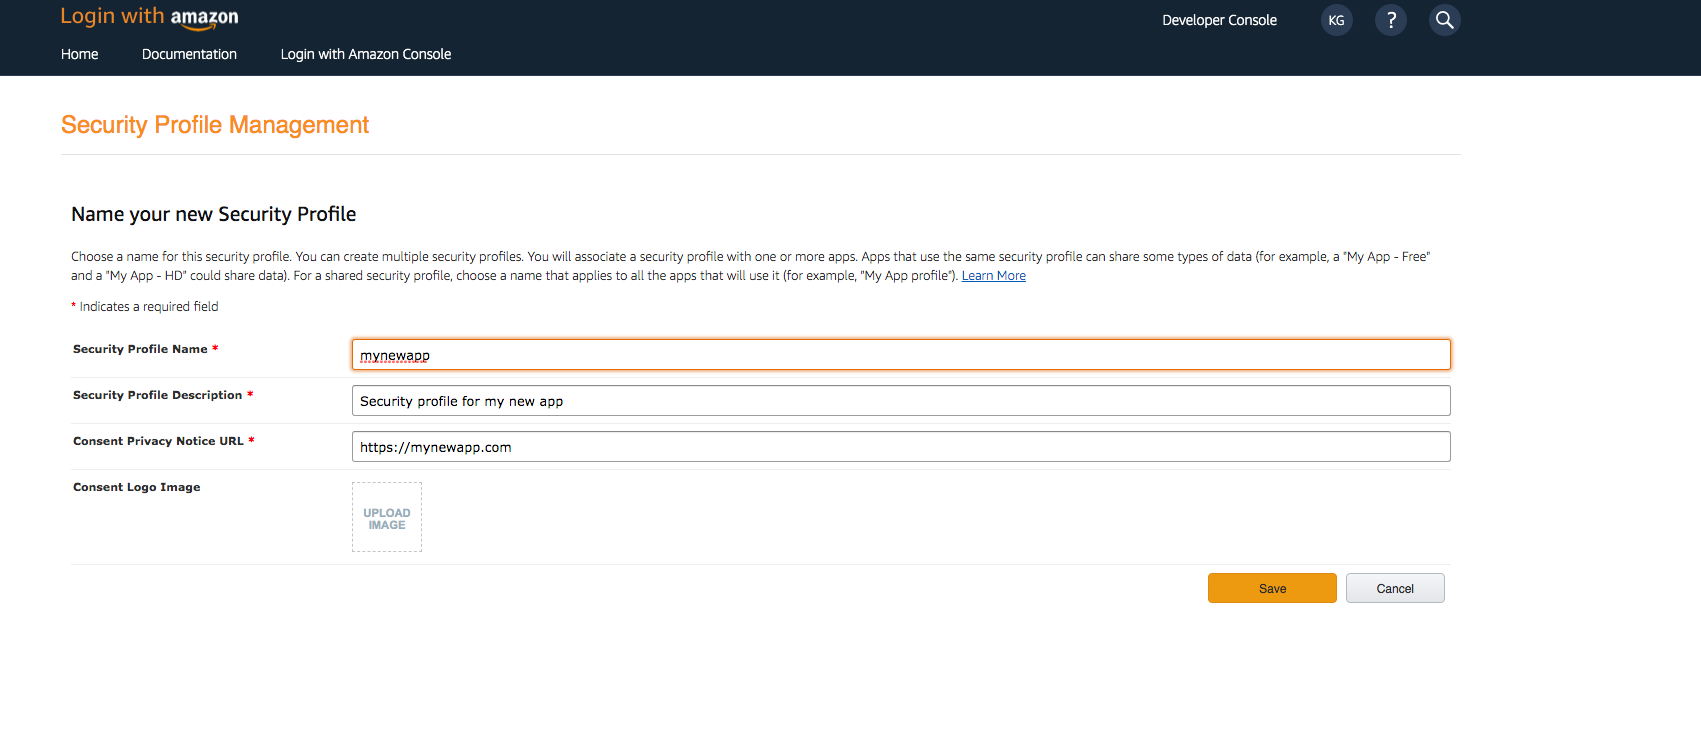
- Choose Save.
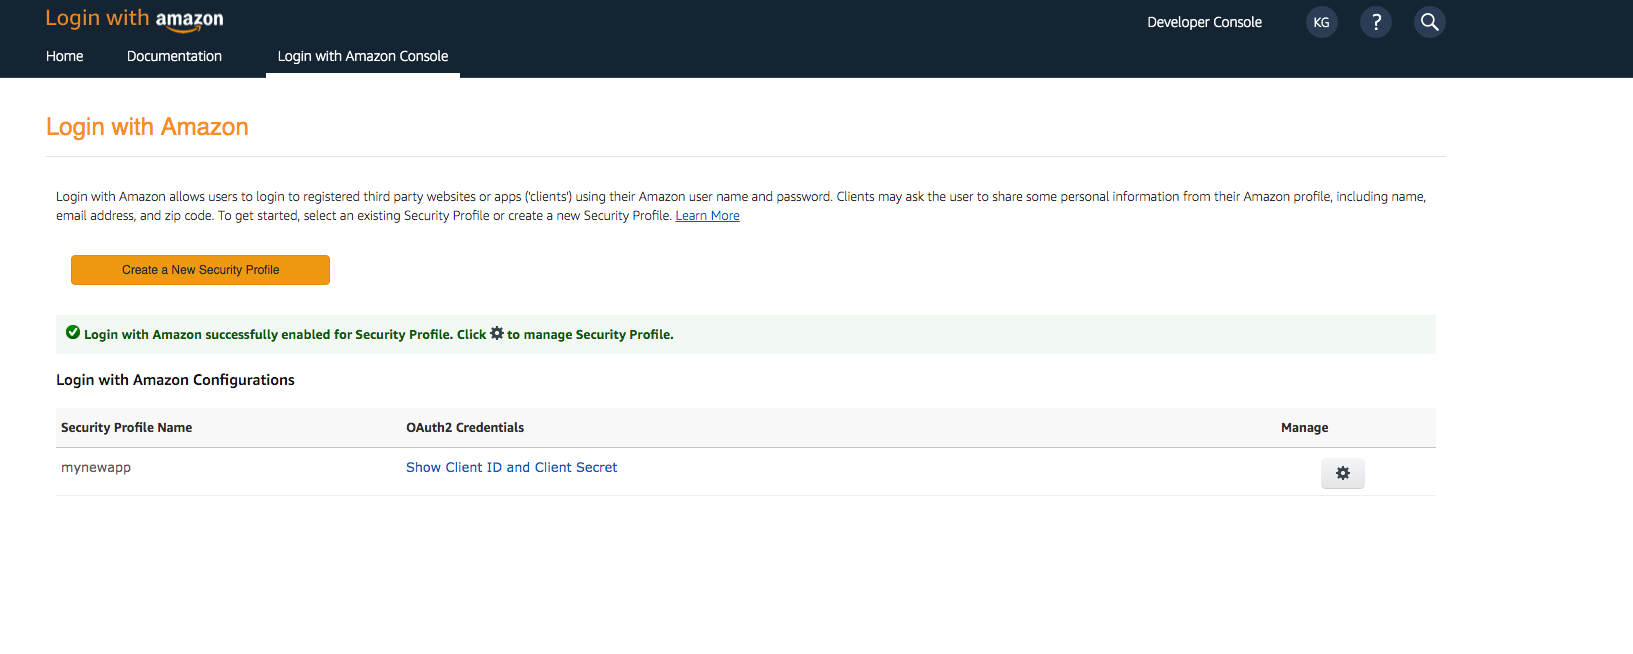
- Choose Client ID and Client Secret to show the client ID and secret. You will need them for the next section in the CLI flow.
Finish Social Setup
After adding your Social provider information into the Amplify project setup, the domain that was created must be added into the Social provider configuration to complete the process.
Facebook Instructions
- Sign In with your Facebook credentials.
- From the My Apps menu, choose Your App.
- On the left navigation bar, choose Settings and then Basic.
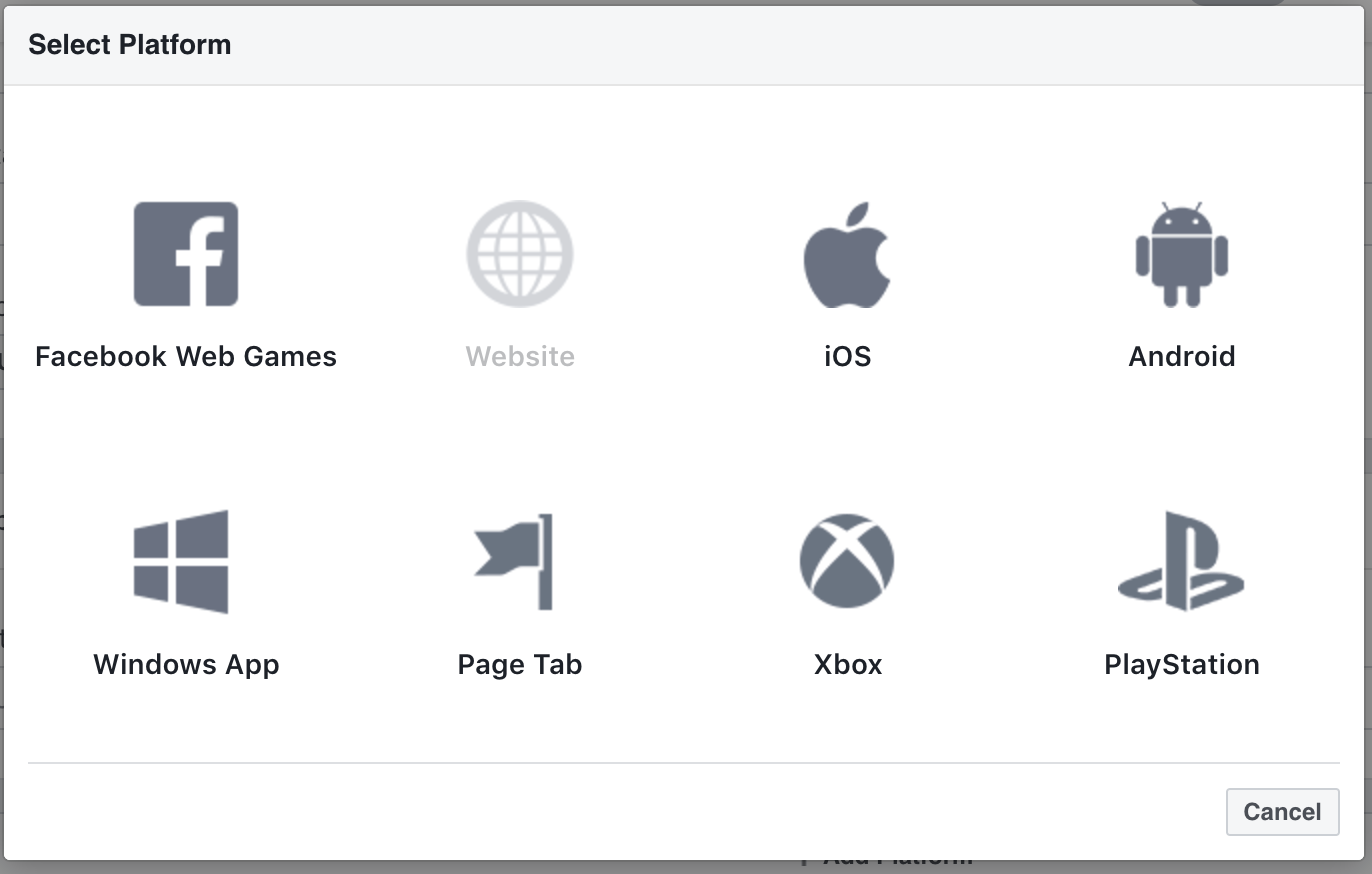
- Choose + Add Platform from the bottom of the page and then choose Website.
-
Under Website, type your user pool domain with the /oauth2/idpresponse endpoint into Site URL
https://<your-user-pool-domain>/oauth2/idpresponse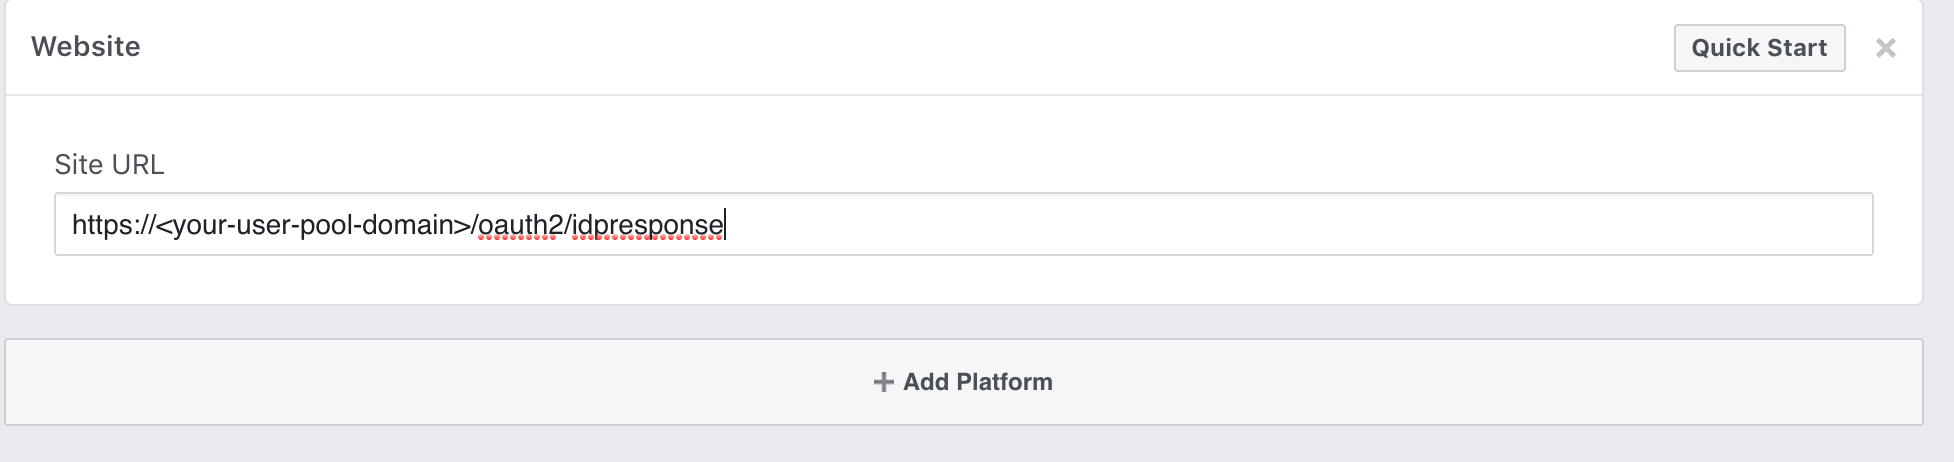
- Save changes.
-
Type your user pool domain into App Domains:
https://<your-user-pool-domain>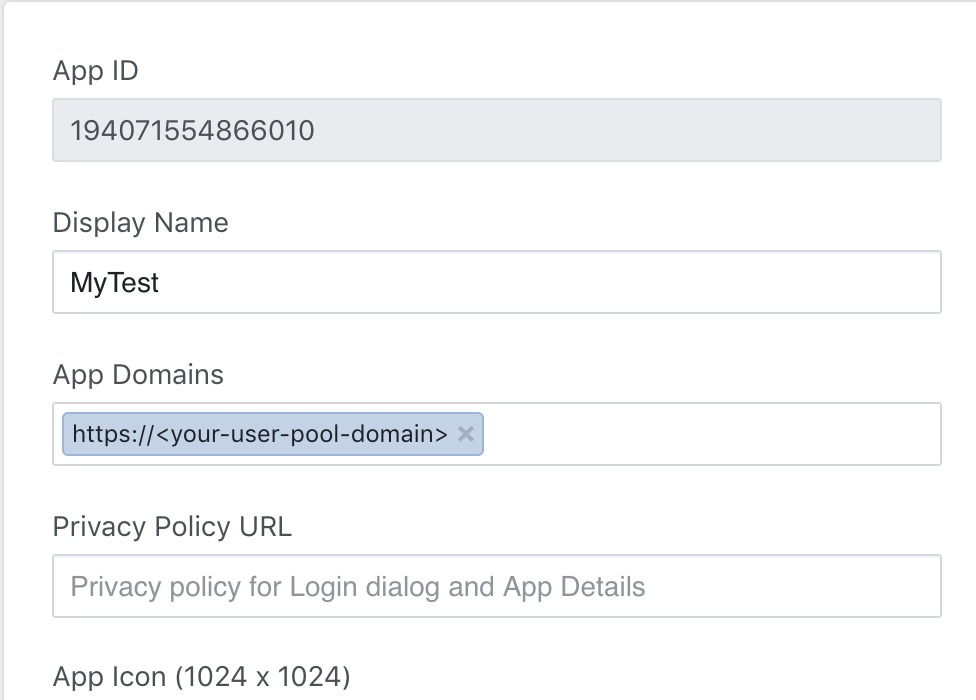
- Save changes.
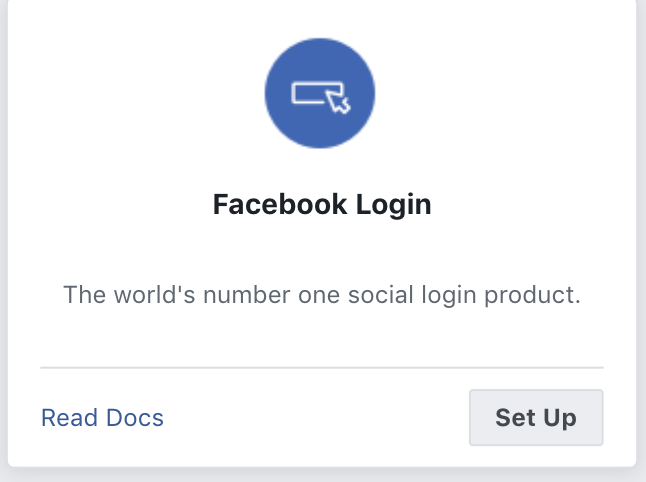
- From the navigation bar choose Products and then Set up from Facebook Login.
- From the navigation bar choose Facebook Login and then Settings.
-
Type your redirect URL into Valid OAuth Redirect URIs. It will consist of your user pool domain with the /oauth2/idpresponse endpoint.
https://<your-user-pool-domain>/oauth2/idpresponse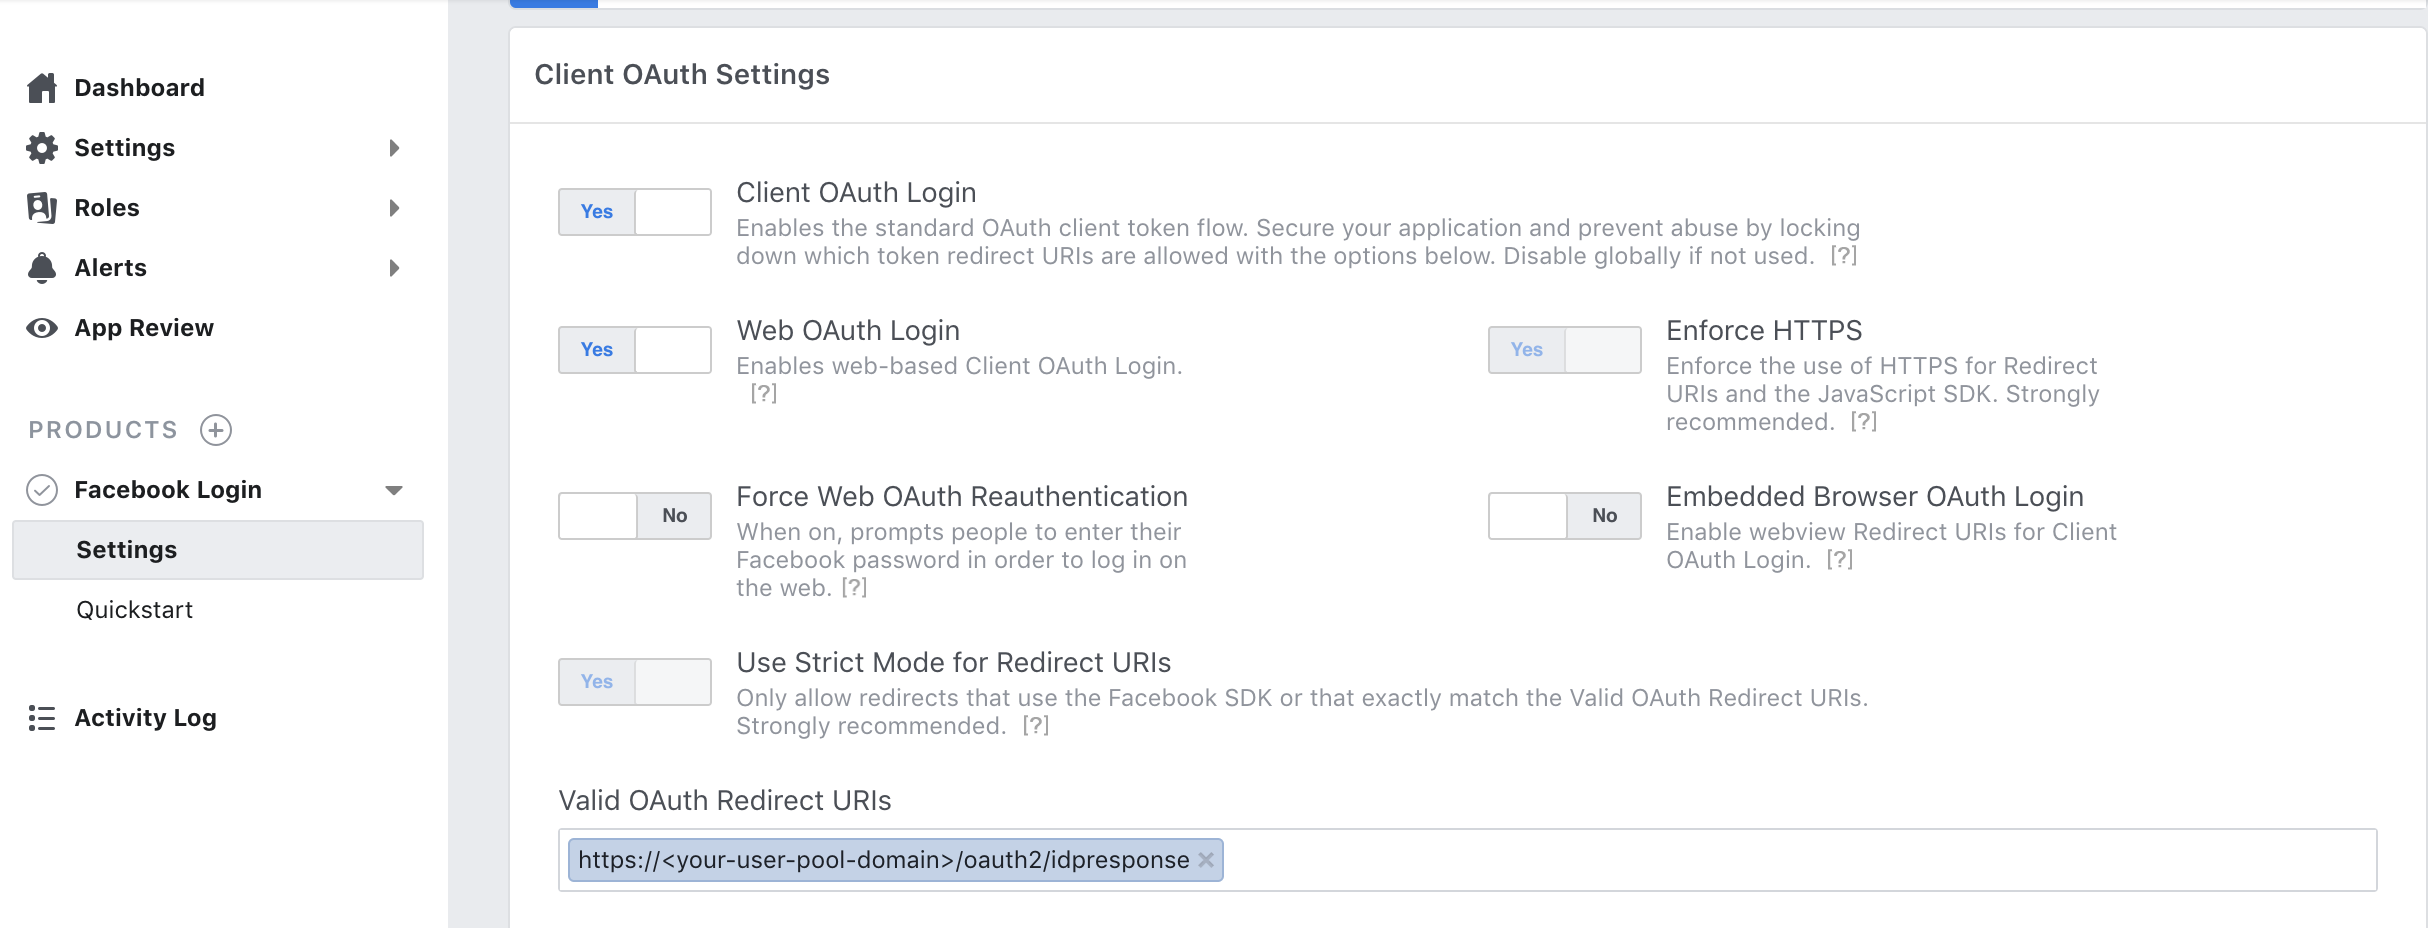
- Save changes.
Google Sign-In Instructions
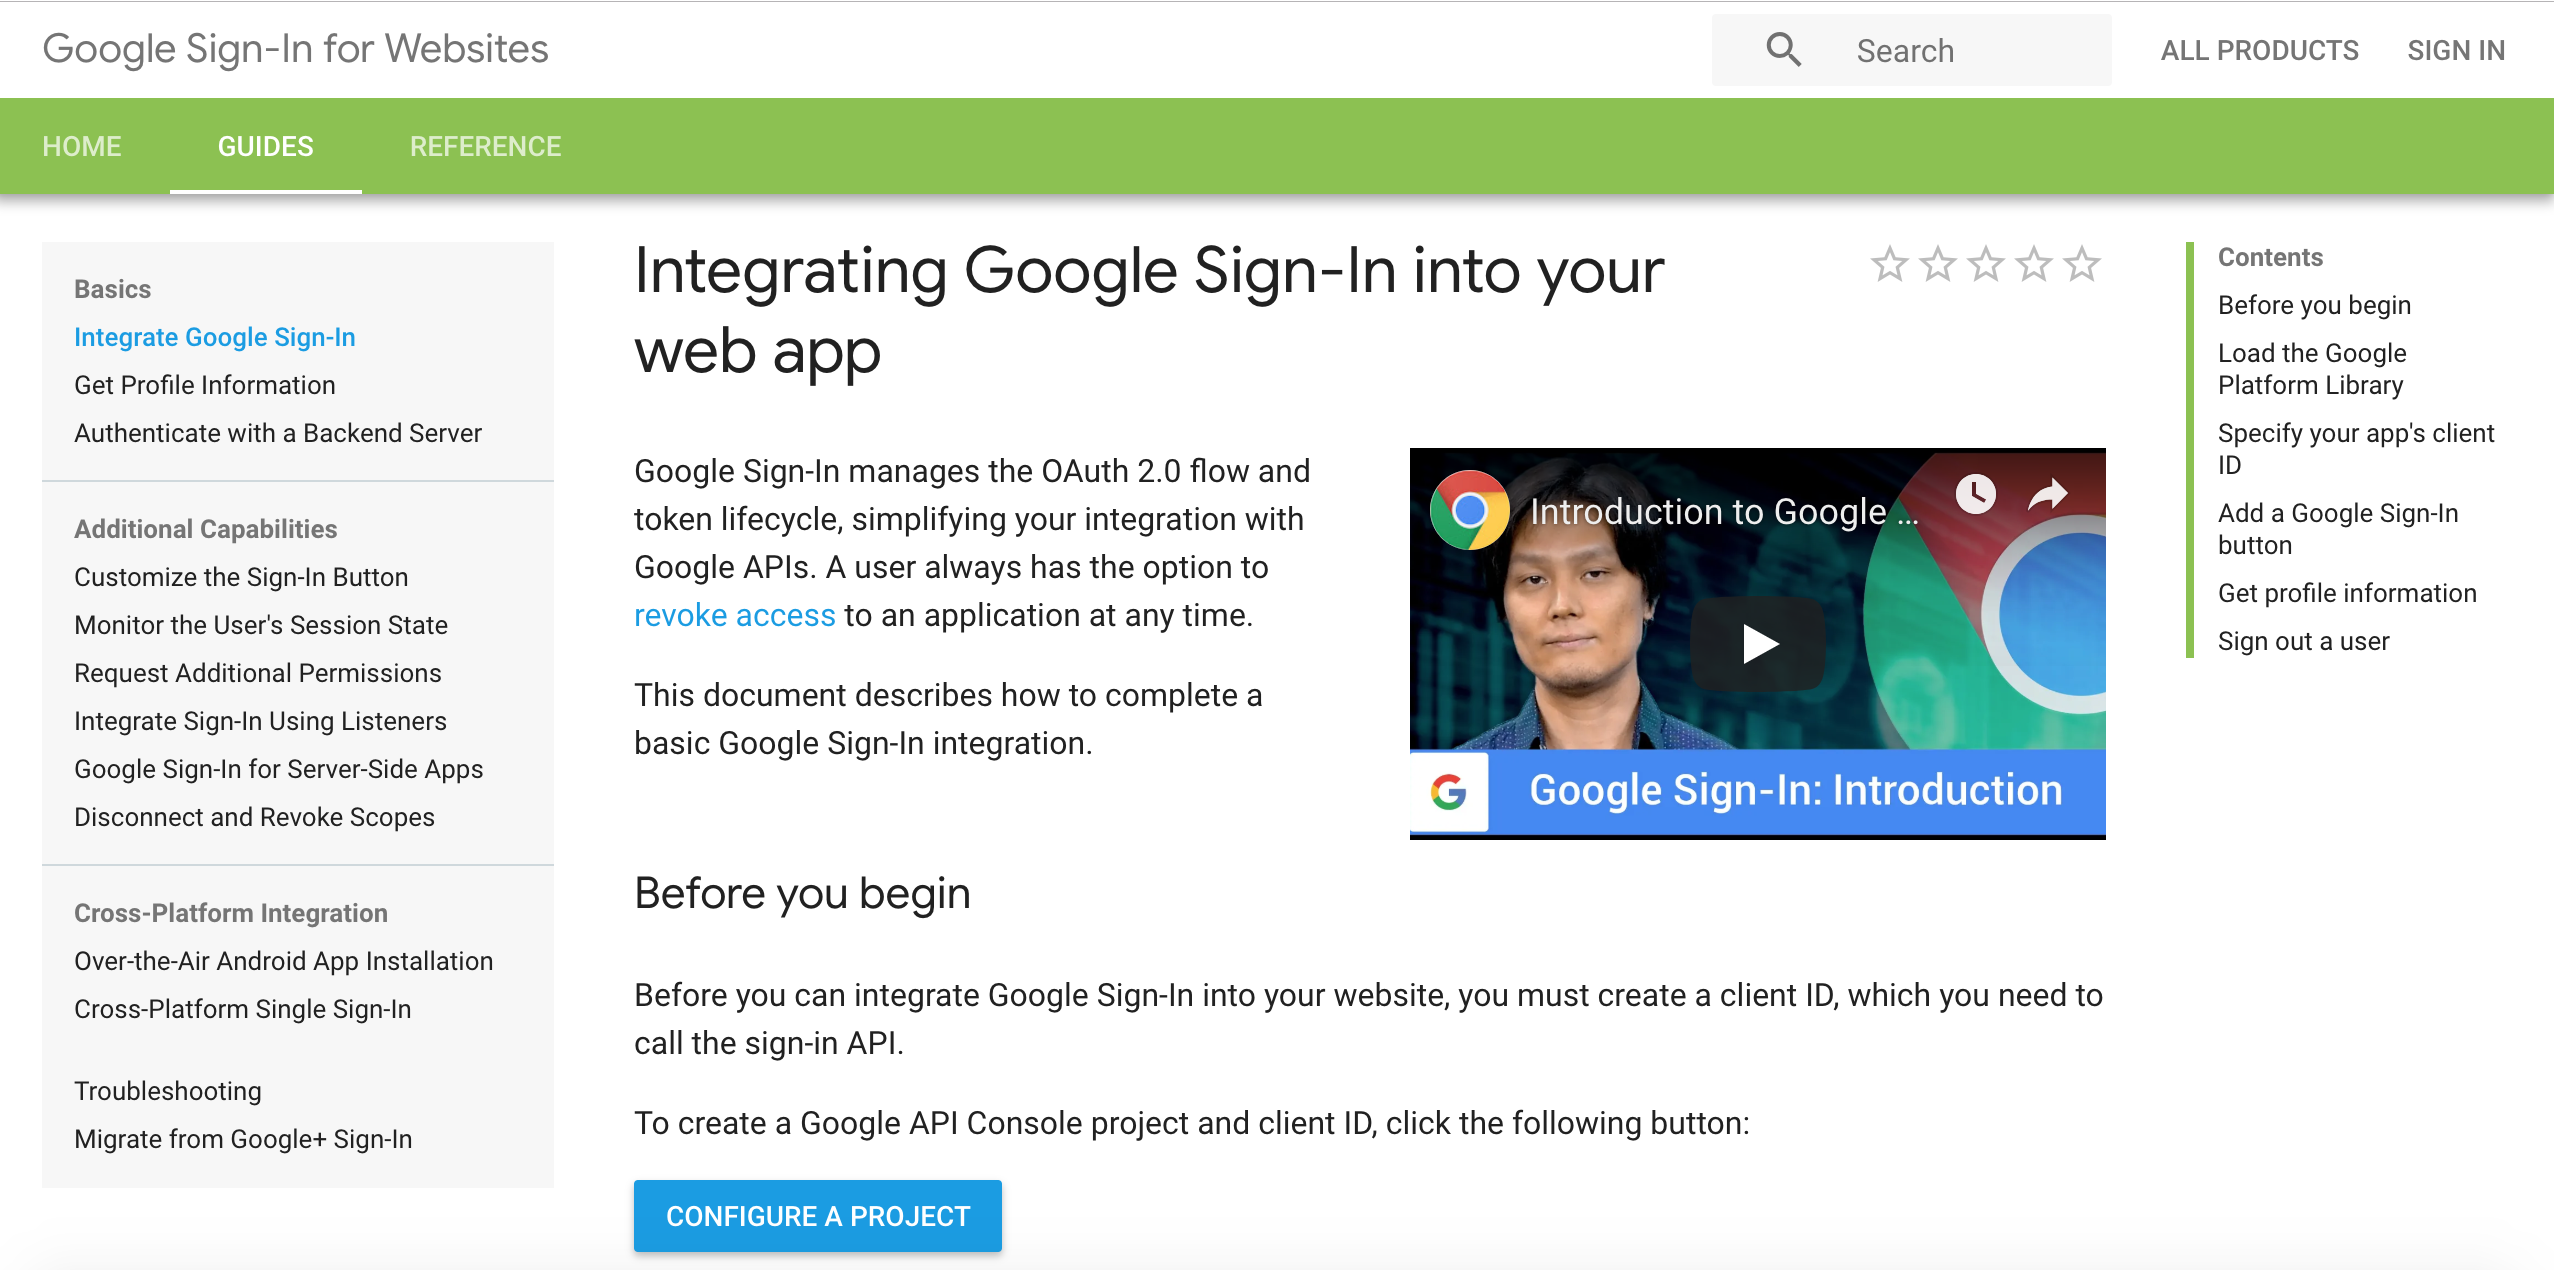
- Go to Google Developer Console.
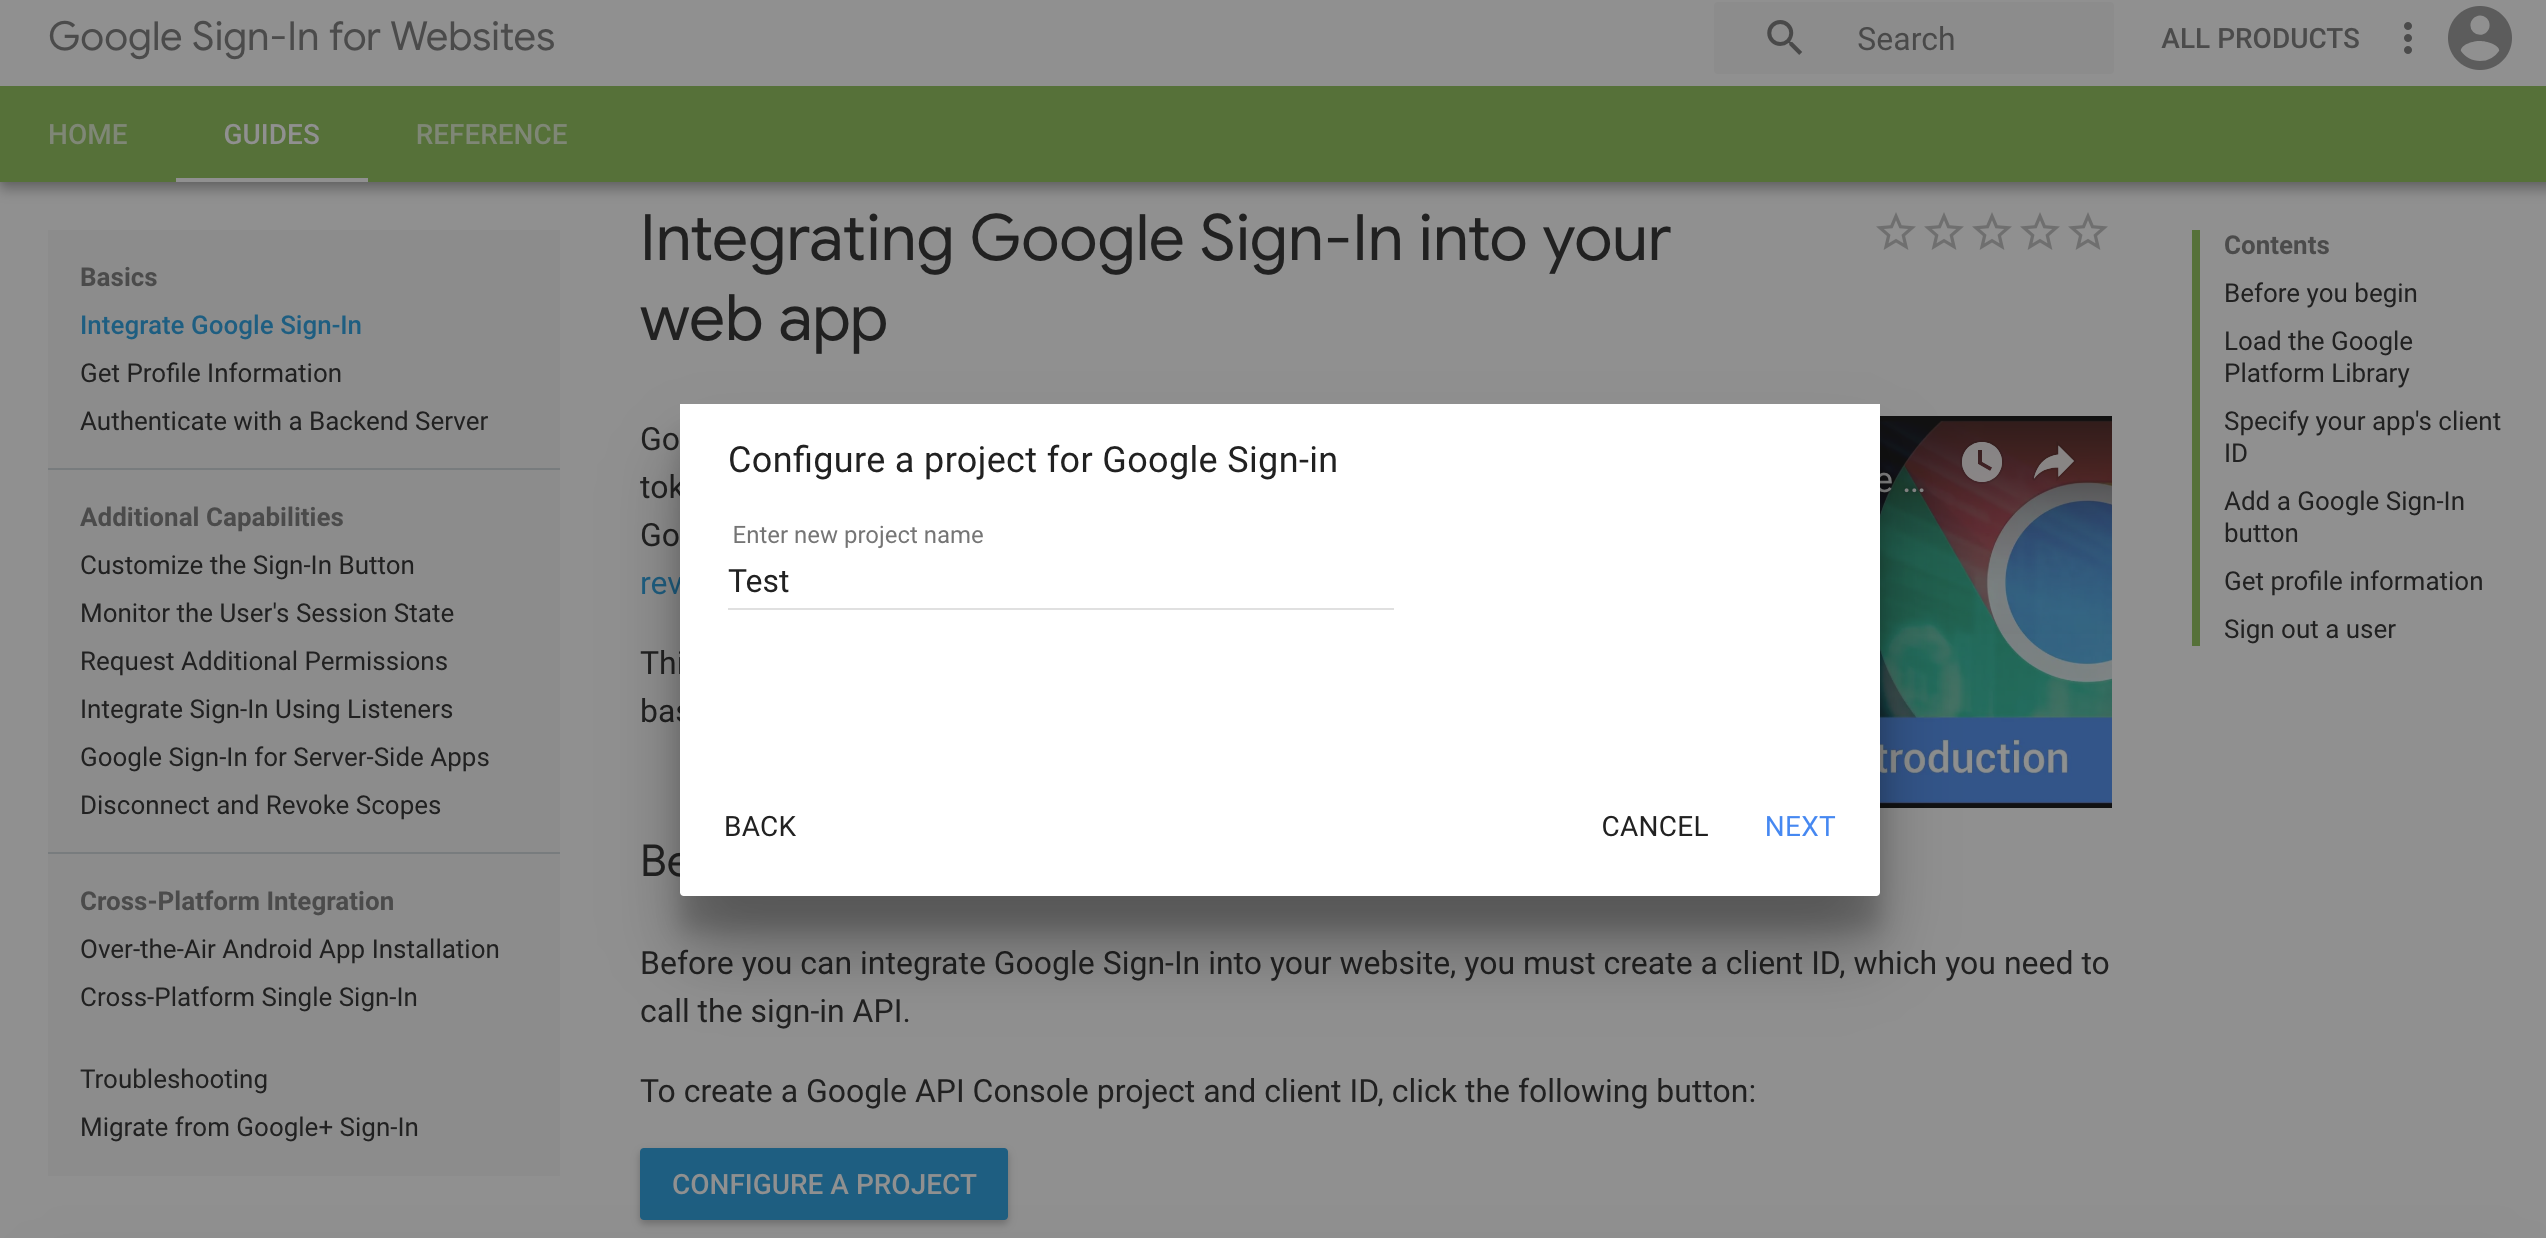
- Click CONFIGURURE A PROJECT
- Type in a project name and choose NEXT.
- Type in your product name and choose NEXT.
- Choose Web browser from the Where are you calling from? drop-down list.
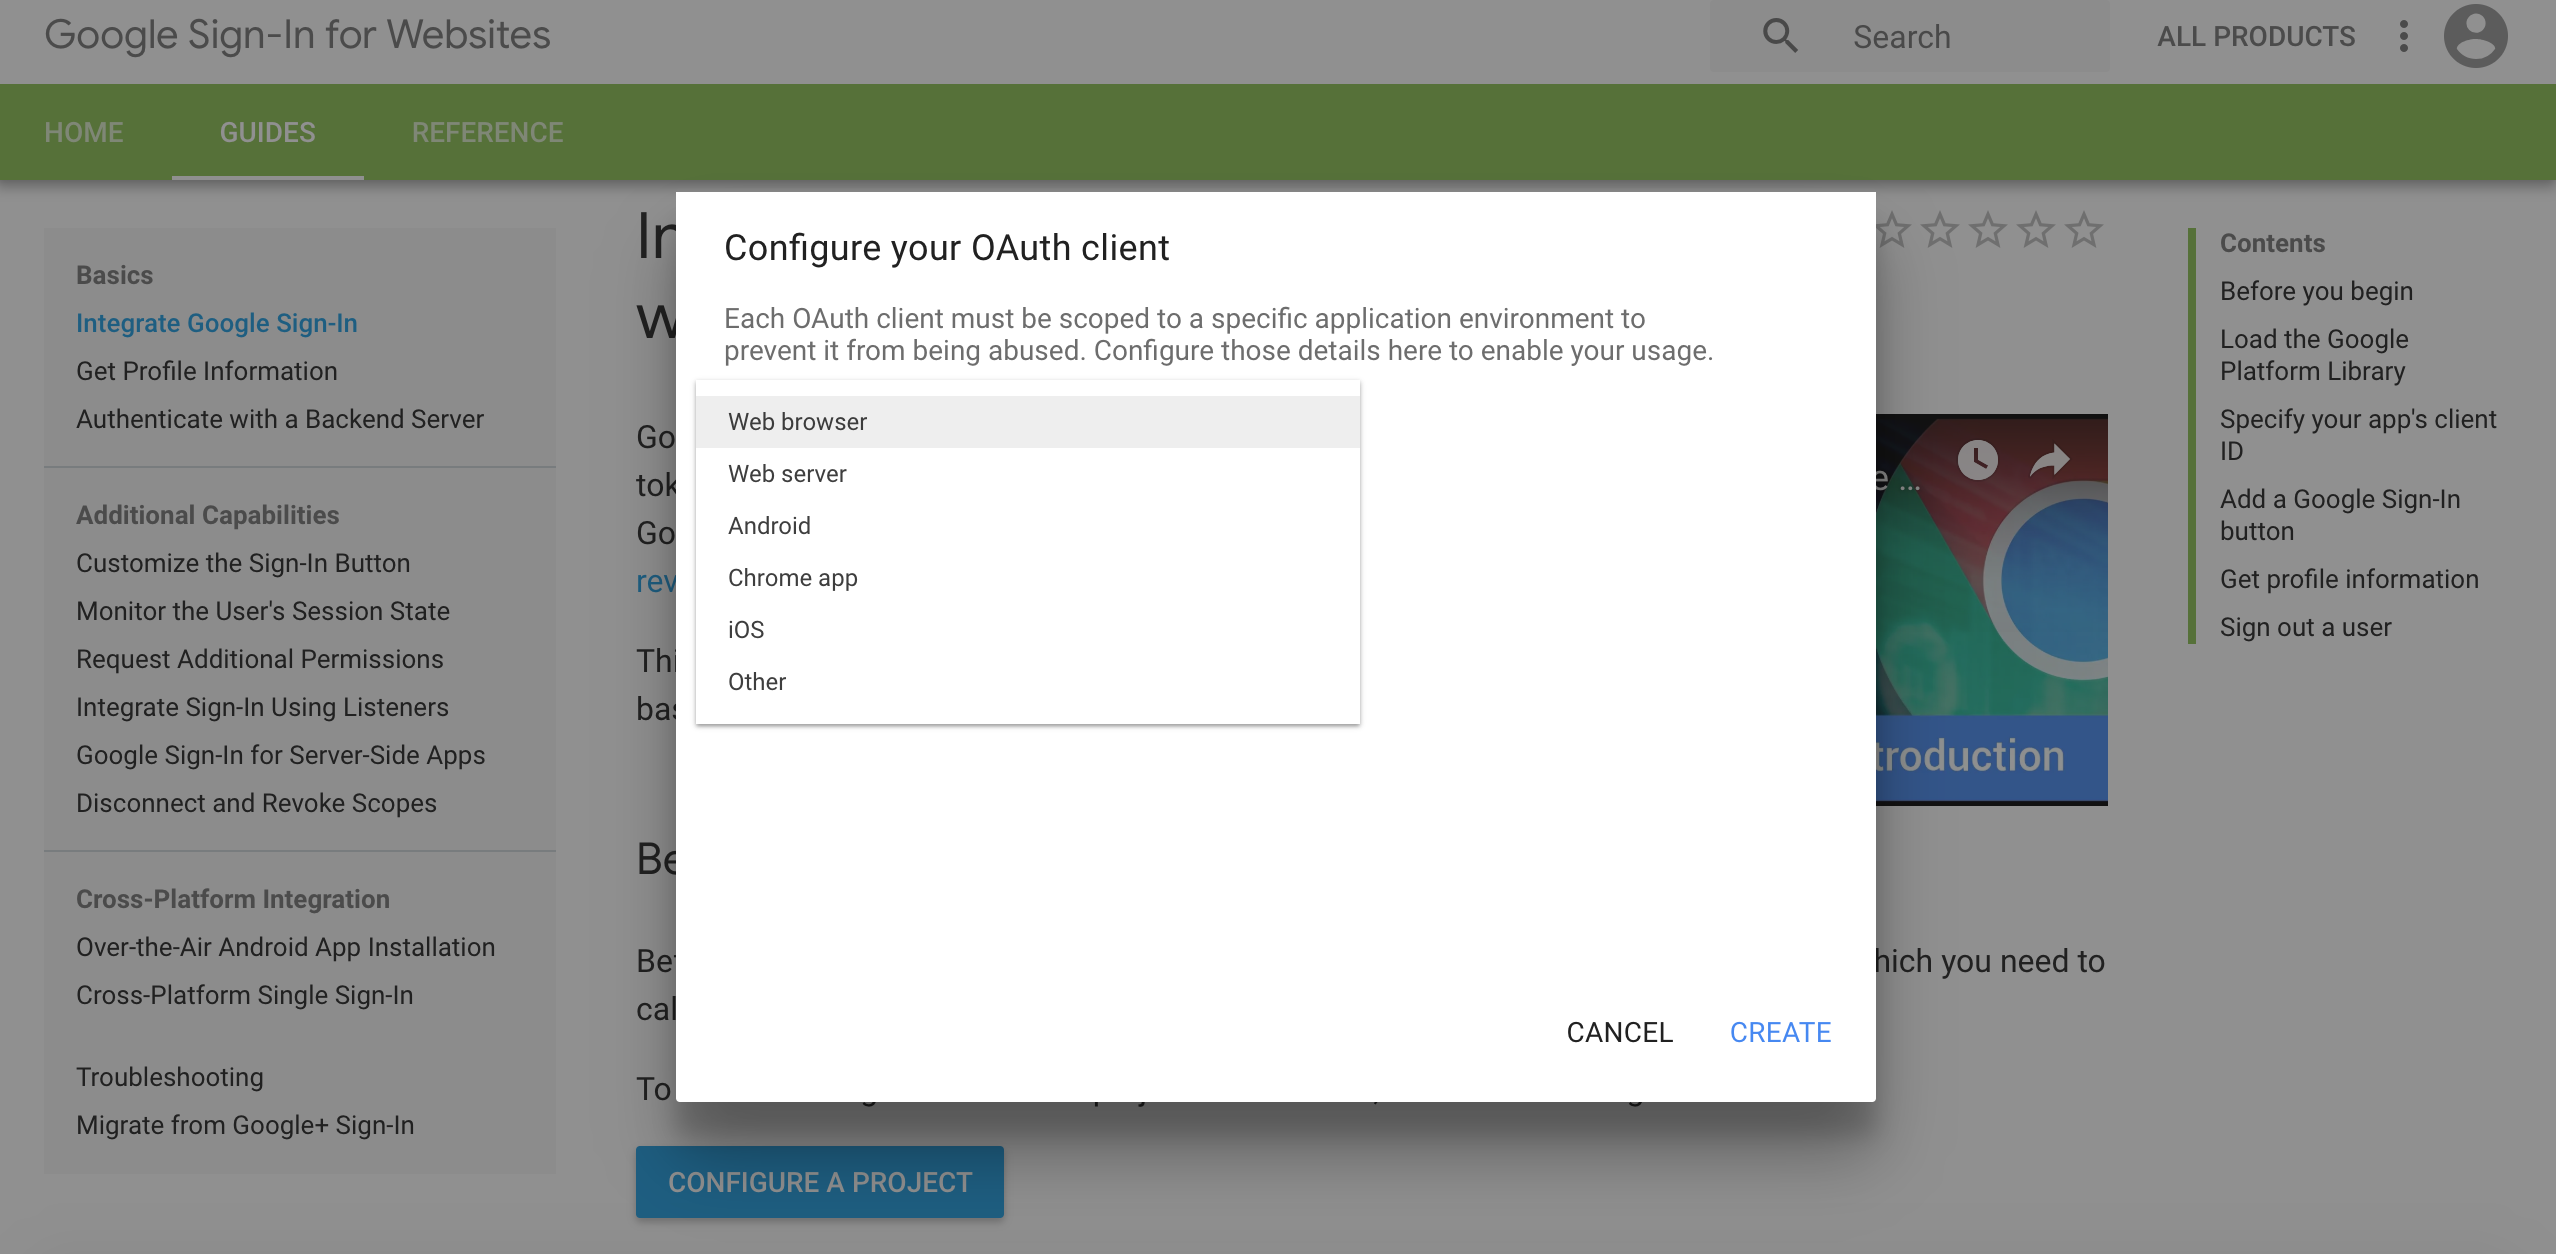
- Click CREATE. You will NOT use the Client ID and CLient Secret from this step.
- Click Done.
- Go to the Google developer console.
- On the left navigation bar, choose Credentials.
- Select the client you created in the first step and choose the edit option
- Type your user pool domain into Authorized Javascript origins.
-
Type your user pool domain with the
/oauth2/idpresponseendpoint into Authorized Redirect URIs.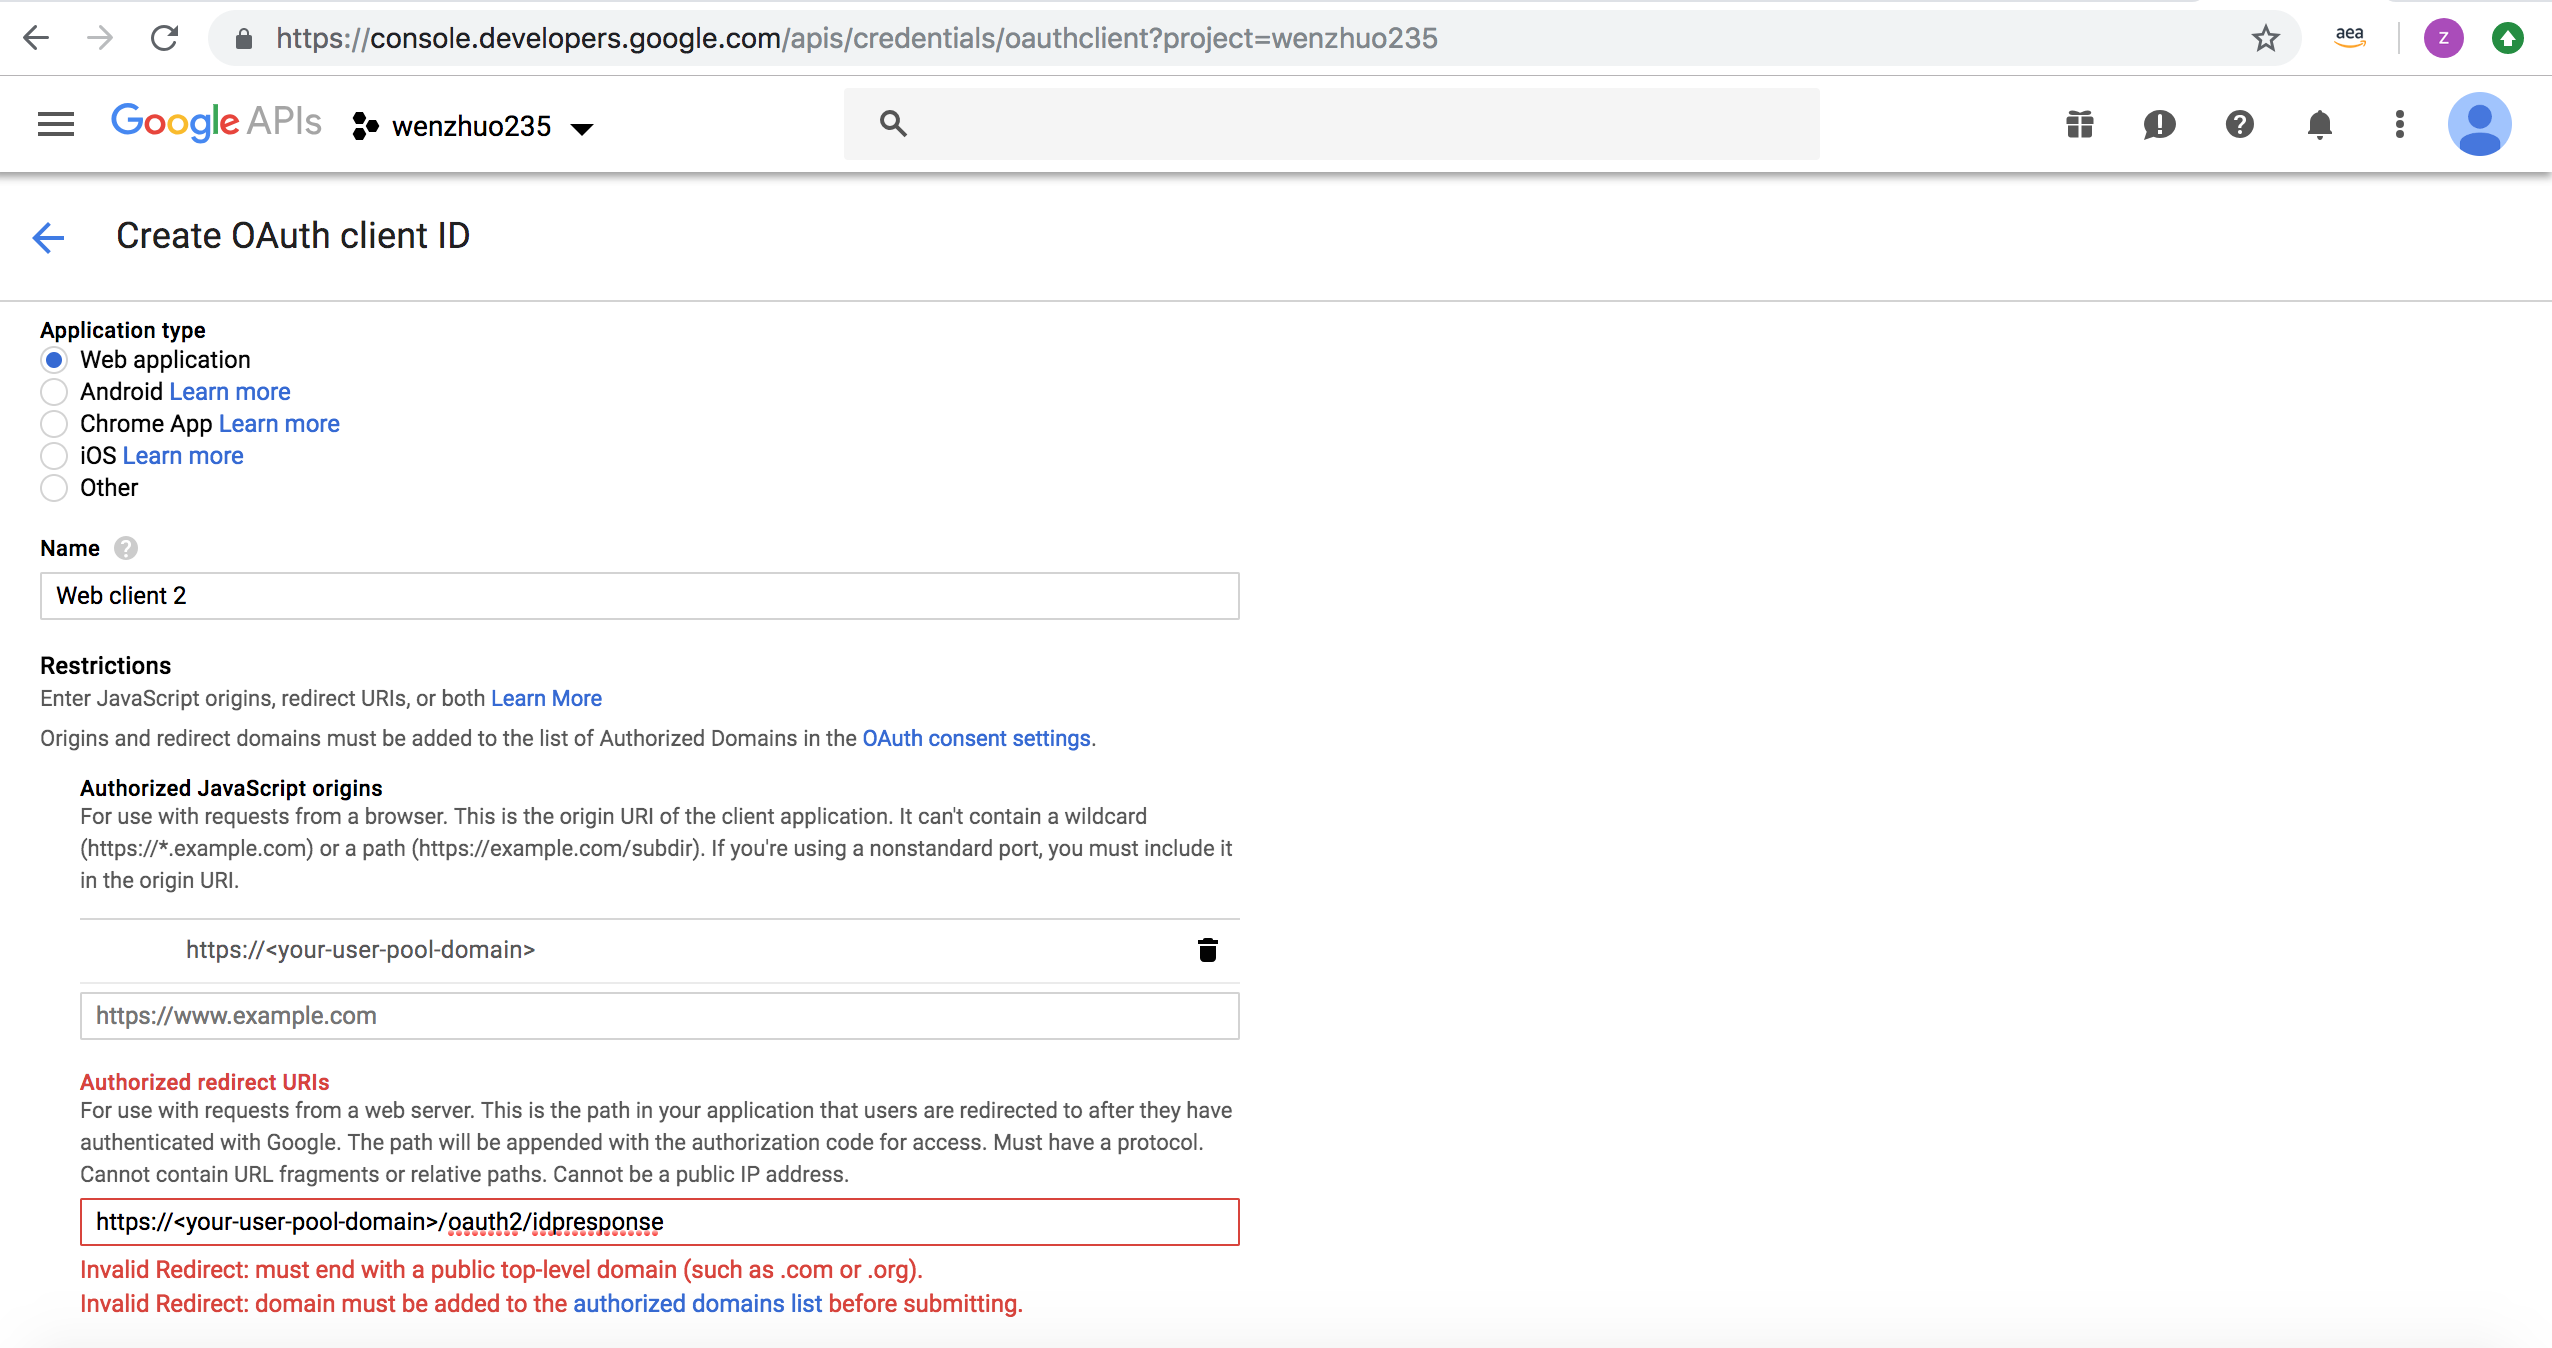
Note: If you saw an error message
Invalid Redirect: domain must be added to the authorized domains list before submitting.when adding the endpoint, please go to the authorized domains list and add the domain. - Click Save.
Amazon Login Instructions
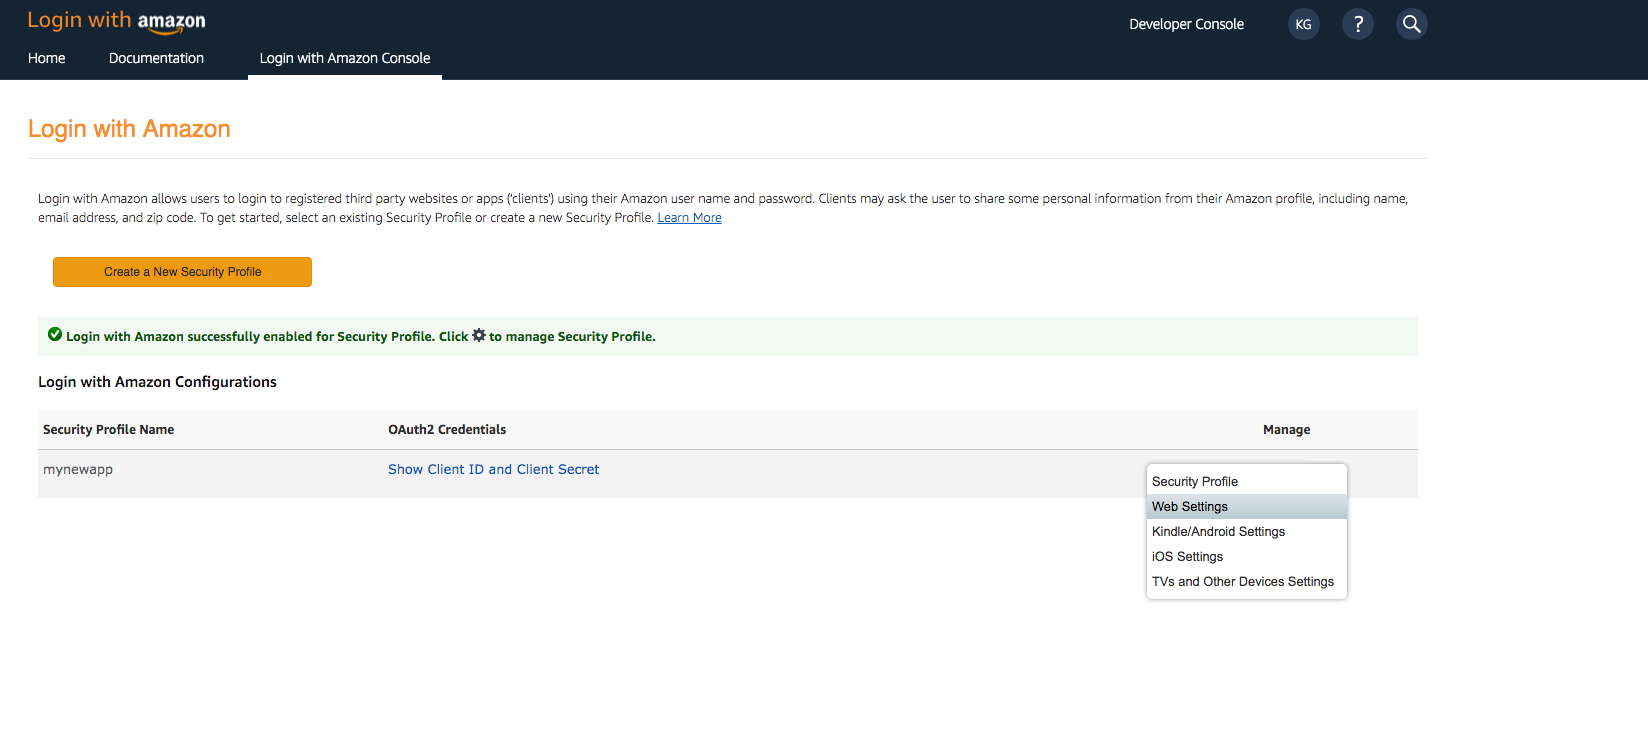
- Sign in with your Amazon credentials.
- Hover over the gear and choose Web Settings associated with the security profile you created in the previous step, and then choose Edit.
- Type your user pool domain into Allowed Origins and type your user pool domain with the /oauth2/idpresponse endpoint into Allowed Return URLs.
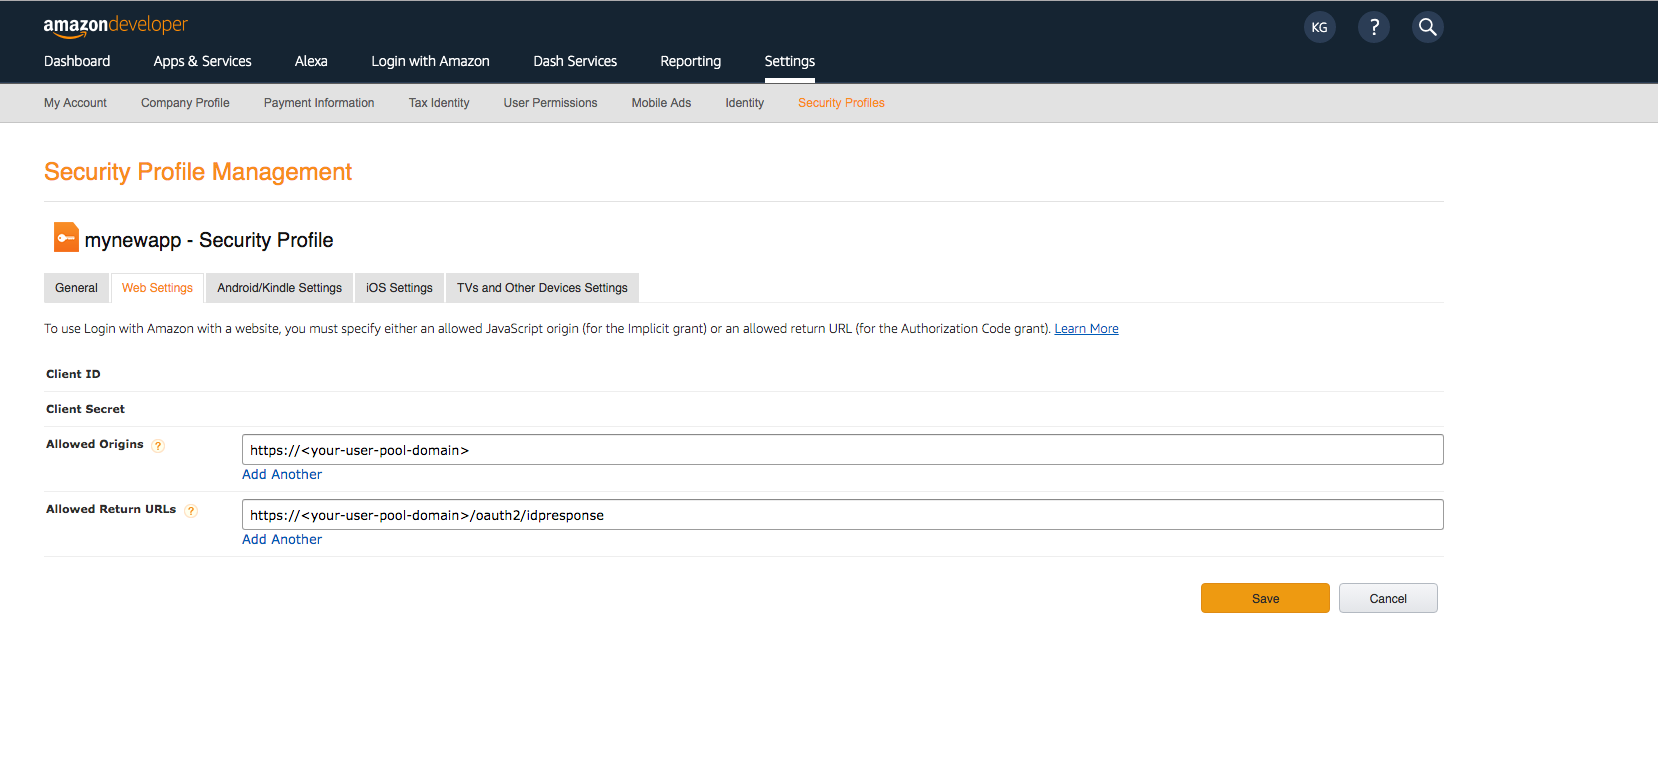
- Choose Save.