

Authentication
The AWSMobileClient provides client APIs and building blocks for developers who want to create user authentication experiences. This includes declarative methods for performing authentication actions, a simple “drop-in auth” UI for performing common tasks, automatic token and credentials management, and state tracking with notifications for performing workflows in your application when users have authenticated.
Amazon Cognito
Amazon Cognito User Pools is a full-featured user directory service to handle user registration, storage, authentication, and account recovery. Cognito User Pools returns JWT tokens to your app and does not provide temporary AWS credentials for calling authorized AWS Services. Amazon Cognito Federated Identities on the other hand, is a way to authorize your users to use AWS services. With an identity pool, you can obtain temporary AWS credentials with permissions you define to access other AWS services directly or to access resources through Amazon API Gateway.
When working together, Cognito User Pools acts as a source of user identities (identity provider) for the Cognito Federated Identities. Other sources can be OpenID, Facebook, Google, etc. AWS Amplify uses User Pools to store your user information and handle authorization, and it leverages Federated Identities to manage user access to AWS Resources, for example allowing a user to upload a file to an S3 bucket.
Prerequisite: Install and configure the Amplify CLI
Recommendation: Complete the Getting Started guide
How it works
The AWSMobileClient manages your application session for authentication related tasks. The credentials it pulls in can be used by other AWS services when you pass it into the constructor for that service object. The Amplify category examples in this documentation use this by default, however you can also use this with any AWS service via the generated SDK clients.
State tracking
AWSMobileClient offers on-demand querying for the “login state” of a user in the application. For instance, you can check if the user is signed-in or not and present an appropriate screen. This is done through a couple of mechanisms:
isSignedInproperty defined as a BOOLEAN for the most simple use casescurrentUserStateused for more advanced scenarios, such as determining if the user has Guest credentials, Authenticated with User Pools, has Federated credentials, or has signed out.
This allows you to write workflows in your application based on the state of the user and what you would like to present on different screens. The AWSMobileClient also offers realtime notifications on user state changes which you can register for in your application using .addUserStateListener() as in the code below.
AWSMobileClient.getInstance().addUserStateListener(new UserStateListener() {
    @Override
    public void onUserStateChanged(UserStateDetails userStateDetails) {
        switch (userStateDetails.getUserState()){
            case GUEST:
                Log.i("userState", "user is in guest mode");
                break;
            case SIGNED_OUT:
                Log.i("userState", "user is signed out");
                break;
            case SIGNED_IN:
                Log.i("userState", "user is signed in");
                break;
            case SIGNED_OUT_USER_POOLS_TOKENS_INVALID:
                Log.i("userState", "need to login again");
                break;
            case SIGNED_OUT_FEDERATED_TOKENS_INVALID:
                Log.i("userState", "user logged in via federation, but currently needs new tokens");
                break;
            default:
                Log.e("userState", "unsupported");
        }
    }
});
Token fetch and refresh
Cognito User Pool tokens
The AWSMobileClient will return valid JWT tokens from your cache immediately if they have not expired. If they have expired it will look for a Refresh token in the cache. If it is available and not expired it will be used to fetch a valid IdToken and AccessToken and store them in the cache.
If the Refresh tokens have expired and you then make call to any AWS service, such as a AppSync GraphQL request or S3 upload, the AWSMobileClient will dispatch a state notification that a re-login is required. At this point you can choose to present the user with a login screen, call AWSMobileClient.getInstance().signIn(), or perform custom business logic. For example:
AWSMobileClient.getInstance().addUserStateListener(new UserStateListener() {
    @Override
    public void onUserStateChanged(UserStateDetails userStateDetails) {
        switch (userStateDetails.getUserState()){
            case SIGNED_OUT:
                // user clicked signout button and signedout
                Log.i("userState", "user signed out");
                break;
            case SIGNED_OUT_USER_POOLS_TOKENS_INVALID:
                Log.i("userState", "need to login again.");
                AWSMobileClient.getInstance().signIn(username, password, null, new Callback<SignInResult>() {
                    //...
                });
                //Alternatively call .showSignIn()
                break;
            default:
                Log.i("userState", "unsupported");
        }
    }
});
You can register to listen for this state change anywhere in your app with .addUserStateListener(), such as in onCreate() in the above example. If you want to cancel the re-login process, for instance if your application is shared among multiple users of the device or a user clicks “cancel” on the re-login attempt, you can call releaseSignInWait() to terminate the call and then call a signOut().
AWS Credentials
AWS Credentials are used for signing requests to services that use AWS IAM, and for mobile clients they are provided by Amazon Cognito Identity Pools. Similar to JWT tokens, AWSMobileClient will return valid AWS Credentials from your cache immediately if they have not expired. If they are expired they will be refreshed using the JWT token that has been federated if the session is authenticated. For Guest scenarios they will be automatically refreshed.
Offline support
AWSMobileClient is optimized to account for applications transitioning from offline to online connectivity, and refreshing credentials at the appropriate time so that errors do not occur when actions are taken and connectivity is not available. In no cases will the AWSMobileClient automatically sign out a user if connectivity is not available. You must always make an explicit signOut() call for a user to be signed out of a session.
In most cases if you are offline and make a service request, and your tokens are valid, the AWSMobileClient will pass the request directly to the service client. Therefore it is your responsibility to check network connectivity. In the case of the AWS AppSync client it supports offline operations and the request will be enqueued and automatically sent when connectivity is restored, refreshing credentials if necessary. See the API guide for more information on AppSync.
If you are offline and make a service request, and your tokens are NOT valid, the service request will be blocked and notifications for SIGNED_OUT_USER_POOLS_TOKENS_INVALID or SIGNED_OUT_FEDERATED_TOKENS_INVALID will be sent to the listener. In the case of the AppSync client this can be ignored and the queries will come from cache or mutations enqueued with credentials automatically refreshing upon reconnection. For all other services, if this happens and you are offline you should not make the service request until you come back online, at which point the AWSMobileClient will automatically re-enter the token refresh flow outlined above and then make the service call with the updated credentials.
Install Dependencies
After initialization in your project directory with amplify init, update your App build.gradle with the below:
//For AWSMobileClient only:
implementation 'com.amazonaws:aws-android-sdk-mobile-client:2.16.+'

//For the drop-in UI also:
implementation 'com.amazonaws:aws-android-sdk-auth-userpools:2.16.+'
implementation 'com.amazonaws:aws-android-sdk-auth-ui:2.16.+'

//For hosted UI also:
implementation 'com.amazonaws:aws-android-sdk-cognitoauth:2.16.+'
For the AWSMobileClient alone you can have a minimum SDK version of 15, but for the drop-in UI you will need a minimum of 23 set in your build.gradle:
minSdkVersion 15
Add the following permissions to the AndroidManifest.xml file:
<uses-permission android:name="android.permission.INTERNET"/>
<uses-permission android:name="android.permission.ACCESS_NETWORK_STATE"/>
Build your Android Studio project.
Automated Setup
Run the following command in your project’s root folder:
$ amplify add auth
If you have previously enabled an Amplify category that uses Auth behind the scenes, e.g. API category, you may already have an Auth configuration. In such a case, run amplify auth update command to edit your configuration.
The CLI prompts will help you to customize your auth flow for your app. With the provided options, you can:
- Customize sign-in/registration flow
- Customize email and SMS messages for Multi-Factor Authentication
- Customize attributes for your users, e.g. name, email
- Enable 3rd party authentication providers, e.g. Facebook, Twitter, Google and Amazon
After configuring your Authentication options, update your backend:
$ amplify push
A configuration file called awsconfiguration.json will be copied to your project ./app/src/main/res/raw directory. The AWSMobileClient will leverage this for communicating with backend services. Click here to learn more about this process.
Lambda Triggers
The CLI allows you to configure Lambda Triggers for your Amazon Cognito User Pool. These enable you to add custom functionality to your registration and authentication flows. Read more
Manual Setup
For manual configuration without the CLI, you must have an awsconfiguration.json file with the following:
- Cognito User Pools:
CognitoUserPool : { Default: ...} - Cognito Identity Pools:
IdentityManagerandCredentialsProvider: {CognitoIdentity: ...}
    {
        "IdentityManager": {
            "Default": {}
        },
        "CredentialsProvider": {
            "CognitoIdentity": {
                "Default": {
                    "PoolId": "XX-XXXX-X:XXXXXXXX-XXXX-1234-abcd-1234567890ab",
                    "Region": "XX-XXXX-X"
                }
            }
        },
        "CognitoUserPool": {
            "Default": {
                "PoolId": "XX-XXXX-X_abcd1234",
                "AppClientId": "XXXXXXXX",
                "AppClientSecret": "XXXXXXXXX",
                "Region": "XX-XXXX-X"
            }
        }
    }
If you are using both Cognito User Pools and Identity Pools, such as in Federated scenarios, you will need all of the keys mentioned above.
Initialization
Go to your MainActivity and inside the onCreate() run the initialize() routine:
AWSMobileClient.getInstance().initialize(getApplicationContext(), new Callback<UserStateDetails>() {

        @Override
        public void onResult(UserStateDetails userStateDetails) {
            Log.i("INIT", "onResult: " + userStateDetails.getUserState());
        }

        @Override
        public void onError(Exception e) {
            Log.e("INIT", "Initialization error.", e);
        }
    }
);
Build and run your program to see the initialized client in LOGCAT messages. Since you haven’t logged in yet it will print a state of SIGNED_OUT. The getUserState() function returns an ENUM which you can perform different actions in your workflow. For example:
AWSMobileClient.getInstance().initialize(getApplicationContext(), new Callback<UserStateDetails>() {
     @Override
    public void onResult(UserStateDetails userStateDetails) {
        switch (userStateDetails.getUserState()){
            case SIGNED_IN:
                runOnUiThread(new Runnable() {
                    @Override
                    public void run() {
                        TextView textView = (TextView) findViewById(R.id.text);
                        textView.setText("Logged IN");
                    }
                });
                break;
            case SIGNED_OUT:
                runOnUiThread(new Runnable() {
                    @Override
                    public void run() {
                        TextView textView = (TextView) findViewById(R.id.text);
                        textView.setText("Logged OUT");
                    }
                });
                break;
            default:
                AWSMobileClient.getInstance().signOut();
                break;
        }
    }

    @Override
    public void onError(Exception e) {
        Log.e("INIT", e.toString());
    }
});
You might leverage the above workflow to perform other actions in the SIGNED_IN case, such as calling GraphQL or REST APIs with AWS AppSync and Amazon API Gateway or uploading content with Amazon S3.
Guest access
Many applications have UX with “Guest” or “Unauthenticated” users. This is provided out of the box with AWSMobileClient through the initialization routine you have added. However, the Amplify CLI does not enable this by default with the amplify add auth flow. You can enable this by running amplify update auth and choosing Manual Configuration when prompted. Ensure you choose the …connected with AWS IAM controls which will allow you to select Allow unauthenticated logins.
When complete run amplify push and your awsconfiguration.json will work automatically with your updated Cognito settings. The AWSMobileClient user session will automatically have permissions configured for Guest/Unauthenticated users upon initialization.
If you login in your app either using the “Drop-In Auth” or the AWSMobileClient APIs then the user session will transition to an authenticated role.
Note: If initialize is giving you the state as ‘SIGNED_OUT’, try calling AWSMobileClient.getInstance().getCredentials() and then calling initialize again.
Drop-In Auth
The AWSMobileClient client supports a simple “drop-in” UI for your application. You can add drop-in Auth UI like so:
// 'this' refers the the current active activity
AWSMobileClient.getInstance().showSignIn(this, new Callback<UserStateDetails>() {
    @Override
    public void onResult(UserStateDetails result) {
        Log.d(TAG, "onResult: " + result.getUserState());
    }

    @Override
    public void onError(Exception e) {
        Log.e(TAG, "onError: ", e);
    }
});
In the above code you would have created an Android Activity called NextActivity which would automatically be navigated to upon successful sign-up and sign-in. For testing, you can alternatively just use MainActivity.class after initializing:
AWSMobileClient.getInstance().showSignIn(
        this,
        SignInUIOptions.builder()
                .nextActivity(NextActivity.class)
                .build(),
        new Callback<UserStateDetails>() {
            @Override
            public void onResult(UserStateDetails result) {
                Log.d(TAG, "onResult: " + result.getUserState());
                switch (result.getUserState()){
                    case SIGNED_IN:
                        Log.i("INIT", "logged in!");
                        break;
                    case SIGNED_OUT:
                        Log.i(TAG, "onResult: User did not choose to sign-in");
                        break;
                    default:
                        AWSMobileClient.getInstance().signOut();
                        break;
                }
            }

            @Override
            public void onError(Exception e) {
                Log.e(TAG, "onError: ", e);
            }
        }
);
The above code also shows an additional Auth API, signOut(). For more advanced scenarios, you can call the AWSMobileClient APIs, such as for building your own UI or using functionality in different UX of your application lifecycle.
Customization
Currently, you can change the following properties of the drop-in UI with the AWSMobileClient:
- Logo: Any Drawable resource supported by ImageView
- Background Color: Any color Android supported
AWSMobileClient.getInstance().showSignIn(
        this,
        SignInUIOptions.builder()
                .nextActivity(NextActivity.class)
                .logo(R.id.logo)
                .backgroundColor(R.color.black)
                .canCancel(false)
                .build(),
        new Callback<UserStateDetails>() {
            @Override
            public void onResult(UserStateDetails result) {
                Log.d(TAG, "onResult: " + result.getUserState());
            }


            @Override
            public void onError(Exception e) {
                Log.e(TAG, "onError: ", e);
            }
        }
);
You can allow the sign in process to be dismissed by setting the canCancel property.
Working with the API
SignUp
Creates a new user in your User Pool:
final String username = getInput(R.id.signUpUsername);
final String password = getInput(R.id.signUpPassword);
final Map<String, String> attributes = new HashMap<>();
attributes.put("email", "name@email.com");
AWSMobileClient.getInstance().signUp(username, password, attributes, null, new Callback<SignUpResult>() {
    @Override
    public void onResult(final SignUpResult signUpResult) {
        runOnUiThread(new Runnable() {
            @Override
            public void run() {
                Log.d(TAG, "Sign-up callback state: " + signUpResult.getConfirmationState());
                if (!signUpResult.getConfirmationState()) {
                    final UserCodeDeliveryDetails details = signUpResult.getUserCodeDeliveryDetails();
                    makeToast("Confirm sign-up with: " + details.getDestination());
                } else {
                    makeToast("Sign-up done.");
                }
            }
        });
    }

    @Override
    public void onError(Exception e) {
        Log.e(TAG, "Sign-up error", e);
    }
});
Confirm SignUp
Confirms a new user after signing up in a User Pool:
final String username = getInput(R.id.confirmSignUpUsername);
final String code = getInput(R.id.confirmSignUpCode);
AWSMobileClient.getInstance().confirmSignUp(username, code, new Callback<SignUpResult>() {
    @Override
    public void onResult(final SignUpResult signUpResult) {
        runOnUiThread(new Runnable() {
            @Override
            public void run() {
                Log.d(TAG, "Sign-up callback state: " + signUpResult.getConfirmationState());
                if (!signUpResult.getConfirmationState()) {
                    final UserCodeDeliveryDetails details = signUpResult.getUserCodeDeliveryDetails();
                    makeToast("Confirm sign-up with: " + details.getDestination());
                } else {
                    makeToast("Sign-up done.");
                }
            }
        });
    }

    @Override
    public void onError(Exception e) {
        Log.e(TAG, "Confirm sign-up error", e);
    }
});
Re-send Confirmation Code
AWSMobileClient.getInstance().resendSignUp("your_username", new Callback<SignUpResult>() {
    @Override
    public void onResult(SignUpResult signUpResult) {
        Log.i(TAG, "A verification code has been sent via" +
            signUpResult.getUserCodeDeliveryDetails().getDeliveryMedium()
            + " at " +
            signUpResult.getUserCodeDeliveryDetails().getDestination());
    }

    @Override
    public void onError(Exception e) {
        Log.e(TAG, e);
    }
});
SignIn
Sign in with user credentials:
AWSMobileClient.getInstance().signIn(username, password, null, new Callback<SignInResult>() {
    @Override
    public void onResult(final SignInResult signInResult) {
        runOnUiThread(new Runnable() {
            @Override
            public void run() {
                Log.d(TAG, "Sign-in callback state: " + signInResult.getSignInState());
                switch (signInResult.getSignInState()) {
                    case DONE:
                        makeToast("Sign-in done.");
                        break;
                    case SMS_MFA:
                        makeToast("Please confirm sign-in with SMS.");
                        break;
                    case NEW_PASSWORD_REQUIRED:
                        makeToast("Please confirm sign-in with new password.");
                        break;
                    default:
                        makeToast("Unsupported sign-in confirmation: " + signInResult.getSignInState());
                        break;
                }
            }
        });
    }

    @Override
    public void onError(Exception e) {
        Log.e(TAG, "Sign-in error", e);
    }
});
Confirm SignIn
AWSMobileClient.getInstance().confirmSignIn(signInChallengeResponse, new Callback<SignInResult>() {
    @Override
    public void onResult(SignInResult signInResult) {
        Log.d(TAG, "Sign-in callback state: " + signInResult.getSignInState());
        switch (signInResult.getSignInState()) {
            case DONE:
                makeToast("Sign-in done.");
                break;
            case SMS_MFA:
                makeToast("Please confirm sign-in with SMS.");
                break;
            case NEW_PASSWORD_REQUIRED:
                makeToast("Please confirm sign-in with new password.");
                break;
            default:
                makeToast("Unsupported sign-in confirmation: " + signInResult.getSignInState());
                break;
        }
    }

    @Override
    public void onError(Exception e) {
        Log.e(TAG, "Sign-in error", e);
    }
});
Force Change Password
If a user is required to change their password on first login, there is a NEW_PASSWORD_REQUIRED state returned when signIn is called. You need to provide a new password given by the user in that case. It can be done using confirmSignIn with the new password.
AWSMobileClient.getInstance().signIn("username", "password", null, new Callback<SignInResult>() {
    @Override
    public void onResult(final SignInResult signInResult) {
        runOnUiThread(new Runnable() {
            @Override
            public void run() {
                Log.d(TAG, "Sign-in callback state: " + signInResult.getSignInState());
                switch (signInResult.getSignInState()) {
                    case DONE:
                        makeToast("Sign-in done.");
                        break;
                    case NEW_PASSWORD_REQUIRED:
                        makeToast("Please confirm sign-in with new password.");
                        break;
                    default:
                        makeToast("Unsupported sign-in confirmation: " + signInResult.getSignInState());
                        break;
                }
            }
        });
    }
     @Override
    public void onError(Exception e) {
        Log.e(TAG, "Sign-in error", e);
    }
});

AWSMobileClient.getInstance().confirmSignIn("NEW_PASSWORD_HERE", new Callback<SignInResult>() {
    @Override
    public void onResult(SignInResult signInResult) {
        Log.d(TAG, "Sign-in callback state: " + signInResult.getSignInState());
        switch (signInResult.getSignInState()) {
            case DONE:
                makeToast("Sign-in done.");
                break;
            case SMS_MFA:
                makeToast("Please confirm sign-in with SMS.");
                break;
            default:
                makeToast("Unsupported sign-in confirmation: " + signInResult.getSignInState());
                break;
        }
    }
     @Override
    public void onError(Exception e) {
        Log.e(TAG, "Sign-in error", e);
    }
});
Forgot Password
Forgot password is a 2 step process. You need to first call forgotPassword() method which would send a confirmation code to user via email or phone number. The details of how the code was sent are included in the response of forgotPassword(). Once the code is given by the user, you need to call confirmForgotPassword() with the confirmation code to confirm the change of password.
AWSMobileClient.getInstance().forgotPassword("username", new Callback<ForgotPasswordResult>() {
    @Override
    public void onResult(final ForgotPasswordResult result) {
        runOnUiThread(new Runnable() {
            @Override
            public void run() {
                Log.d(TAG, "forgot password state: " + result.getState());
                switch (result.getState()) {
                    case CONFIRMATION_CODE:
                        makeToast("Confirmation code is sent to reset password");
                        break;
                    default:
                        Log.e(TAG, "un-supported forgot password state");
                        break;
                }
            }
        });
    }

    @Override
    public void onError(Exception e) {
        Log.e(TAG, "forgot password error", e);
    }
});

AWSMobileClient.getInstance().confirmForgotPassword("NEW_PASSWORD_HERE", "CONFIRMATION_CODE", new Callback<ForgotPasswordResult>() {
    @Override
    public void onResult(final ForgotPasswordResult result) {
        runOnUiThread(new Runnable() {
            @Override
            public void run() {
                Log.d(TAG, "forgot password state: " + result.getState());
                switch (result.getState()) {
                    case DONE:
                        makeToast("Password changed successfully");
                        break;
                    default:
                        Log.e(TAG, "un-supported forgot password state");
                        break;
                }
            }
        });
    }

    @Override
    public void onError(Exception e) {
        Log.e(TAG, "forgot password error", e);
    }
});
SignOut
AWSMobileClient.getInstance().signOut();
Global SignOut
Using global signout, you can signout a user from all active login sessions. By doing this, you are revoking all the OIDC tokens(id token, access token and refresh token) which means the user is signed out from all the devices. However, although the tokens are revoked, the AWS credentials will remain valid until they expire (which by default is 1 hour).
AWSMobileClient.getInstance().signOut(SignOutOptions.builder().signOutGlobally(true).build(), new Callback<Void>() {
    @Override
    public void onResult(final Void result) {
        Log.d(TAG, "signed-out");
    }

    @Override
    public void onError(Exception e) {
        Log.e(TAG, "sign-out error", e);
    }
});
Utility Properties
The AWSMobileClient provides several property “helpers” that are automatically cached locally for you to use in your application.
AWSMobileClient.getInstance().getUsername()       //String
AWSMobileClient.getInstance().isSignedIn()        //Boolean
AWSMobileClient.getInstance().getIdentityId()     //String
Managing Security Tokens
When using Authentication with AWSMobileClient, you don’t need to refresh Amazon Cognito tokens manually. The tokens are automatically refreshed by the library when necessary.
OIDC Tokens
AWSMobileClient.getInstance().getTokens();
AWSMobileClient.getInstance().getTokens().getIdToken().getTokenString();
AWS Credentials
AWSMobileClient.getInstance().getCredentials();
Federated Identities (Social Sign-in)
Availability Note Currently, the federation feature in the AWSMobileClient supports Cognito Identity Pools only.
Federated Sign In
AWSMobileClient.getInstance().federatedSignIn(IdentityProvider.FACEBOOK.toString(), "FACEBOOK_TOKEN_HERE", new Callback<UserStateDetails>() {
    @Override
    public void onResult(final UserStateDetails userStateDetails) {
        //Handle the result
    }

    @Override
    public void onError(Exception e) {
        Log.e(TAG, "sign-in error", e);
});
federatedSignIn() can be used to obtain federated “Identity ID” using external providers like Google, Facebook or Twitter. If the tokens are expired and new tokens are needed, a notification will be dispatched on the AWSMobileClient listener with the user state SIGNED_OUT_FEDERATED_TOKENS_INVALID. You can give the updated tokens via the same federatedSignIn() method.
The API calls to get AWS credentials will be asynchronously blocked until you fetch the social provider’s token and give it to AWSMobileClient. Once you pass the tokens, the AWSMobileClient will fetch AWS Credentials using the new tokens and unblock all waiting calls. It will then use the new credentials.
SAML with Cognito Identity
To federate your SAML sign-in provider as a user sign-in provider for AWS services called in your app, you will pass tokens to AWSMobileClient.getInstance().federatedSignIn().
You must first register your SAML application with AWS IAM by using the the following instructions.
Once you retrieve the SAML tokens from your sign-in, you can call the federatedSignIn API in AWSMobileClient:
// Perform SAML token federation
AWSMobileClient.getInstance().federatedSignIn("YOUR_SAML_PROVIDER_NAME", "YOUR_SAML_TOKEN", new Callback<UserStateDetails>() {
    @Override
    public void onResult(final UserStateDetails userStateDetails) {
        //Handle the result
    }

    @Override
    public void onError(Exception e) {
        Log.e(TAG, "sign-in error", e);
});
Note
If the SAML token contains more than one Role ARN, you will need to specify which role will be assumed when federating. If the SAML token has more than one Role ARN and a customRoleARN is not specified, it will result in an error.
// Choose one of the roles available in the token
FederatedSignInOptions options = FederatedSignInOptions.builder()
                                     .customRoleARN("choose-one")
                                     .build();
// Perform SAML token federation
AWSMobileClient.getInstance().federatedSignIn("YOUR_SAML_PROVIDER_NAME", "YOUR_SAML_TOKEN", options, new Callback<UserStateDetails>() {
    @Override
    public void onResult(final UserStateDetails userStateDetails) {
        //Handle the result
    }

    @Override
    public void onError(Exception e) {
        Log.e(TAG, "sign-in error", e);
});
Facebook with Cognito Identity
To federate Facebook as a user sign-in provider for AWS services called in your app, you will pass tokens to AWSMobileClient.getInstance().federatedSignIn(). You must first register your application with Facebook by using the Facebook Developers portal and configure this with Amazon Cognito Identity Pools.
AWS Amplify helps set this up for you but first this topic explains how to set up Facebook as an identity provider for your app.
If you already have a Facebook app ID, you can copy and paste it into the Facebook App ID field
when configuring authentication using the AWS Amplify CLI.
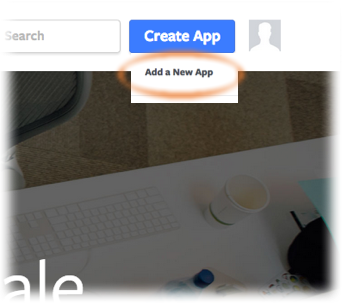
To get a Facebook app ID
-
In the Facebook Developers portal, sign in with your Facebook credentials.
-
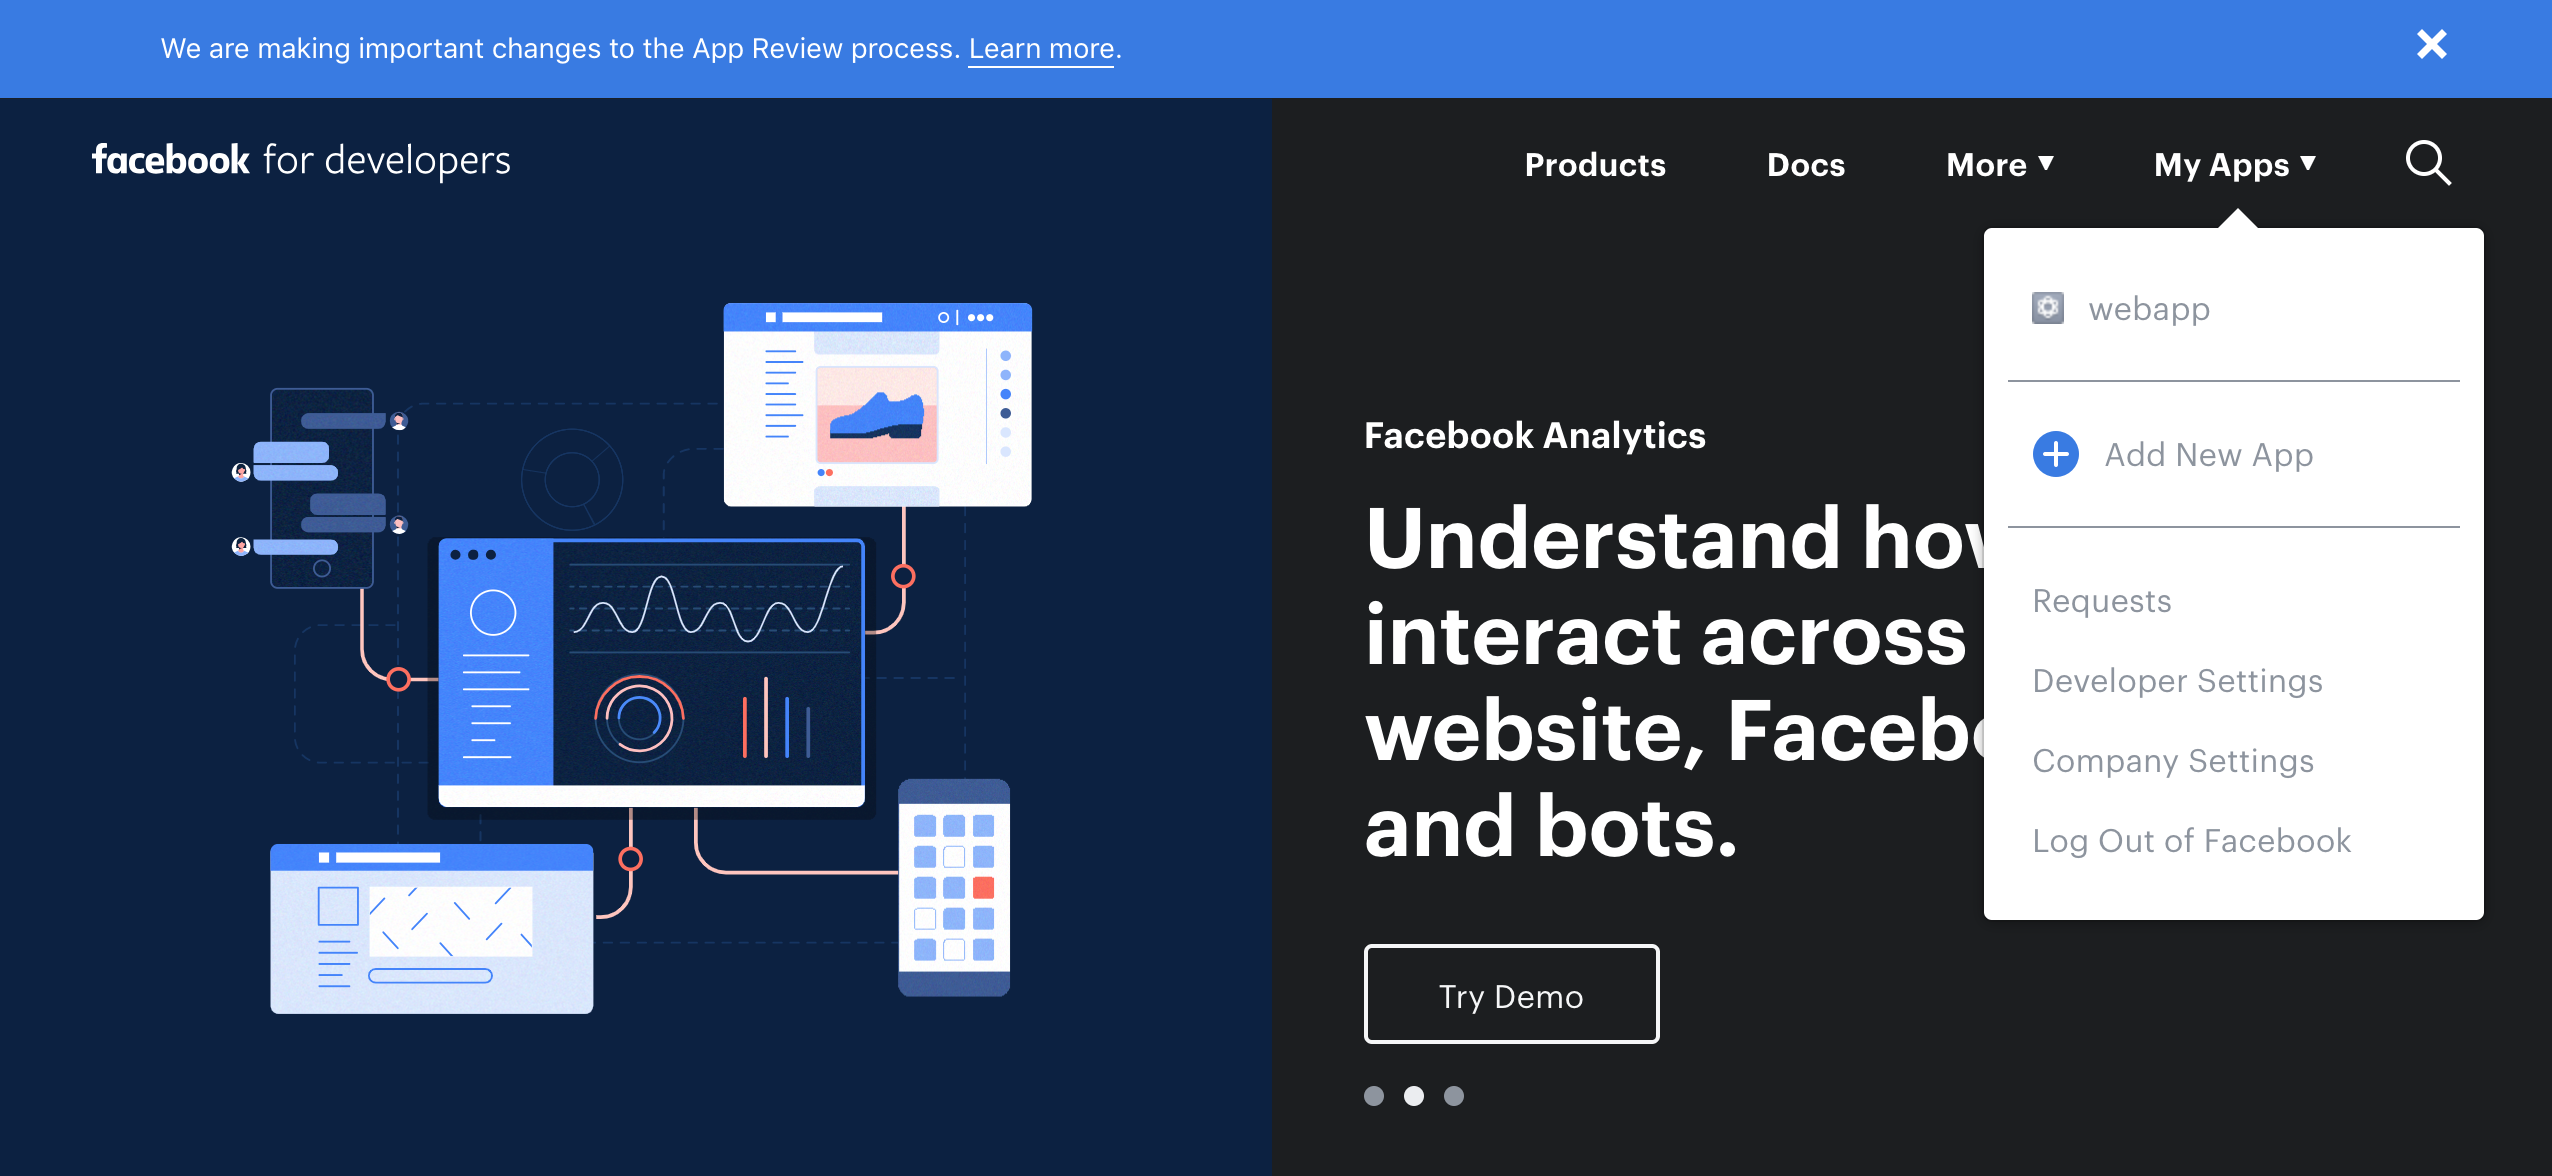
From
Create App, chooseAdd a New App(note: this menu label will beMy Appsif you have previously created an app.
-
If asked, choose the platform of your app that will use Facebook sign-in, and
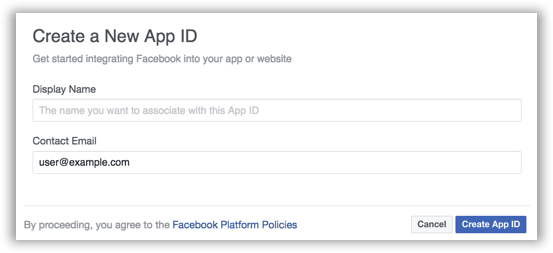
basic
setup
. -
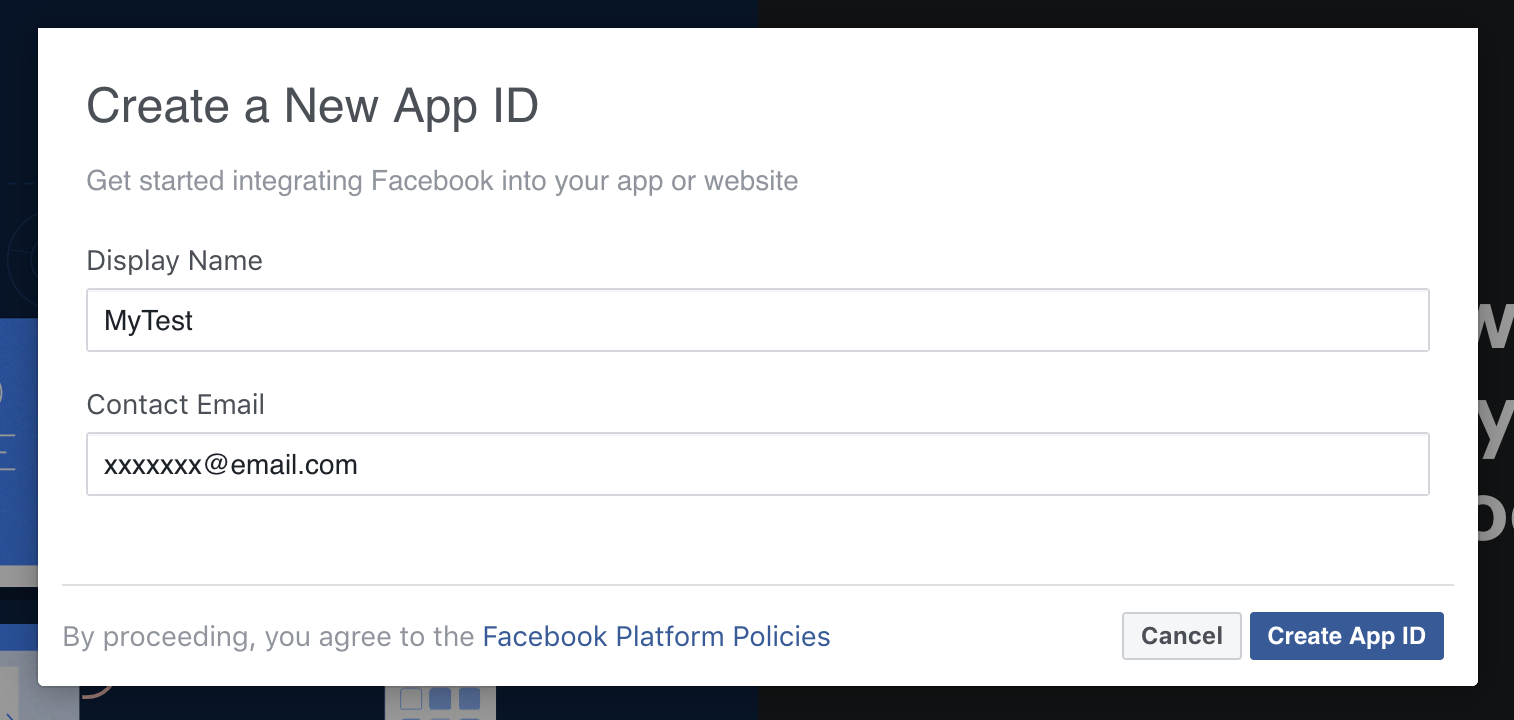
Type a display name for your app, select a category for your app from the
Categorydrop-down list, and then chooseCreate App ID.
- Complete the
Security Checkthat appears. Your new app then appears in theDashboard.
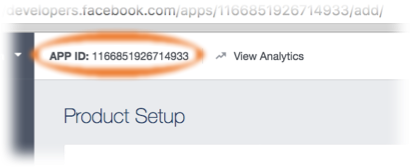
-
Copy the App ID and note it for later when using the Amplify CLI.
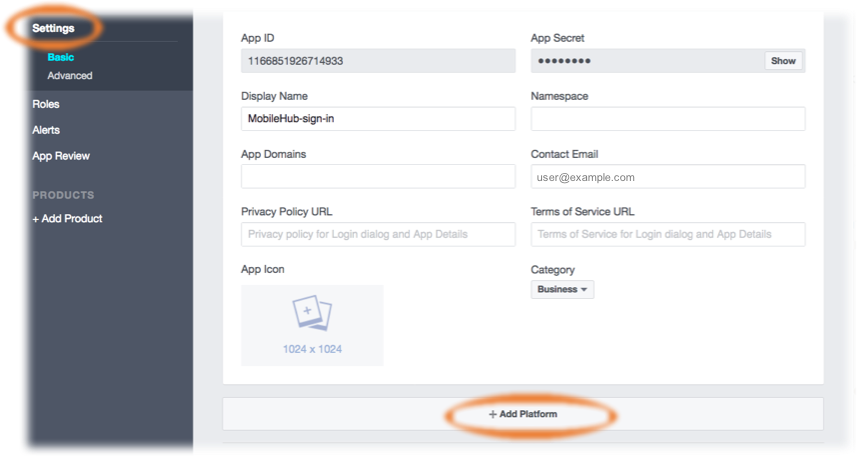
-
In the Facebook Developer portal’s left hand navigation list, choose
Settings, then choose+ Add Platform.
-
Choose your platform and provide information about your app that Facebook will use for integration during credential validation.
-
In the Facebook Developers portal, choose
Save changes, thenUse this package nameif a dialog appears saying that Google Play has an issue with your package name. -
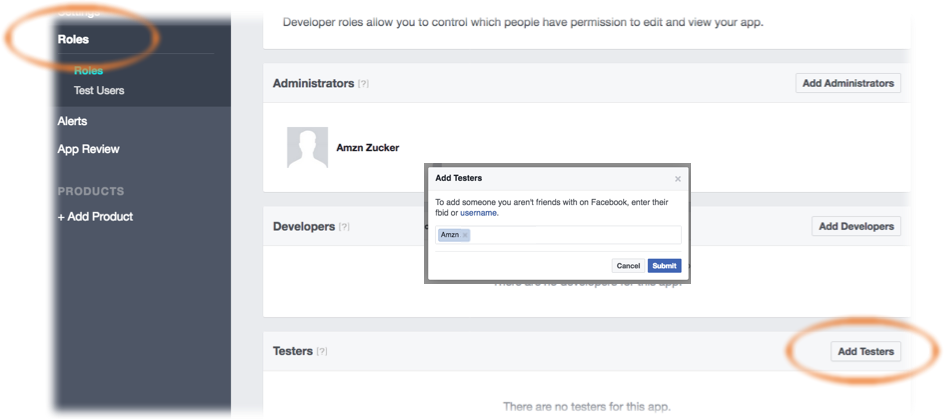
Only users with roles assigned in the Facebook portal will be able to authenticate through your app while it is in development (not yet published).
To authorize users, in the Facebook Developer portal’s left hand navigation list, choose
Roles, thenAdd Testers. Provide a valid Facebook ID.
For more information about integrating with Facebook Login, see the Facebook Getting Started Guide.
Amplify CLI Configuration - Facebook
In a terminal window, navigate to the root of your app files and add the auth category to your app. The CLI prompts you for configuration parameters. Choose I will setup my own configuration and AWS IAM controls when prompted.
$ cd ./YOUR_PROJECT_FOLDER
$ amplify add auth              ##"amplify update auth" if already configured
❯ Manual Configuration
❯ User Sign-Up, Sign-In, connected with AWS IAM controls
Choose YES to ? Allow unauthenticated logins? and YES to ? Do you want to enable 3rd party authentication providers in your identity pool?.
Choose Facebook and then provide your Facebook App ID that you saved earlier.
When configuration for Facebook sign-in is complete, the CLI displays a message confirming that you have configured local CLI metadata for this category. Run the following to update your changes in the cloud:
$ amplify push
You can now configure Facebook in your mobile app.
Note that the CLI allows you to select more than one identity provider for your app. You can also run amplify auth update to add an identity provider to an existing auth configuration.
Google with Cognito Identity
To federate Google as a user sign-in provider for AWS services called in your app, you will pass tokens to AWSMobileClient.getInstance().federatedSignIn(). You must first register your application with Google Sign-In in the Google Developers Console, and then configure this with Amazon Cognito Identity Pools.
To implement Google Sign-in into your Android app, you need two things:
- OAuth Web Client ID
- Android Client ID
These Client IDs are part of your Google Developers project. The Web Client ID will be used by Cognito Identity Pools to manage the OAuth flow between Cognito and Google on the server side. The Android Client ID will be used in your Android app to authorize the OAuth flow directly with Google allowing your users to authenticate with Google using their Google login credentials.
NOTE: The creation and configuration steps for creating OAuth Clients for Google Sign-In is constantly changing, always refer to the official setup instructions from Google.
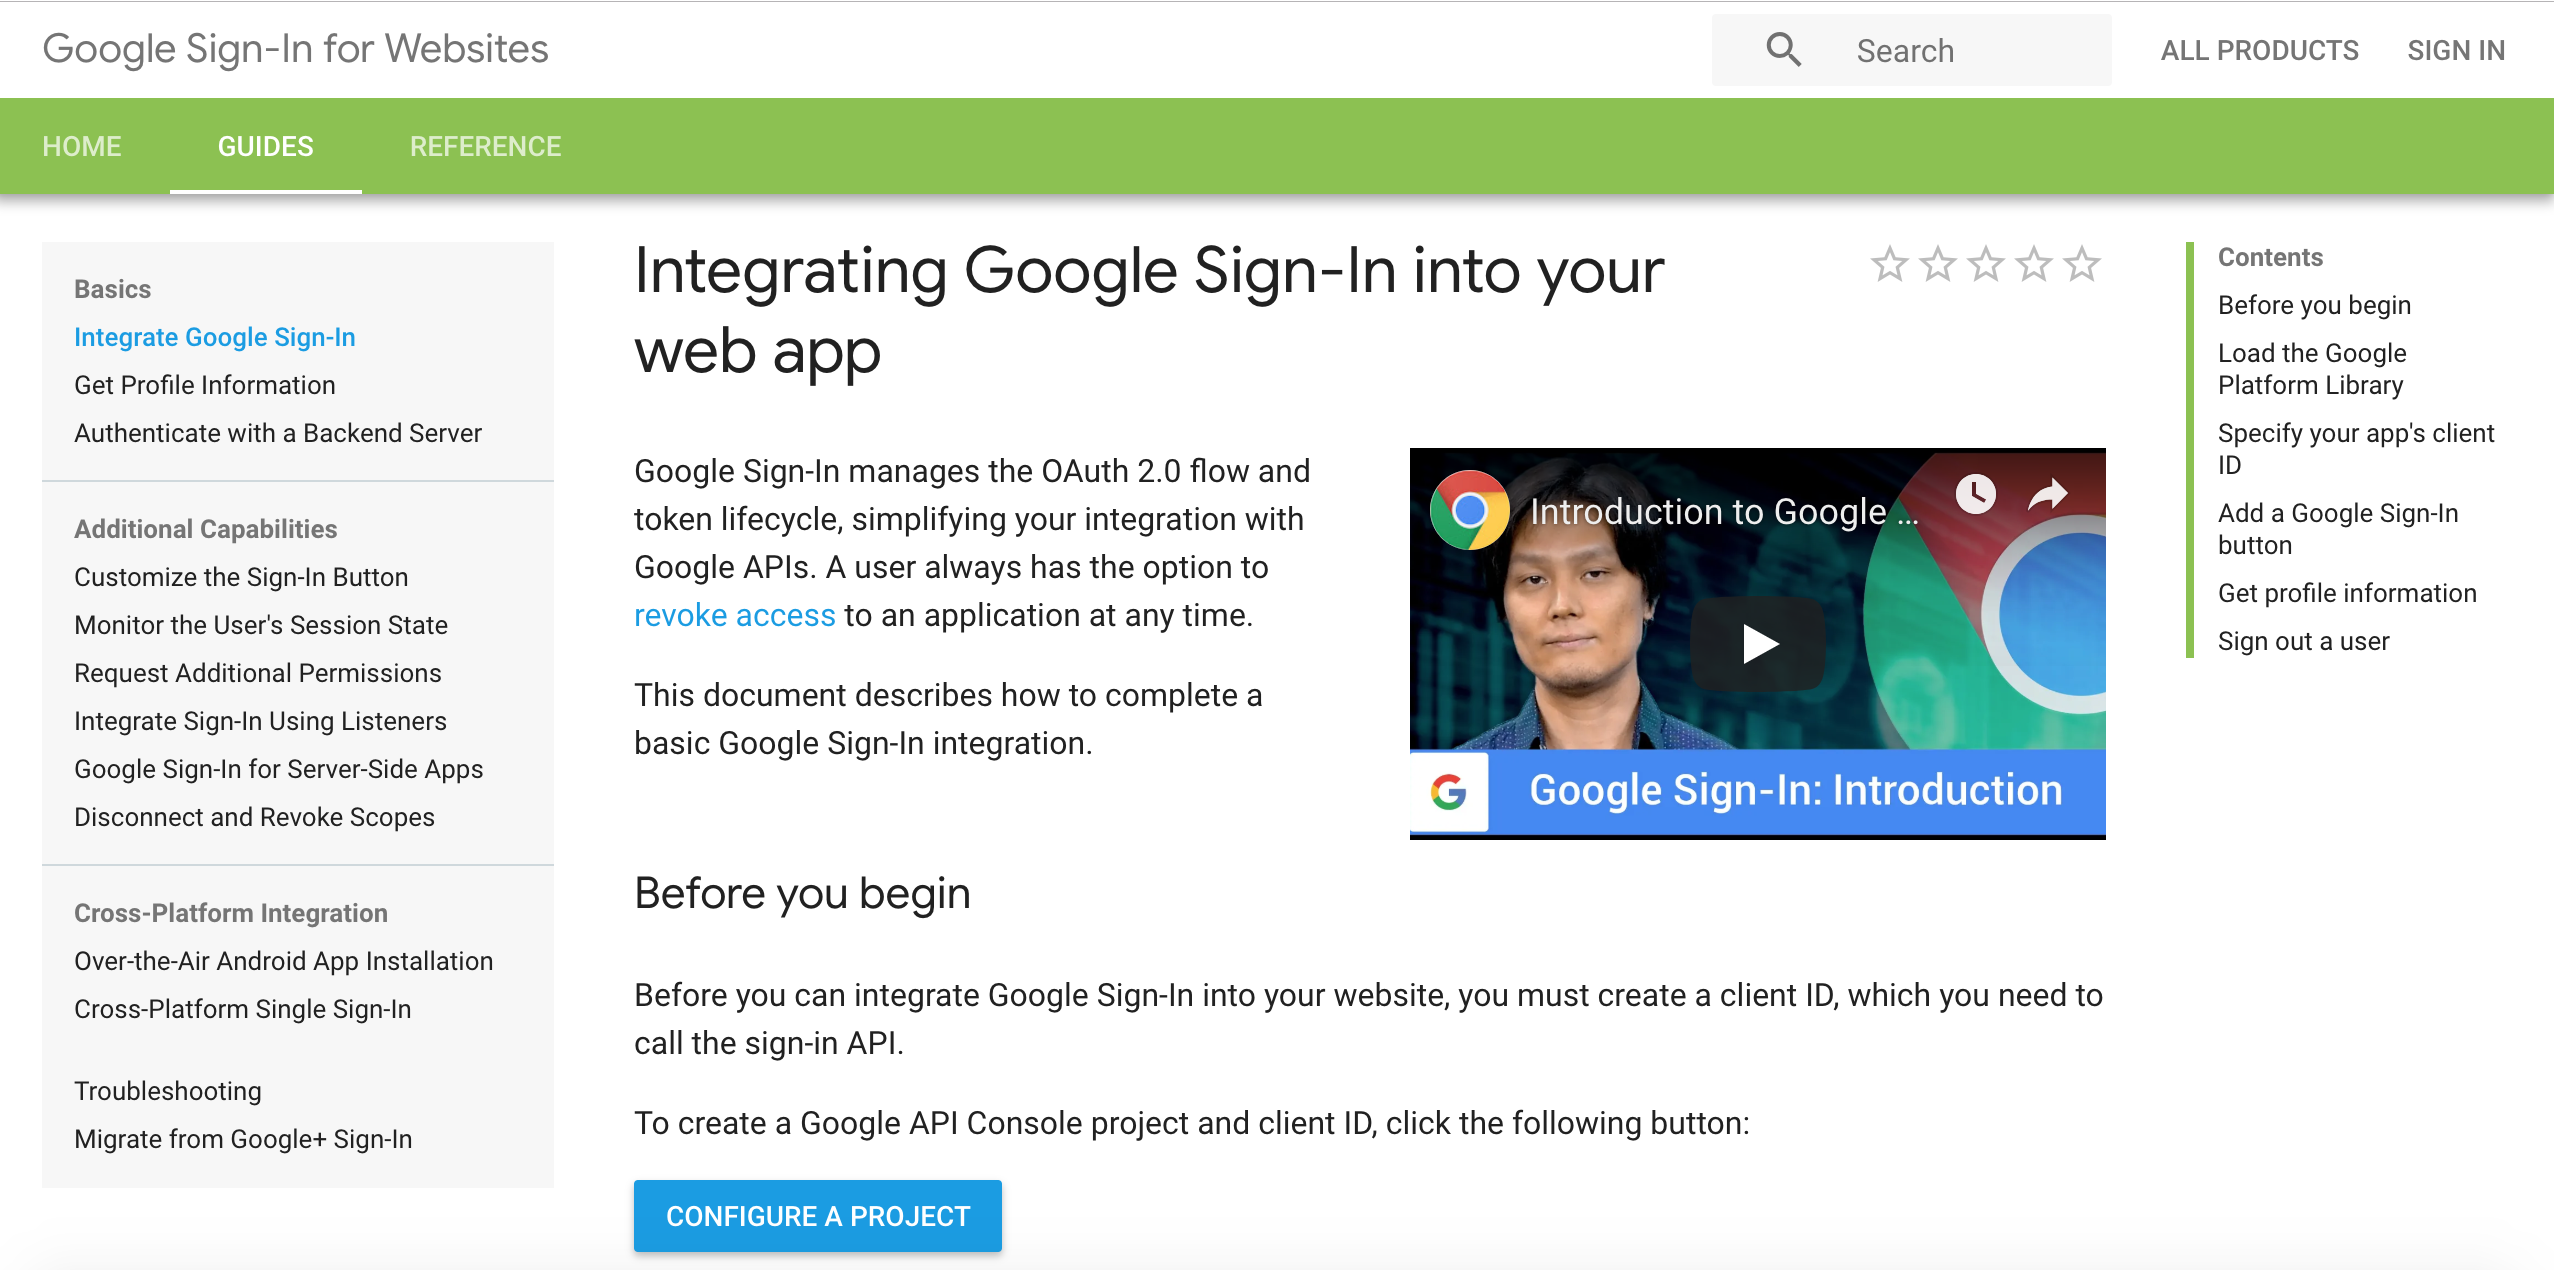
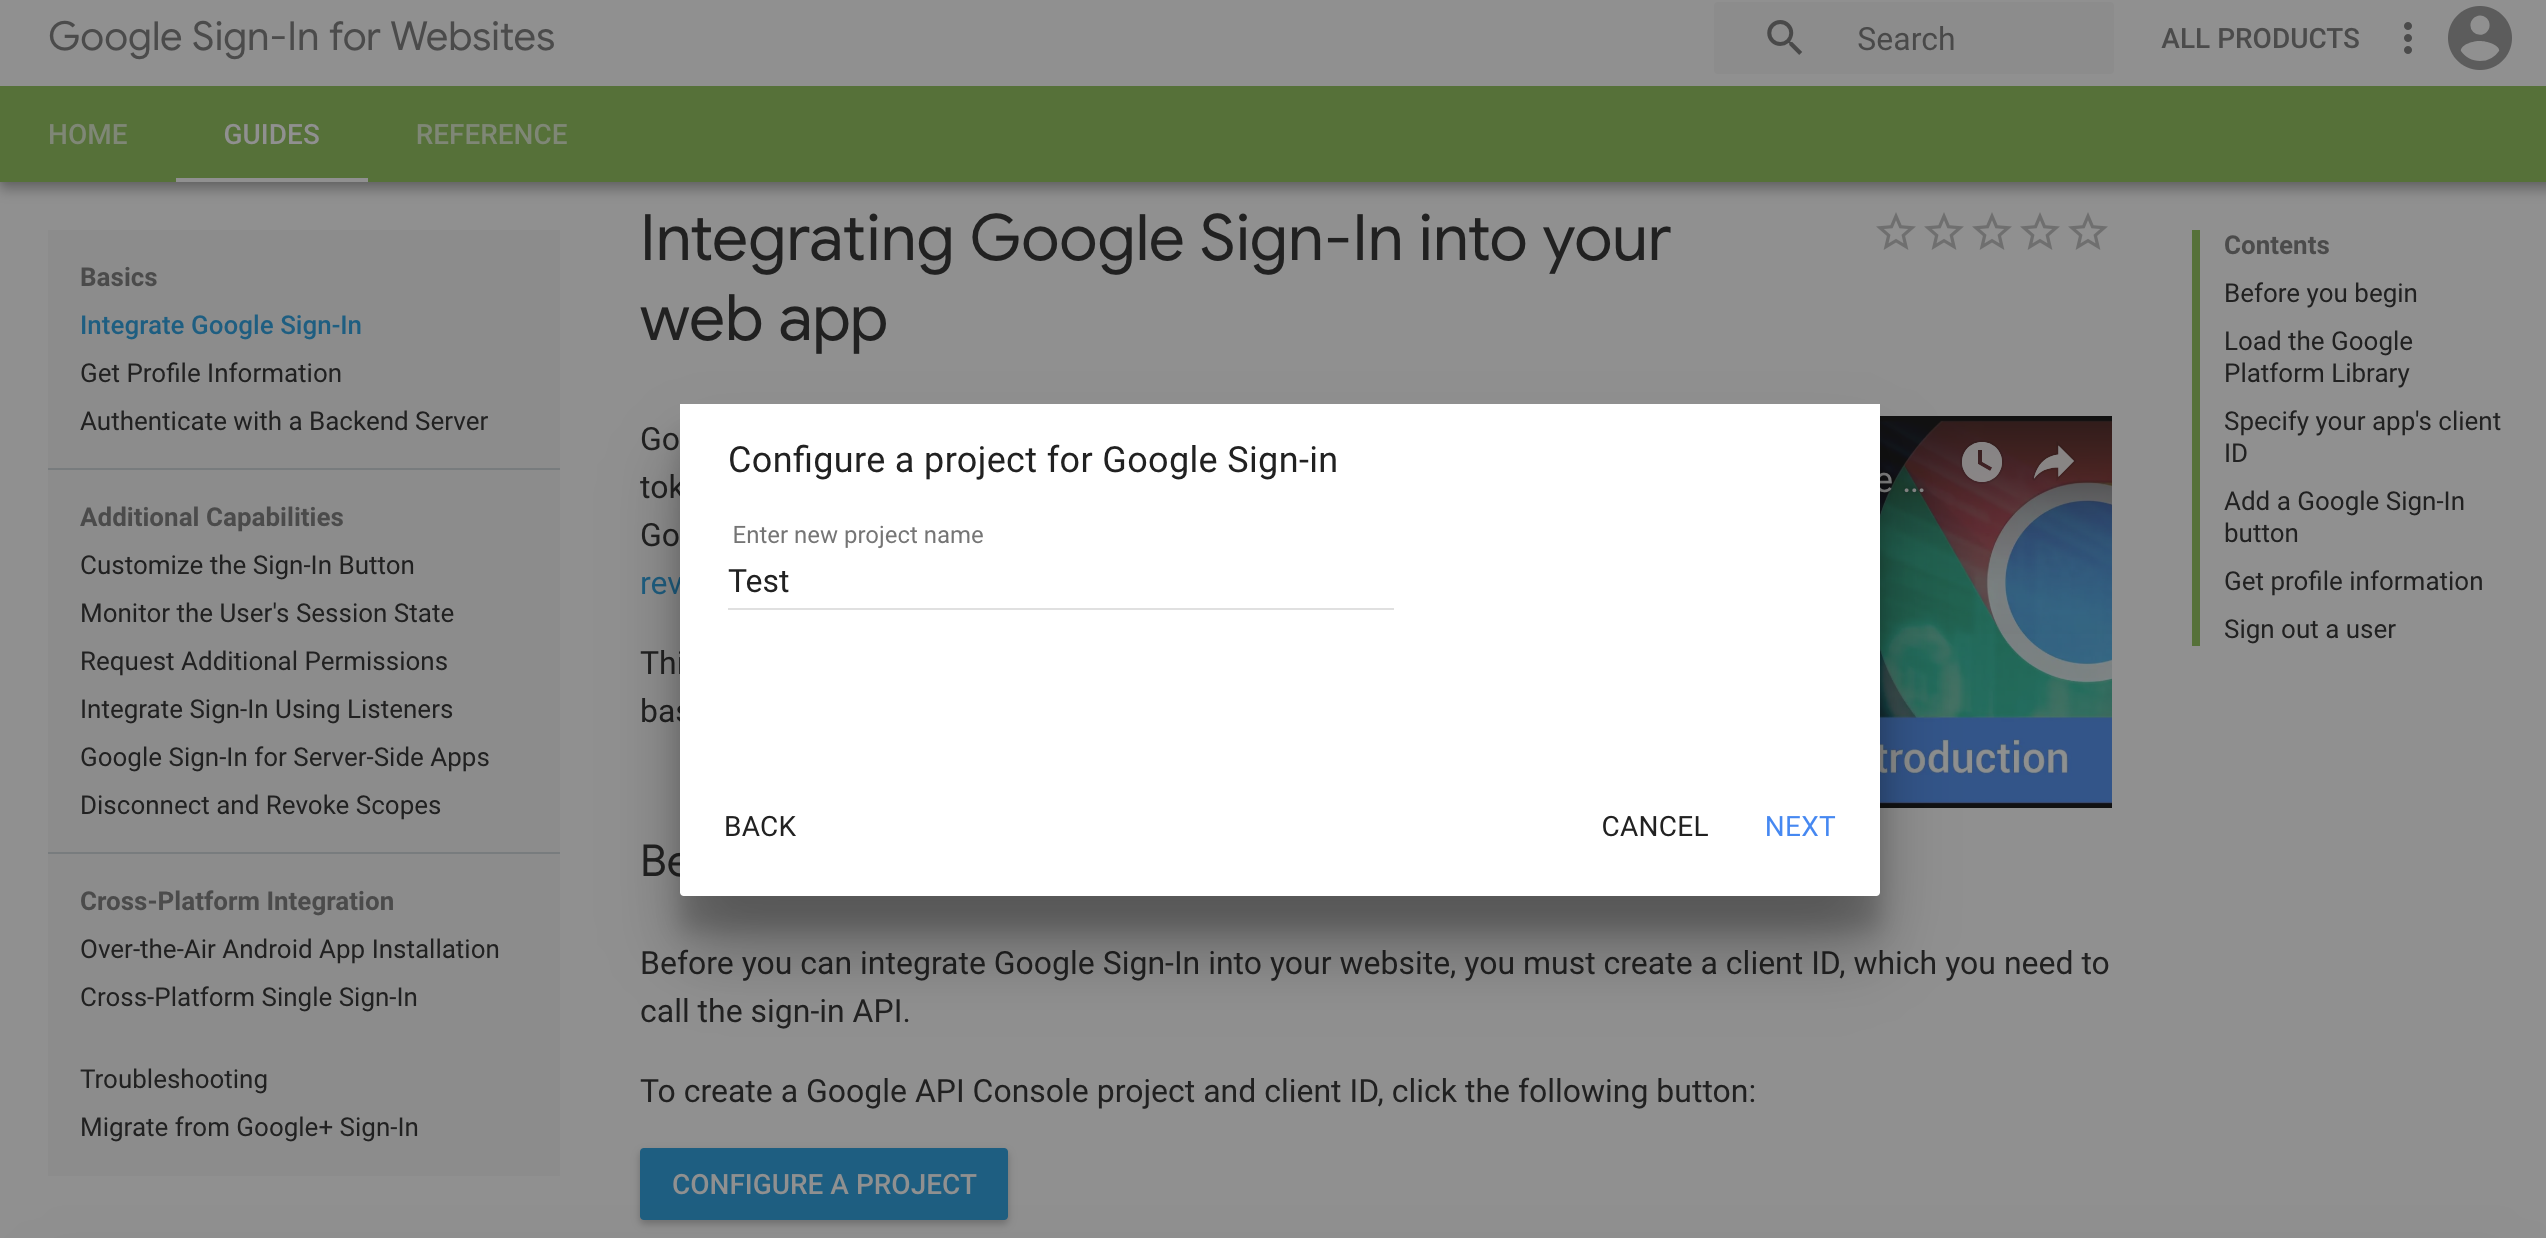
First, navigate to the Configure a Google API Console project and click Configure a Project to get an OAuth client ID. When you select an existing or new project, this will automatically create the “Web Client ID” for you in the background fulfilling requirement #1 above.
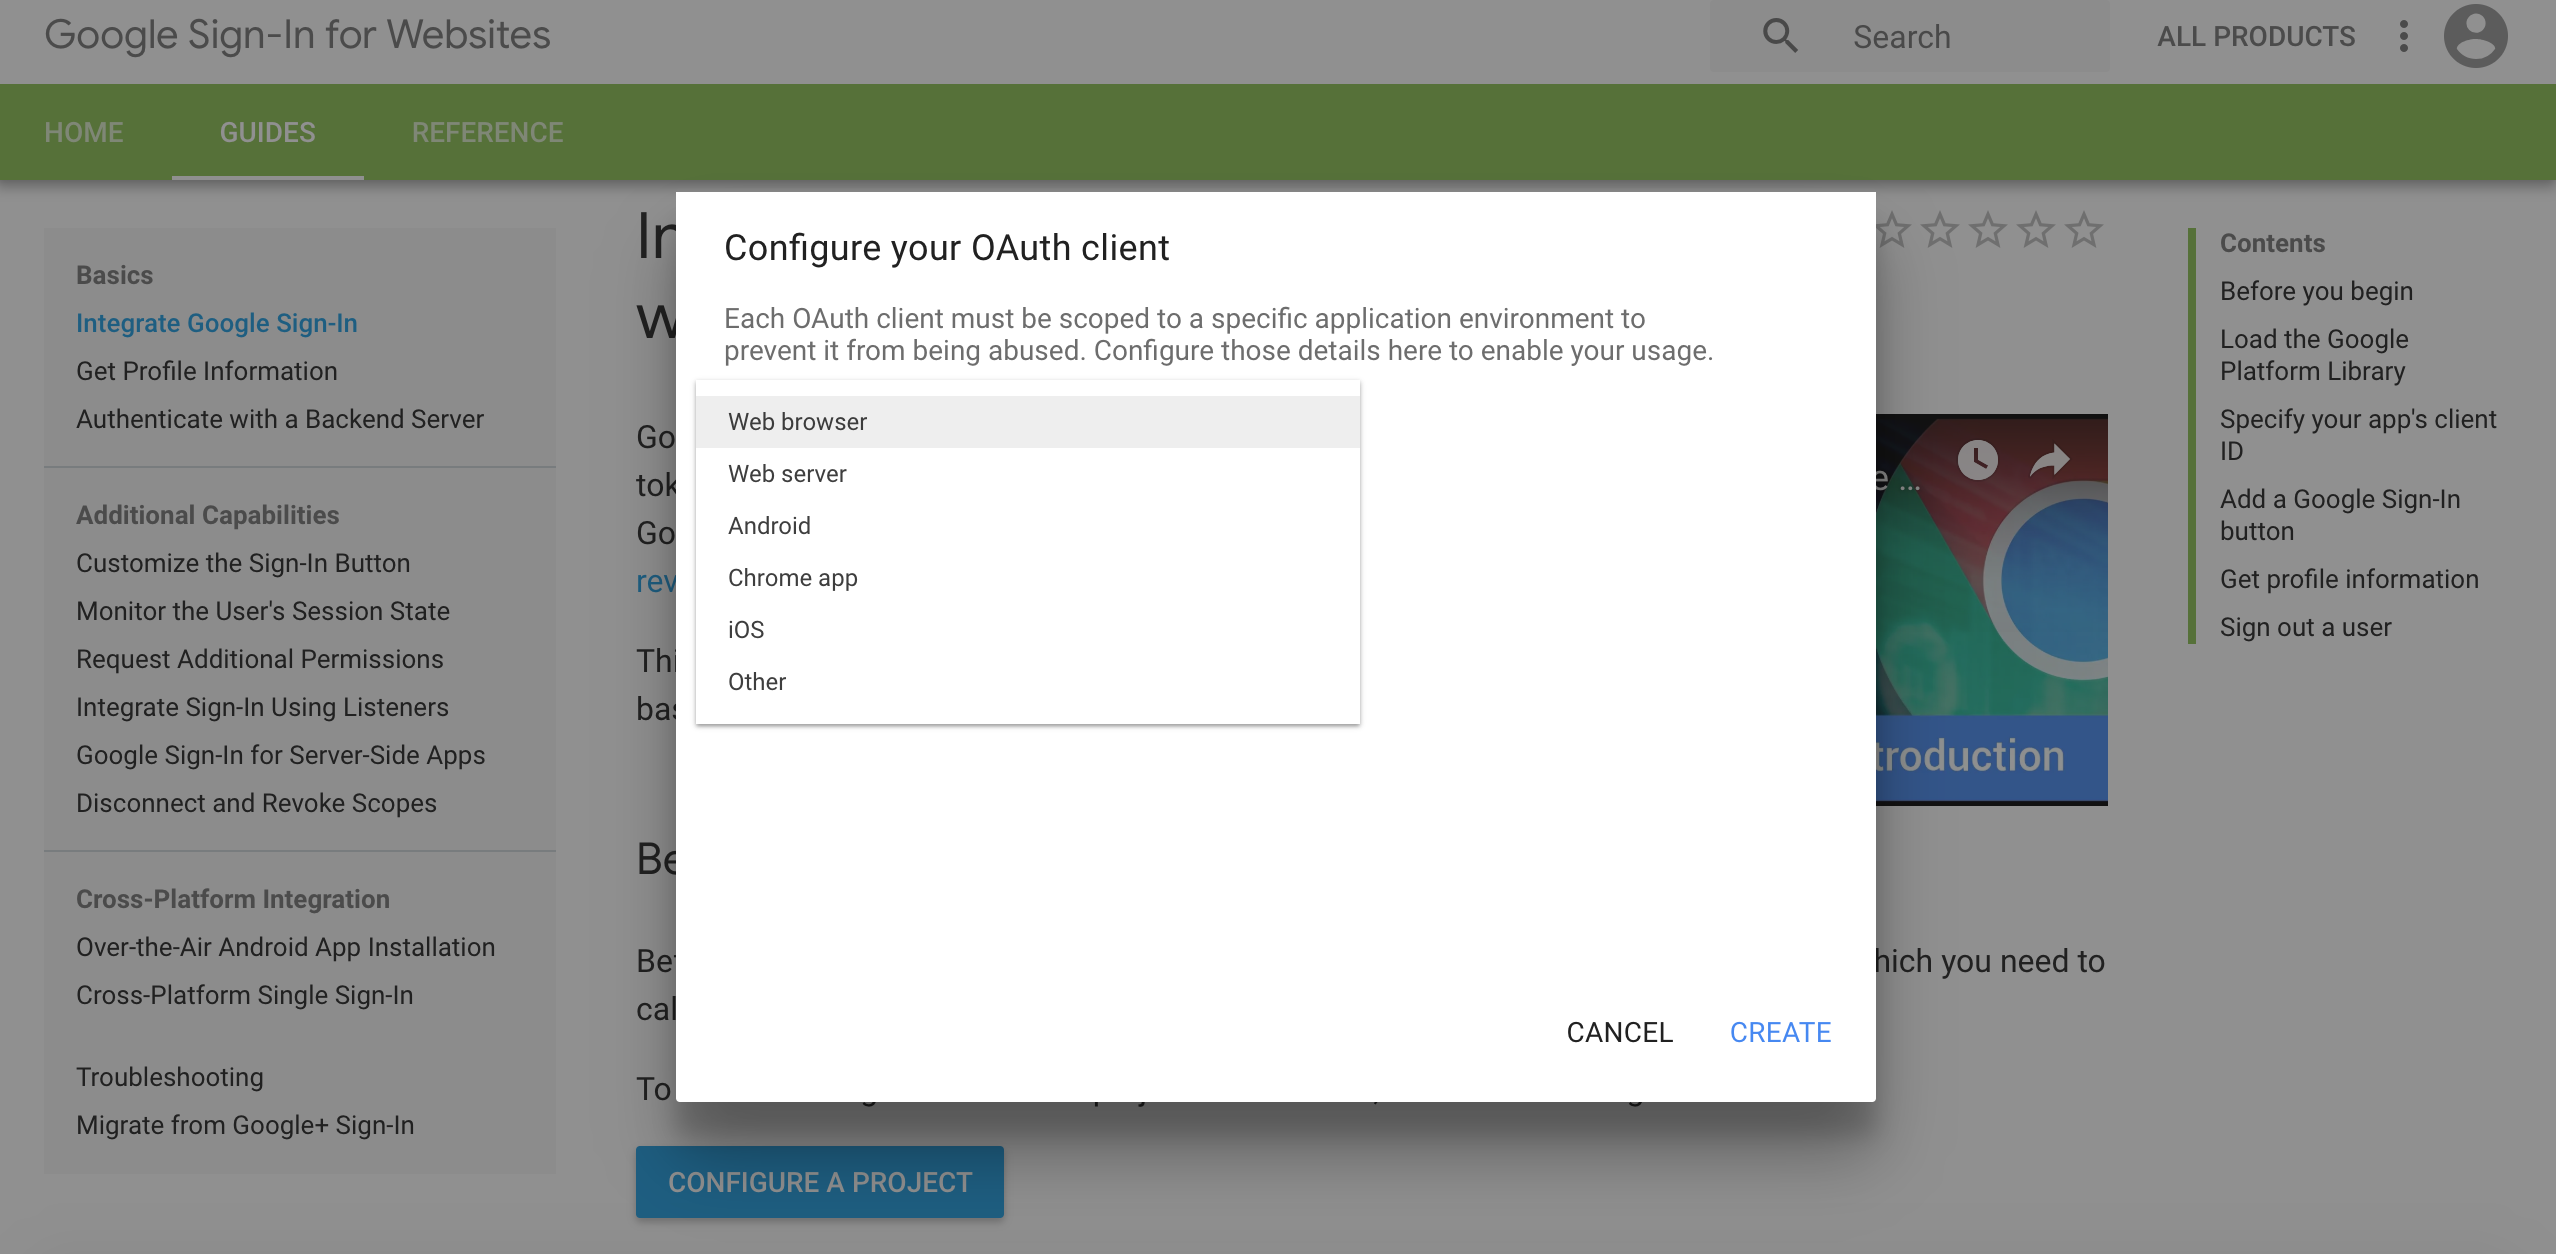
When prompted choose Android as the calling platform along with your Package name and certificate. Once created the Android Client ID will be created. Copy this as you will use it when configuring your backend with the Amplify CLI.
Next, obtain your OAuth Web Client ID from your project credentials navigating directly to the Credentials section of the Google Developer console. Select your project (you may need to click All) and under OAuth 2.0 client IDs copy the Client ID associated with the Web application type. Save it for the next step. The Android Client ID from earlier is listed here as well.

After completing the steps above, note both of the Google Client IDs for usage with the Amplify CLI in the next section.
Amplify CLI Configuration - Google
In a terminal window, navigate to the root of your app files and add the auth category to your app. The CLI prompts you for configuration parameters. Choose I will setup my own configuration and AWS IAM controls when prompted.
$ cd ./YOUR_PROJECT_FOLDER
$ amplify add auth              ##"amplify update auth" if already configured
❯ Manual Configuration
❯ User Sign-Up, Sign-In, connected with AWS IAM controls
Choose YES to ? Allow unauthenticated logins? and YES to ? Do you want to enable 3rd party authentication providers in your identity pool?.
Choose Google and then provide your Google Client IDs as appropriate. The CLI will ask you for both the Web Client ID and Android Client ID at the appropriate time. When configuration for Google sign-in is complete, the CLI displays a message confirming that you have configured local CLI metadata for this category. Run the following to update your changes in the cloud:
$ amplify push
You can now configure Google in your mobile app.
Note that the CLI allows you to select more than one identity provider for your app. You can also run amplify auth update to add an identity provider to an existing auth configuration.
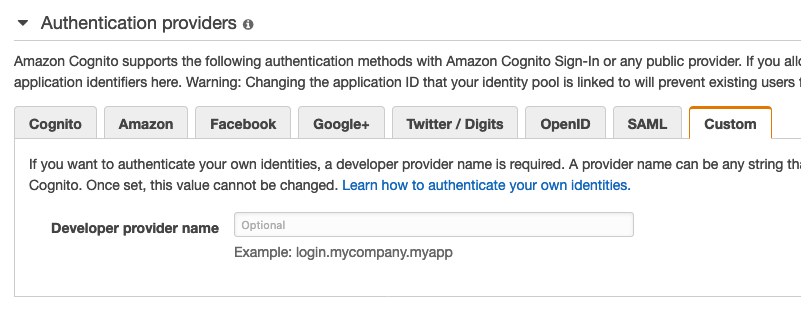
Developer Authenticated Identities with Cognito Identity
With developer authenticated identities, you can register and authenticate users via your own existing authentication process, while still using Amazon Cognito to access AWS resources. Using developer authenticated identities involves interaction between the end user device, your backend for authentication, and Amazon Cognito.
Begin by registering yourself with Cognito Identity in the console.
Then, once the end-user has authenticated with you, the app should receive a Cognito identity id and token confirming the sign-in with you from your servers.
The app will federate your sign-in with Cognito Identity to receive AWS credentials by making the following call.
FederatedSignInOptions options = FederatedSignInOptions.builder()
                                     .cognitoIdentityId(identityId)
                                     .build();

AWSMobileClient.getInstance().federatedSignIn(IdentityProvider.DEVELOPER.toString(), token, options, new Callback<UserStateDetails>() {
    @Override
    public void onResult(final UserStateDetails userStateDetails) {
        // Handle the result
    }

    @Override
    public void onError(Exception e) {
        Log.e(TAG, "federated sign-in error", e);
    }
});
Facebook Login in Your Mobile App
Use Android API level 23 or higher The
AWSMobileClientlibrary for Android sign-in provides the activity and view for presenting aSignInUIfor the sign-in providers you configure. This library depends on the Android SDK API Level 23 or higher.
Add the following permissions and Activity to your AndroidManifest.xml file:
<uses-permission android:name="android.permission.INTERNET"/>
<uses-permission android:name="android.permission.ACCESS_NETWORK_STATE"/>

<activity
    android:name="com.facebook.FacebookActivity"
    android:exported="true">
<intent-filter>
    <action android:name="android.intent.action.VIEW" />
    <category android:name="android.intent.category.DEFAULT" />
    <category android:name="android.intent.category.BROWSABLE" />
    <data android:scheme="@string/fb_login_protocol_scheme" />
</intent-filter>
</activity>

<meta-data android:name="com.facebook.sdk.ApplicationId" android:value="@string/facebook_app_id" />
Add the following dependencies to your app/build.gradle file:
dependencies {
    // Mobile Client for initializing the SDK
    implementation ('com.amazonaws:aws-android-sdk-mobile-client:2.16.+@aar') { transitive = true }

    // Facebook SignIn
    implementation 'com.android.support:support-v4:28.+'
    implementation ('com.amazonaws:aws-android-sdk-auth-facebook:2.16.+@aar') { transitive = true }

    // Sign in UI
    implementation 'com.android.support:appcompat-v7:28.+'
    implementation ('com.amazonaws:aws-android-sdk-auth-ui:2.16.+@aar') { transitive = true }
}
Note: When you add the dependencies, make sure that the major version of appcompat and support libraries match. In the previous example, we’re using version 28.
In strings.xml, add string definitions for your Facebook app ID and login protocol scheme. The value for app_id is your Facebook app ID and the value for logic_protocol_scheme should be your Facebook app ID prefixed with fb.
<string name="facebook_app_id">1231231231232123123</string>
<string name="fb_login_protocol_scheme">fb1231231231232123123</string>
Next, create an activity that will present your sign-in screen. In Android Studio, choose File > New > Activity > Basic Activity and type an activity name, such as AuthenticatorActivity. If you want to make this your starting activity, move the intent filter block containing .LAUNCHER to the AuthenticatorActivity in your app’s AndroidManifest.xml.
<activity android:name=".AuthenticatorActivity">
    <intent-filter>
        <action android:name="android.intent.action.MAIN" />
        <category android:name="android.intent.category.LAUNCHER" />
    </intent-filter>
</activity>
Finally, you can update the onCreate function of your AuthenticatorActivity to call AWSMobileClient.getInstance().federatedSignIn() as outlined earlier.
import android.app.Activity;
import android.os.Bundle;

import com.amazonaws.mobile.auth.ui.SignInUI;
import com.amazonaws.mobile.client.AWSMobileClient;
import com.amazonaws.mobile.client.AWSStartupHandler;
import com.amazonaws.mobile.client.AWSStartupResult;

public class AuthenticatorActivity extends Activity {
    @Override
    protected void onCreate(Bundle savedInstanceState) {
        super.onCreate(savedInstanceState);
        setContentView(R.layout.activity_authenticator);

        AWSMobileClient.getInstance().initialize(this, new Callback<UserStateDetails>() {
            @Override
            public void onResult(UserStateDetails userStateDetails) {
                Log.i("INIT", userStateDetails.getUserState());
                AWSMobileClient.getInstance().showSignIn(
                        AuthenticatorActivity.this,
                        SignInUIOptions.builder()
                                .nextActivity(NextActivity.class)
                                .build(),
                        new Callback<UserStateDetails>() {
                            @Override
                            public void onResult(UserStateDetails result) {
                                Log.d(TAG, "onResult: " + result.getUserState());
                            }

                            @Override
                            public void onError(Exception e) {
                                Log.e(TAG, "onError: ", e);
                            }
                        }
                );
            }

            @Override
            public void onError(Exception e) {
                Log.e("INIT", "Error during initialization", e);
            }
        });
    }
}
Google Login in Your Mobile App
Use Android API level 23 or higher The
AWSMobileClientlibrary for Android sign-in provides the activity and view for presenting aSignInUIfor the sign-in providers you configure. This library depends on the Android SDK API Level 23 or higher.
Add the following permissions to your AndroidManifest.xml file:
<uses-permission android:name="android.permission.INTERNET"/>
<uses-permission android:name="android.permission.ACCESS_NETWORK_STATE"/>
Add the following dependencies to your app/build.gradle file:
dependencies {
    // Mobile Client for initializing the SDK
    implementation ('com.amazonaws:aws-android-sdk-mobile-client:2.16.+@aar') { transitive = true }

    // Google SignIn
    implementation 'com.android.support:support-v4:28.+'
    implementation ('com.amazonaws:aws-android-sdk-auth-google:2.16.+@aar') { transitive = true }

    // Sign in UI Library
    implementation 'com.android.support:appcompat-v7:28.+'
    implementation ('com.amazonaws:aws-android-sdk-auth-ui:2.16.+@aar') { transitive = true }
}
Note: When you add the dependencies, make sure that the major version of appcompat and support libraries match. In the previous example, we’re using version 28.
Create an activity that will present your sign-in screen. In Android Studio, choose File > New > Activity > Basic Activity and type an activity name, such as AuthenticatorActivity. If you want to make this your starting activity, move the intent filter block containing .LAUNCHER to the AuthenticatorActivity in your app’s AndroidManifest.xml.
<activity android:name=".AuthenticatorActivity">
    <intent-filter>
        <action android:name="android.intent.action.MAIN" />
        <category android:name="android.intent.category.LAUNCHER" />
    </intent-filter>
</activity>
Finally, you can update the onCreate function of your AuthenticatorActivity to call AWSMobileClient.getInstance().federatedSignIn() as outlined earlier.
import android.app.Activity;
import android.os.Bundle;

import com.amazonaws.mobile.auth.ui.SignInUI;
import com.amazonaws.mobile.client.AWSMobileClient;
import com.amazonaws.mobile.client.AWSStartupHandler;
import com.amazonaws.mobile.client.AWSStartupResult;

public class AuthenticatorActivity extends Activity {
    @Override
    protected void onCreate(Bundle savedInstanceState) {
        super.onCreate(savedInstanceState);
        setContentView(R.layout.activity_authenticator);

        AWSMobileClient.getInstance().initialize(this, new Callback<UserStateDetails>() {
            @Override
            public void onResult(UserStateDetails userStateDetails) {
                Log.i("INIT", userStateDetails.getUserState());
                AWSMobileClient.getInstance().showSignIn(
                        AuthenticatorActivity.this,
                        SignInUIOptions.builder()
                                .nextActivity(NextActivity.class)
                                .build(),
                        new Callback<UserStateDetails>() {
                            @Override
                            public void onResult(UserStateDetails result) {
                                Log.d(TAG, "onResult: " + result.getUserState());
                            }

                            @Override
                            public void onError(Exception e) {
                                Log.e(TAG, "onError: ", e);
                            }
                        }
                );
            }

            @Override
            public void onError(Exception e) {
                Log.e("INIT", "Error during initialization", e);
            }
        });
    }
}
Using Hosted UI for Authentication
Using Amazon Cognito Hosted UI
Amazon Cognito provides a customizable user experience via the Hosted UI. The Hosted UI is an OAuth 2.0 flow that allows you to launch a login screen without embedding an SDK for Cognito or a social provider into your application. The Hosted UI allows end-users to sign-in directly to your user pool through Facebook, Amazon, and Google, as well as through OpenID Connect (OIDC) and SAML identity providers. To learn more about Amazon Cognito Hosted UI, please visit Amazon Cognito Developer Guide.
Automated Setup with CLI
You need to configure your identity providers(Google, Facebook or Login with Amazon) which you would like to use.
Setting Up OAuth With Facebook
- Create a developer account with Facebook.
- Sign In with your Facebook credentials.
- From the My Apps menu, choose Add New App.
- Give your Facebook app a name and choose Create App ID.
- On the left navigation bar, choose Settings and then Basic.
- Note the App ID and the App Secret. You will use them in the next section in the CLI flow.
Setting up OAuth with Google
- Go to the Google developer console.
- On the left navigation bar, choose Credentials.
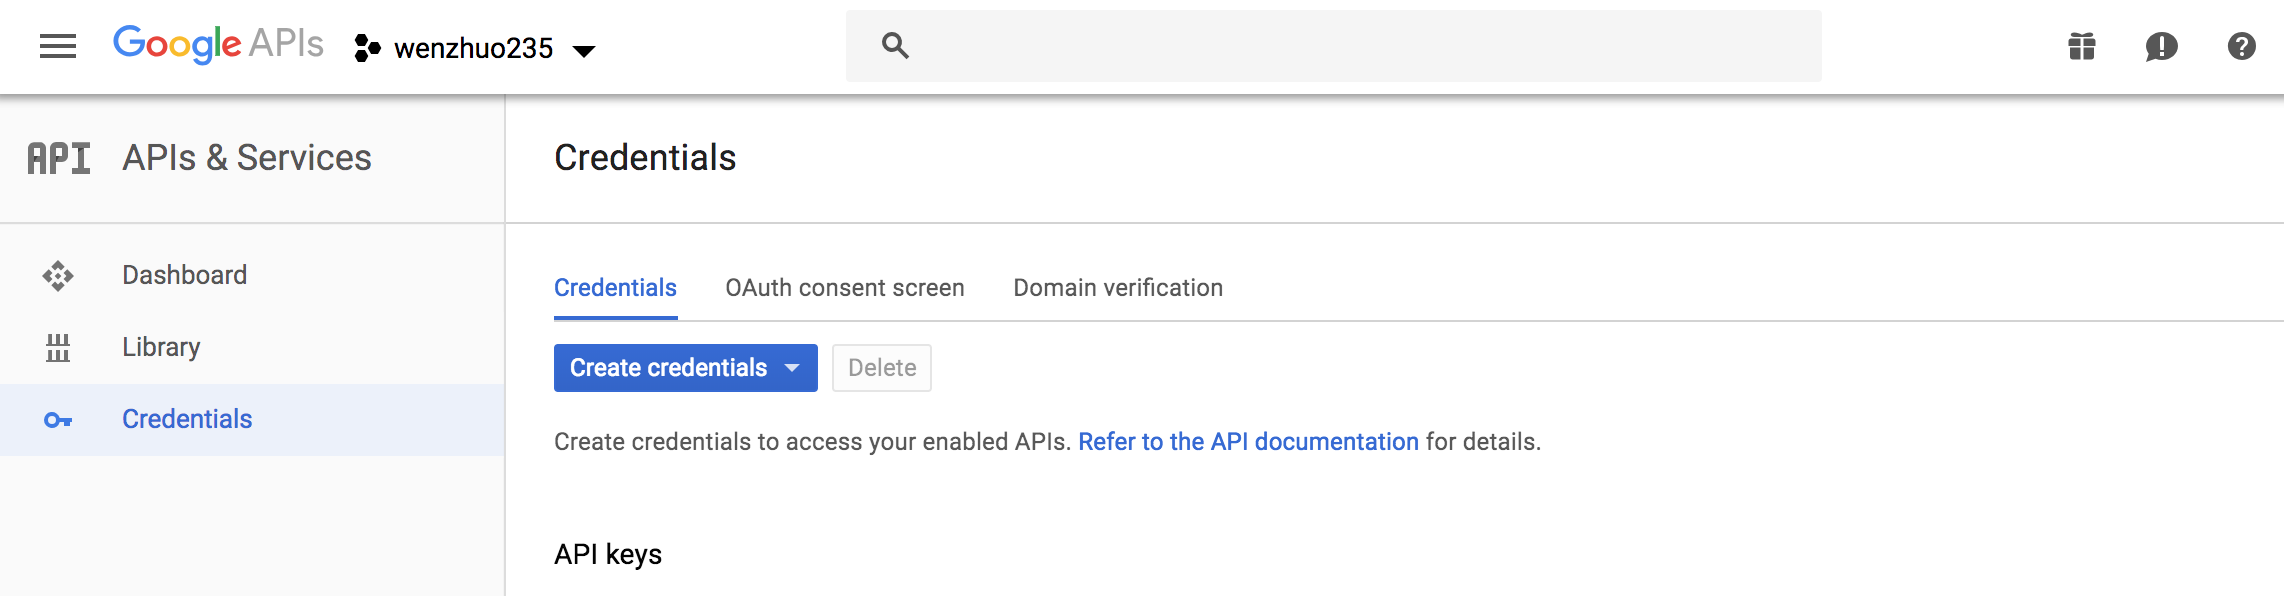
- Create your OAuth2.0 credentials by choosing OAuth client ID from the Create credentials drop-down list.
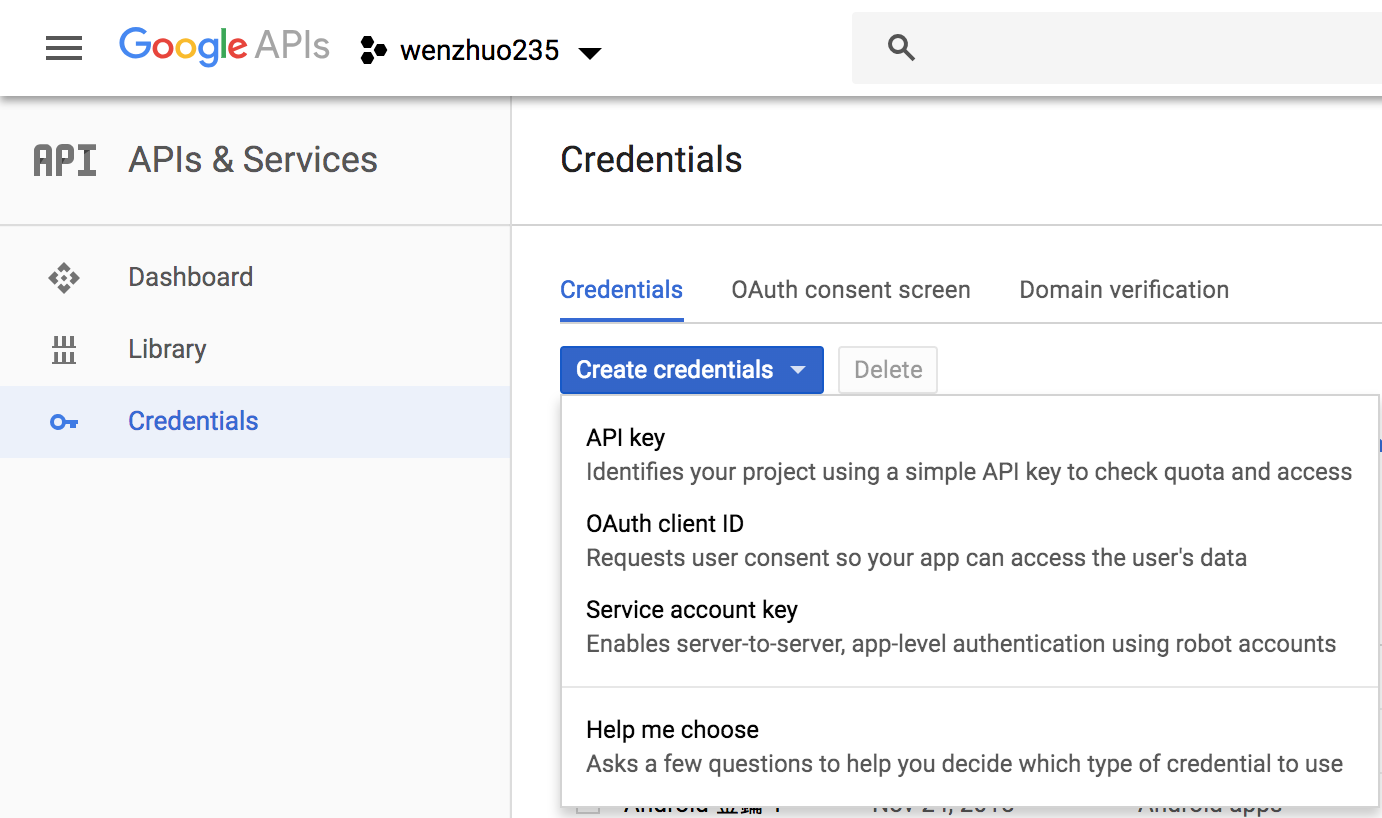 .
. - Choose Web application.
- Click Create.
- Note the OAuth client ID and client secret. You will need them for the next section in the CLI flow.
- Choose OK.
Setting up OAuth with Login with Amazon
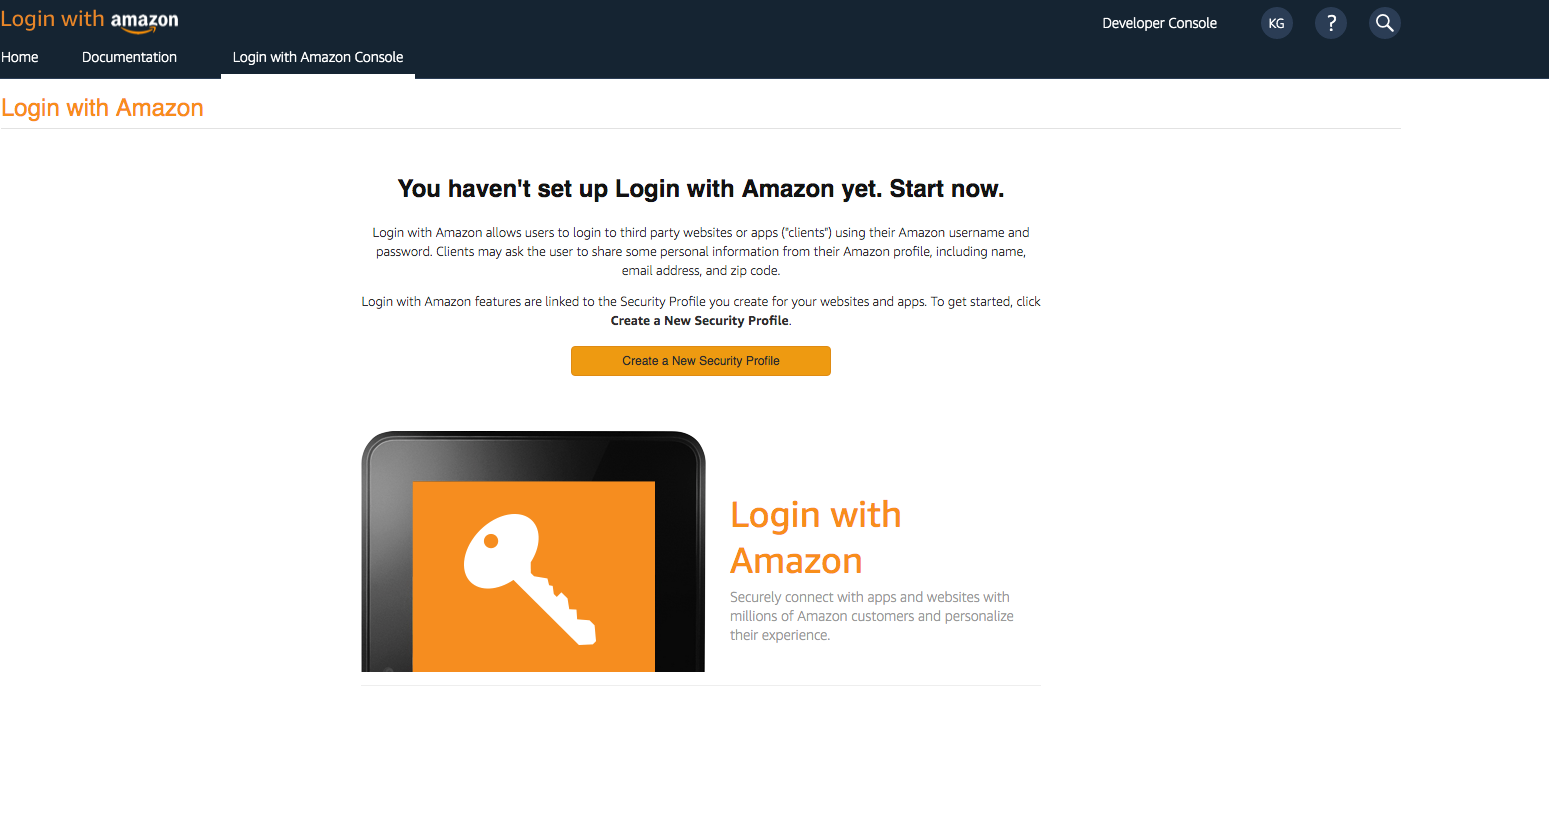
- Create a developer account with Amazon.
- Sign in with your Amazon credentials.
- You need to create an Amazon security profile to receive the Amazon client ID and client secret. Choose Create a Security Profile.
- Type in a Security Profile Name, a Security Profile Description, and a Consent Privacy Notice URL.
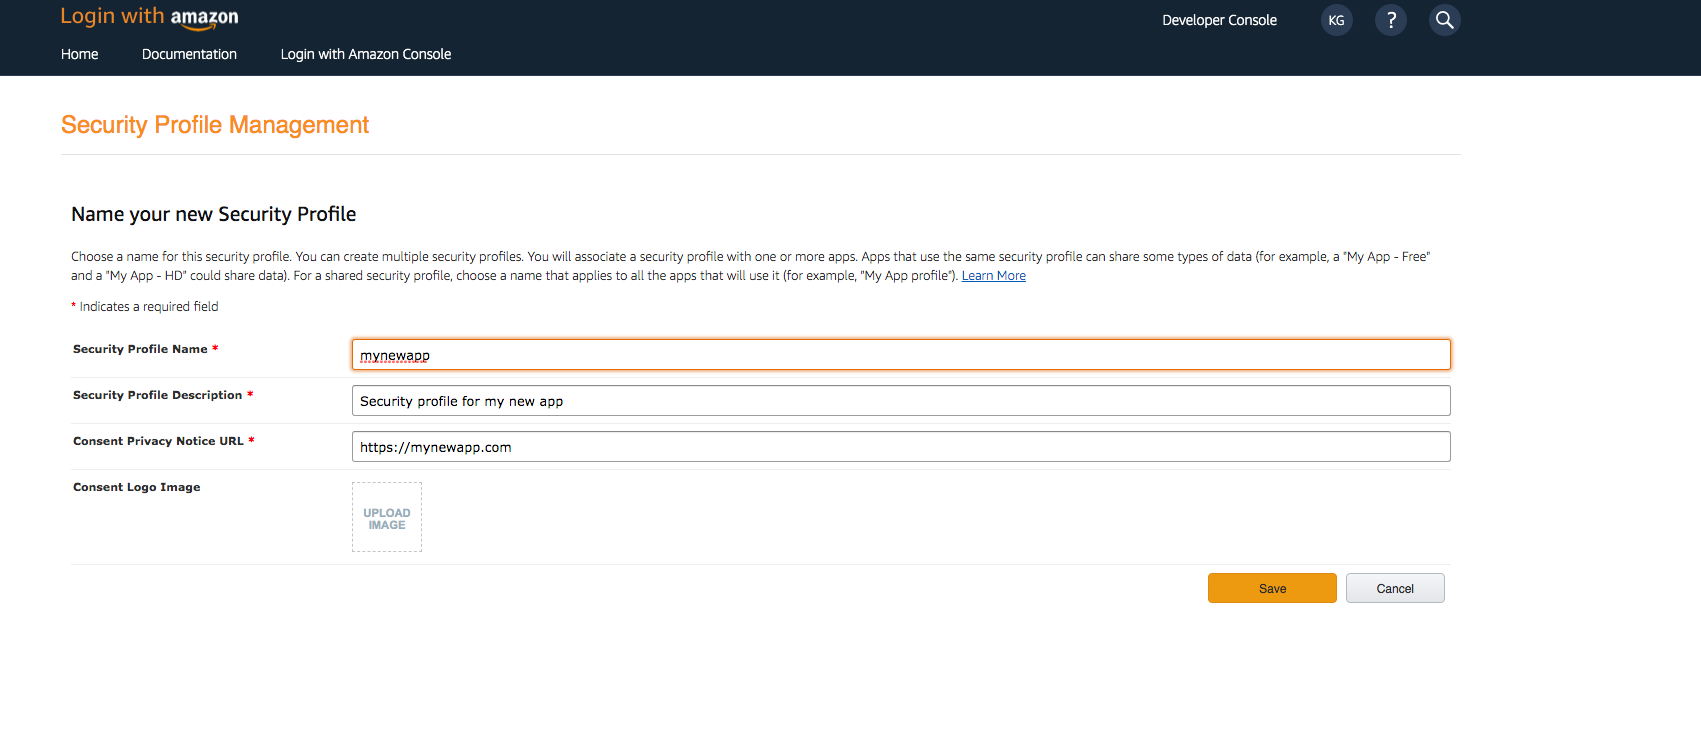
- Choose Save.
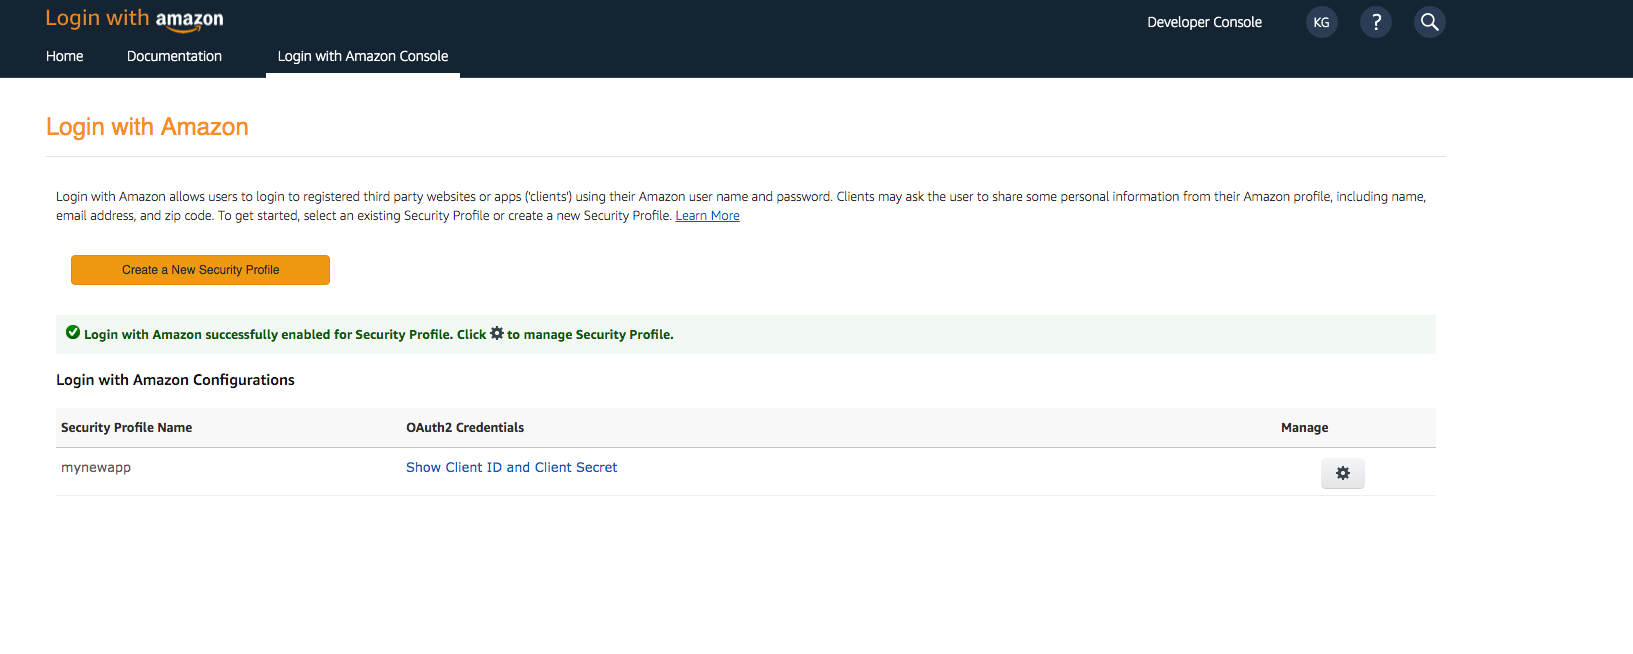
- Choose Client ID and Client Secret to show the client ID and secret. You will need them for the next section in the CLI flow.
Run the following command in your project’s root folder:
$ amplify add auth ##"amplify update auth" if already configured
Select Default configuration with Social Provider (Federation):
Do you want to use the default authentication and security configuration?
  Default configuration
❯ Default configuration with Social Provider (Federation)
  Manual configuration
  I want to learn more.
After going through the CLI flow, run the following command to deploy the configured resources to the cloud:
$ amplify push
After running the amplify push command, you will find a domain-name provisioned by the CLI for the hosted UI as an output in the terminal. You can find that information anytime later using the amplify status command.
Note: your user pool domain is something like: domain_prefix-<env-name>.auth.<region>.amazoncognito.com
{: .callout .callout–info}. If you’ve setup federation through third party providers, you would need to update the providers with the CLI provisioned domain-name.
Setting up Hosted UI Domain With Facebook
- Sign In with your Facebook credentials.
- From the My Apps menu, choose Your App.
- On the left navigation bar, choose Settings and then Basic.
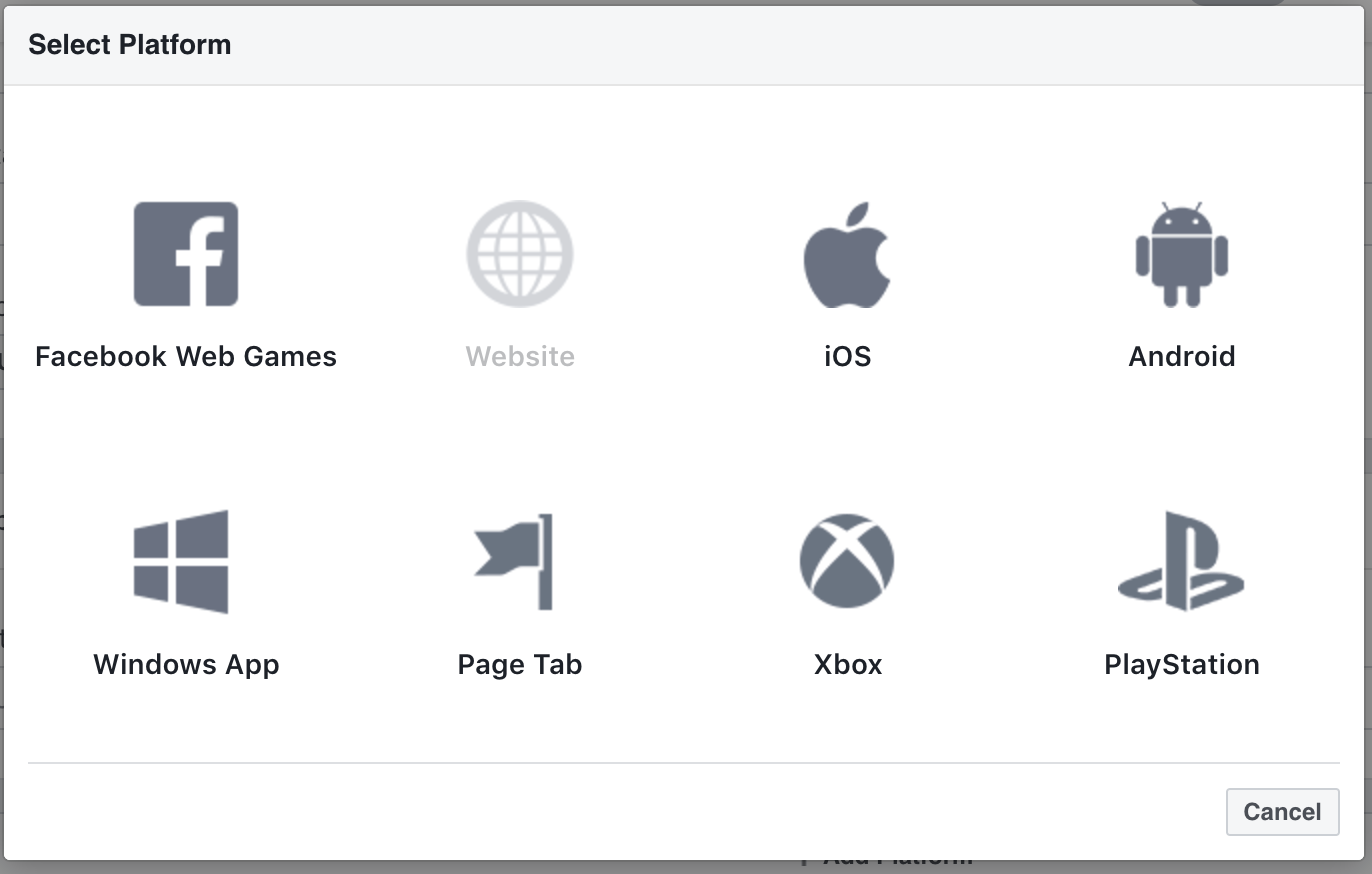
- Choose + Add Platform from the bottom of the page and then choose Website.
-
Under Website, type your user pool domain with the /oauth2/idpresponse endpoint into Site URL
https://<your-user-pool-domain>/oauth2/idpresponse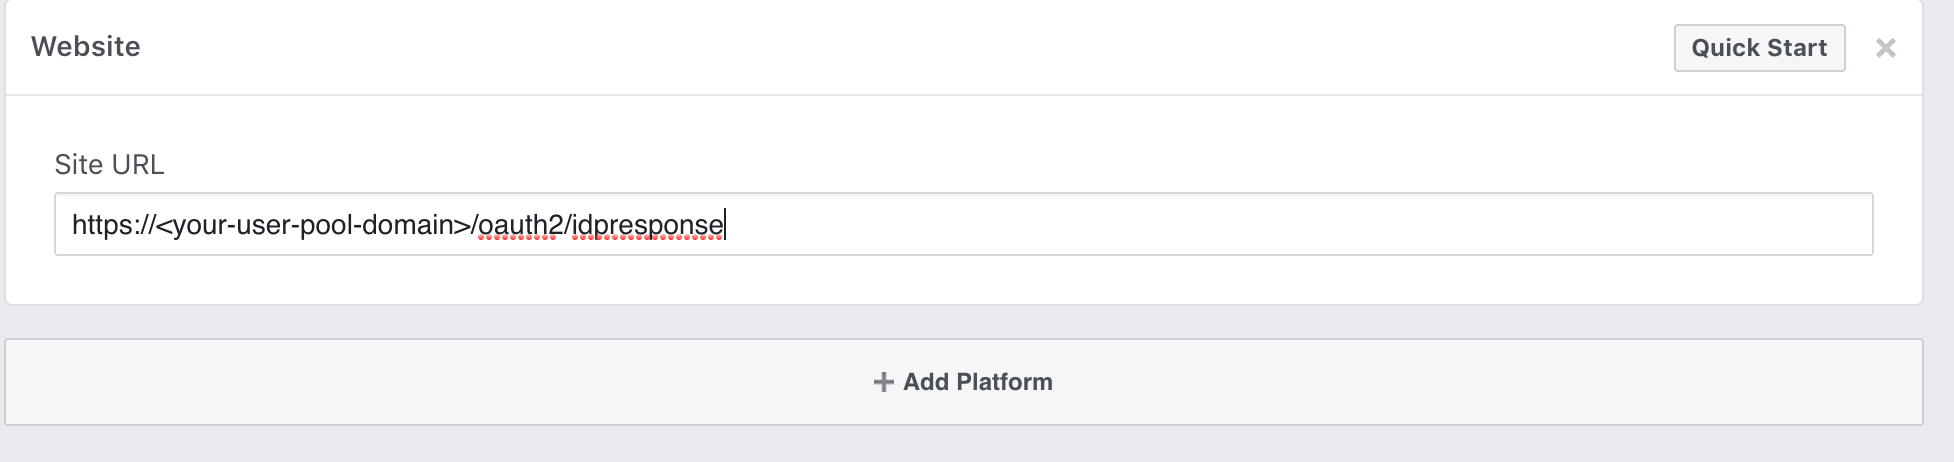
- Save changes.
-
Type your user pool domain into App Domains:
https://<your-user-pool-domain>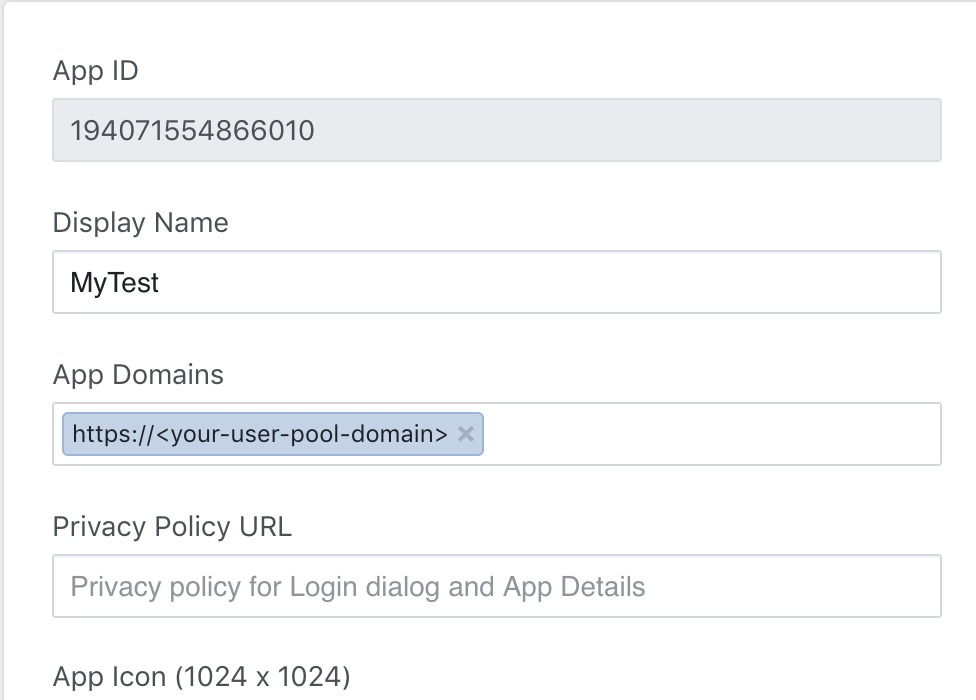
- Save changes.
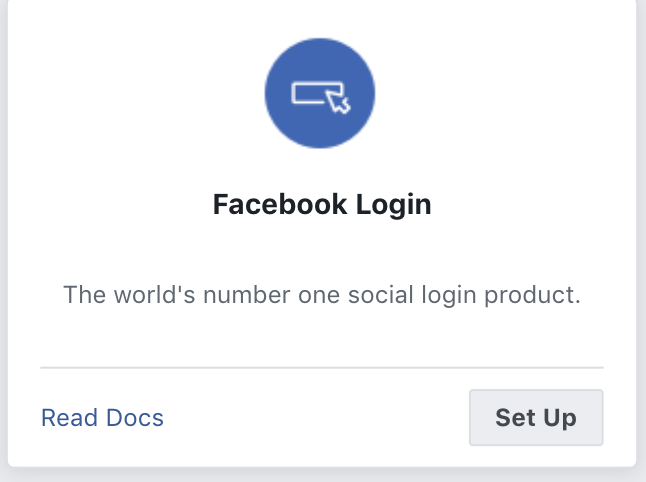
- From the navigation bar choose Products and then Set up from Facebook Login.
- From the navigation bar choose Facebook Login and then Settings.
-
Type your redirect URL into Valid OAuth Redirect URIs. It will consist of your user pool domain with the /oauth2/idpresponse endpoint.
https://<your-user-pool-domain>/oauth2/idpresponse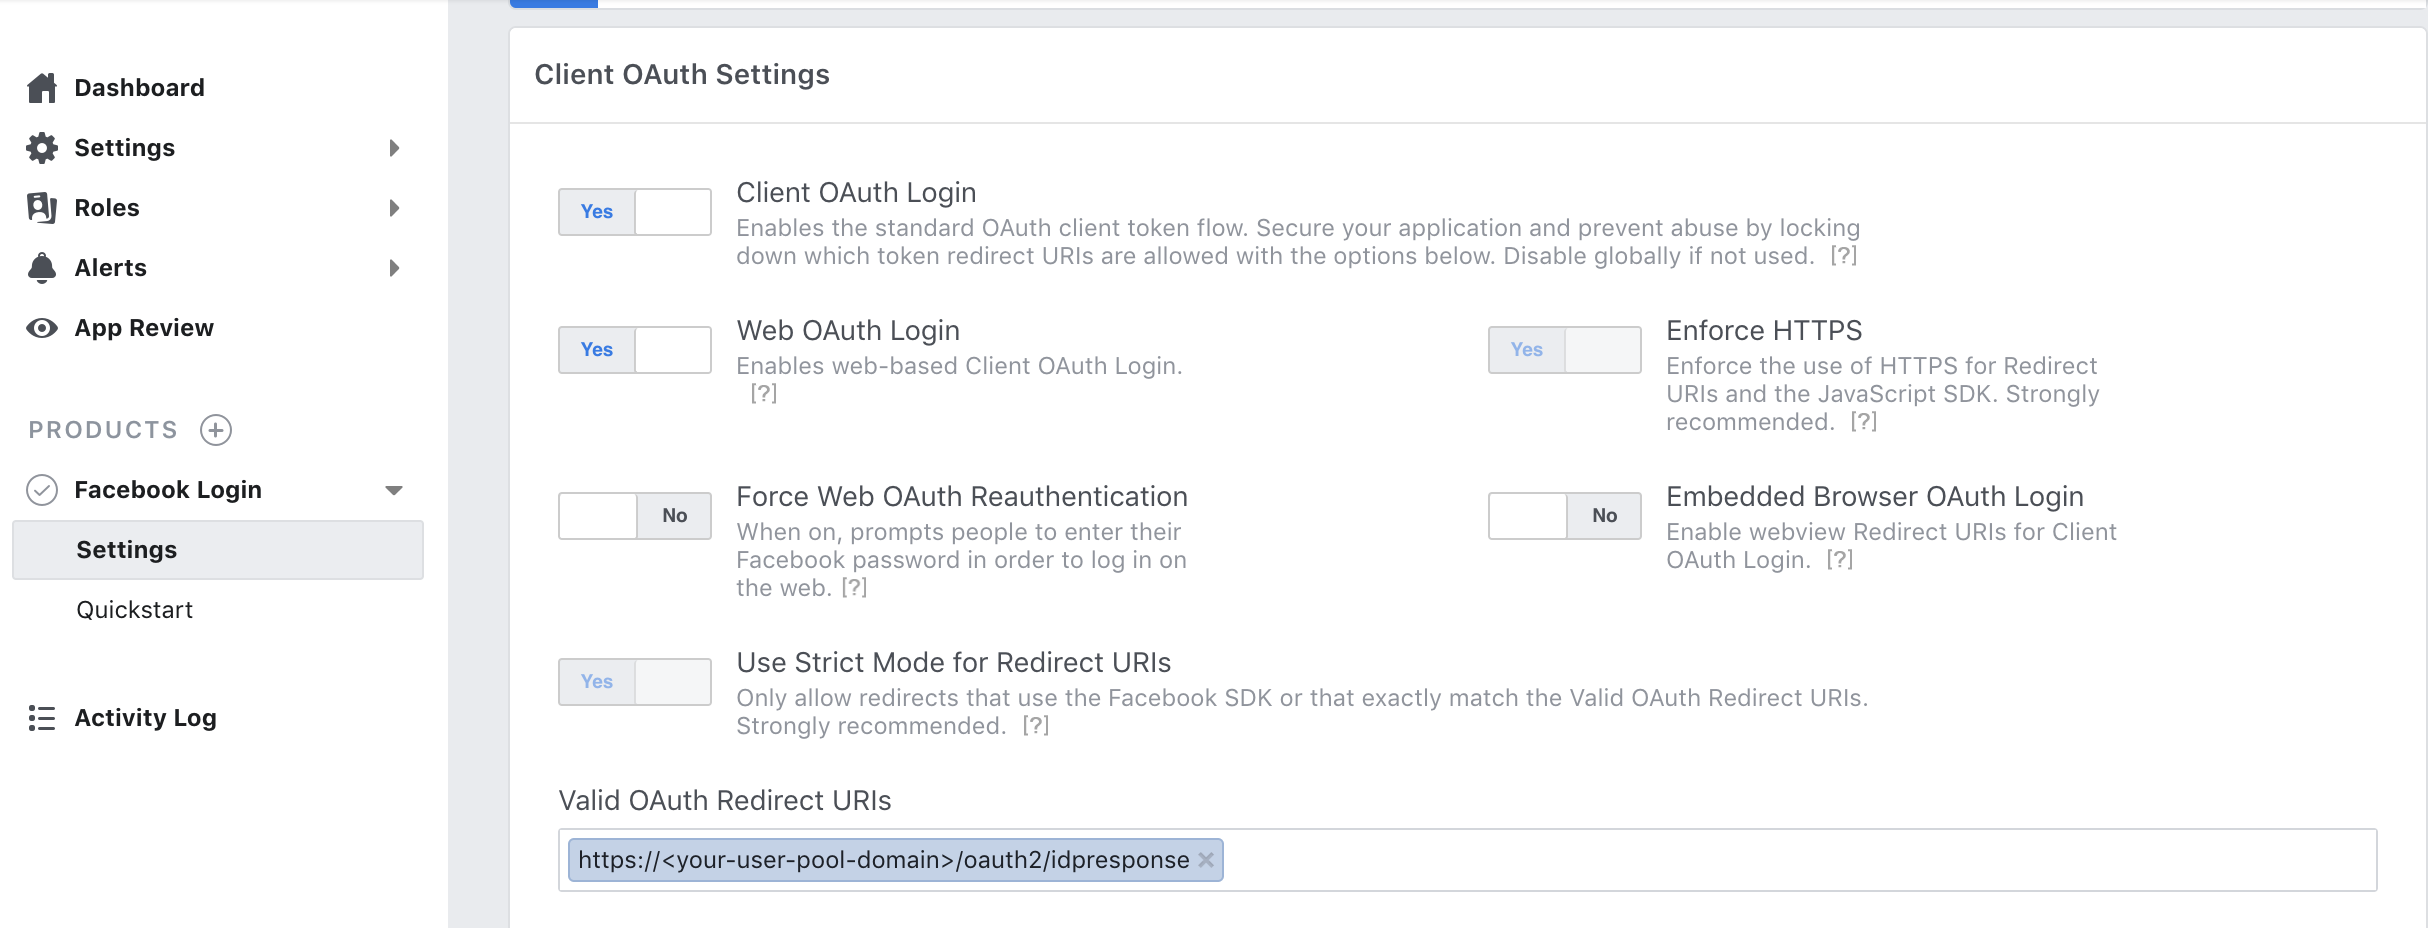
- Save changes.
Setting up Hosted UI Domain with Google
- Go to Google Developer Console
- Click CONFIGURURE A PROJECT
- Type in a project name and choose NEXT.
- Type in your product name and choose NEXT.
- Choose Web browser from the Where are you calling from? drop-down list.
- Click CREATE. You will NOT use the Client ID and CLient Secret from this step.
- Click Done.
- Go to the Google developer console.
- On the left navigation bar, choose Credentials.
- Select the client you created in the first step and choose the edit option.
- Type your user pool domain into Authorized Javascript origins.
-
Type your user pool domain with the
/oauth2/idpresponseendpoint into Authorized Redirect URIs.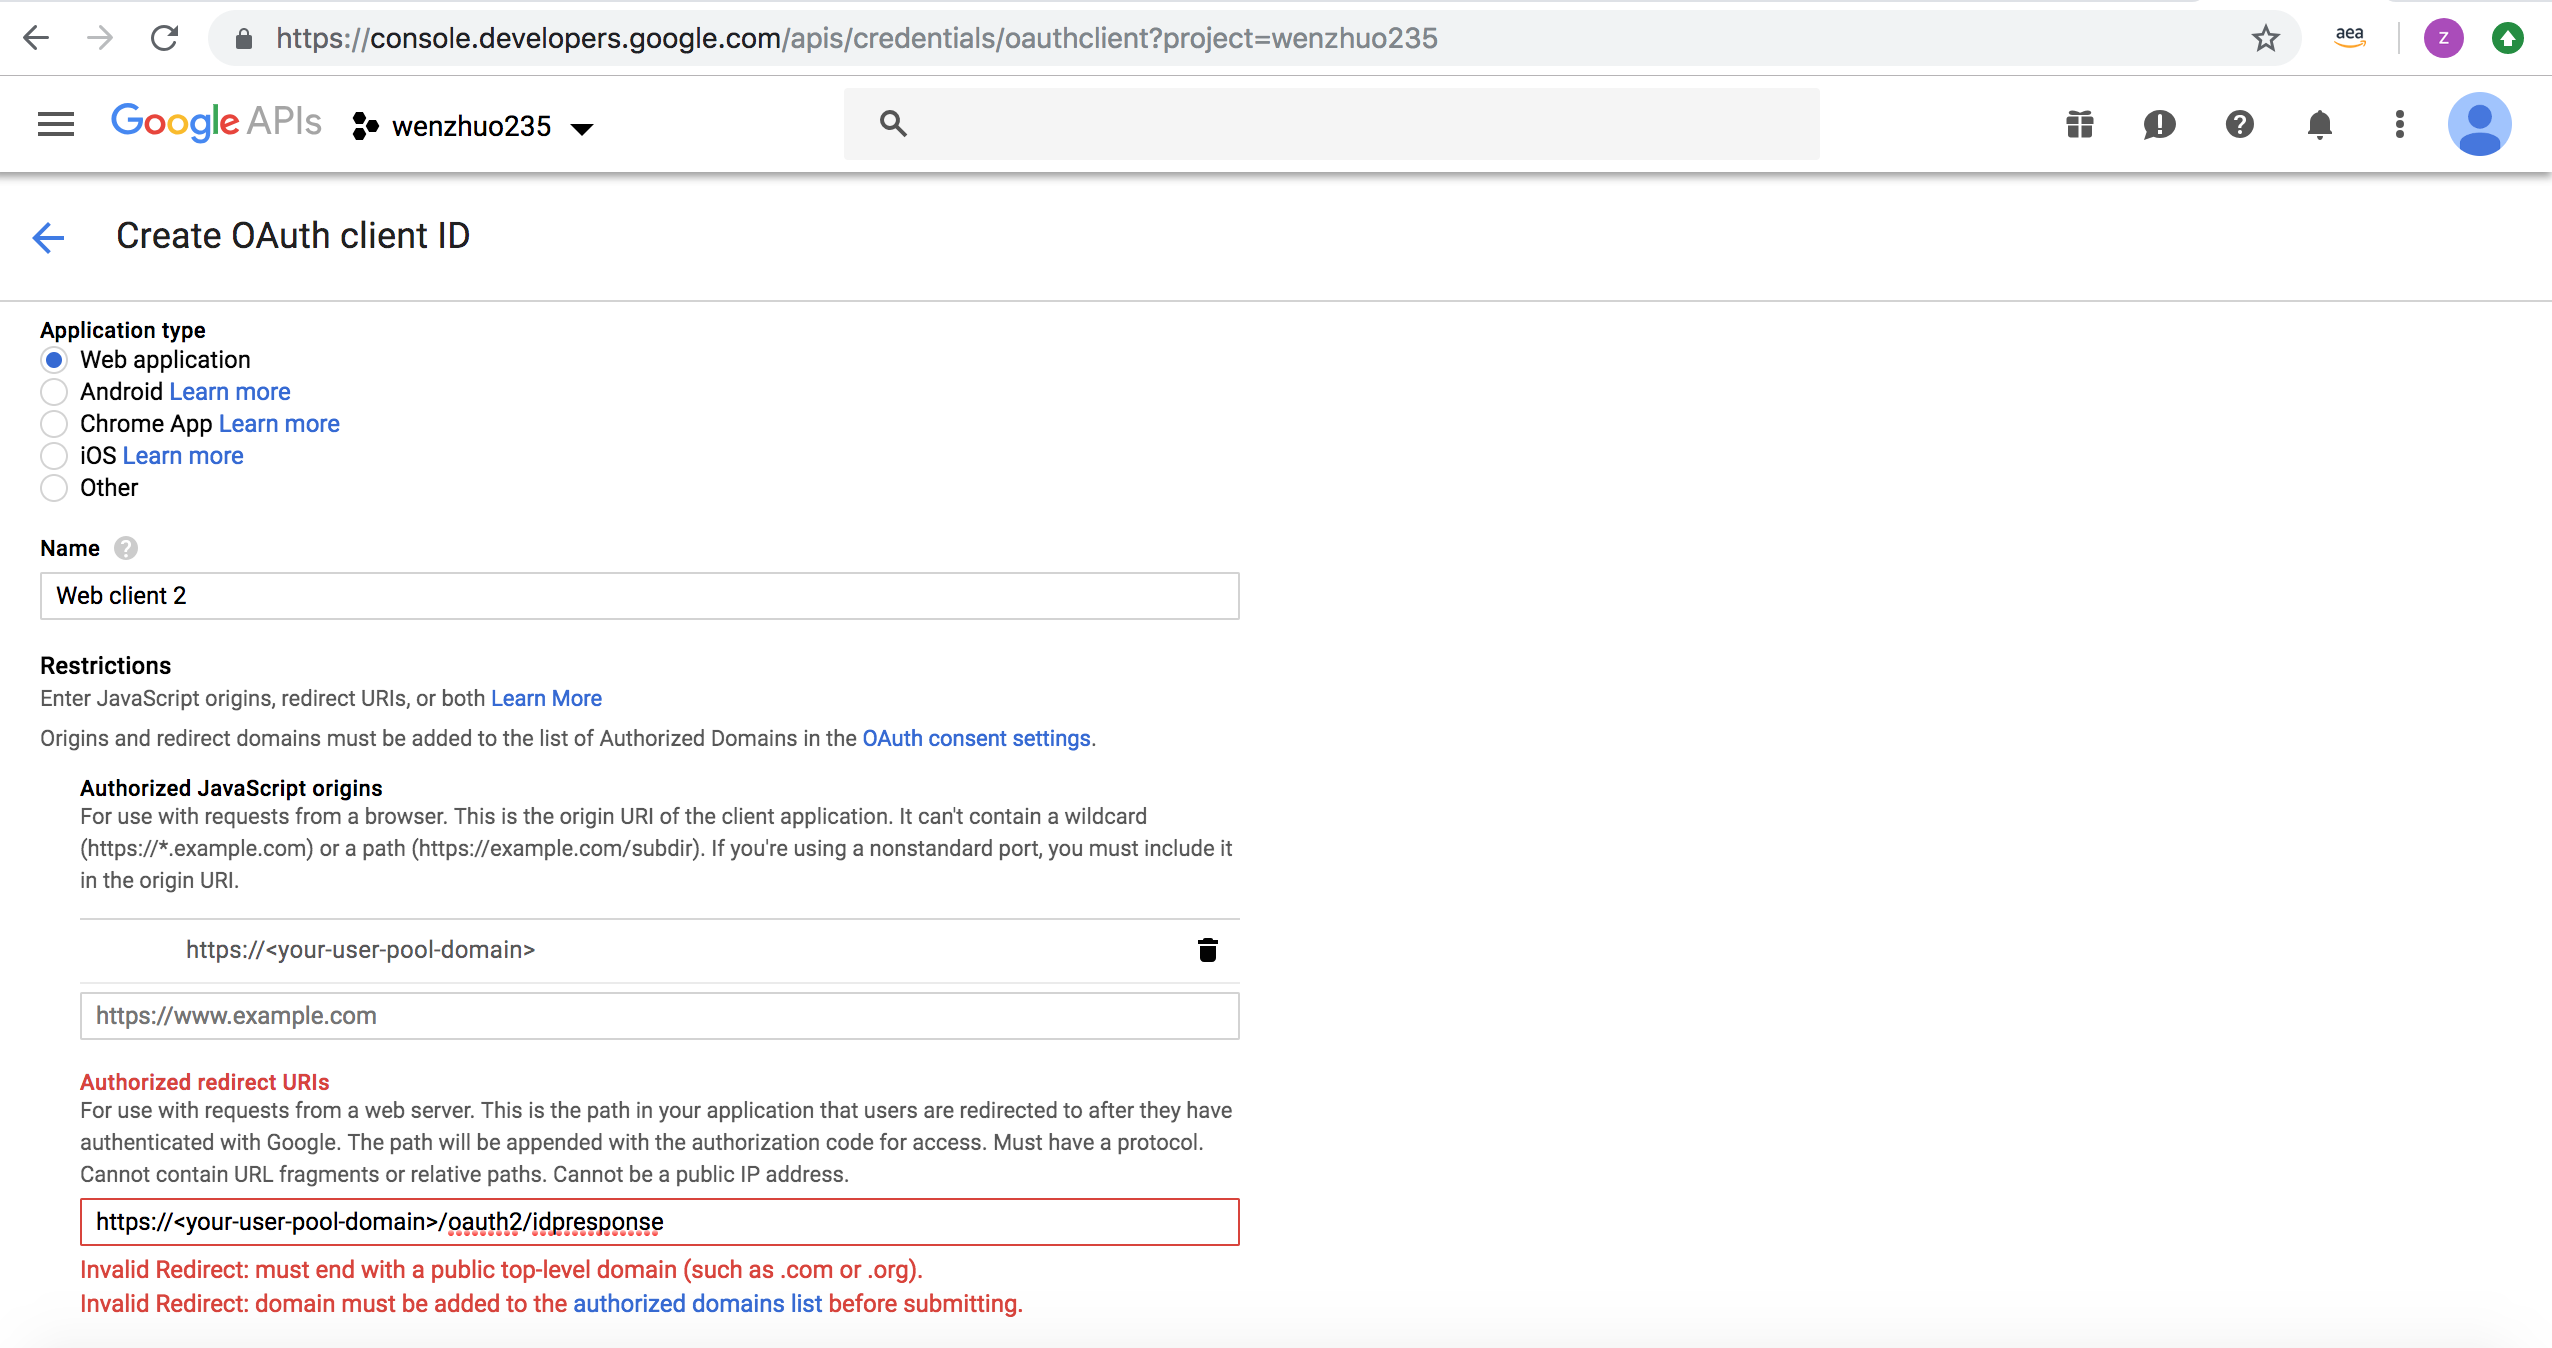
Note: If you saw an error message
Invalid Redirect: domain must be added to the authorized domains list before submitting.when adding the endpoint, please go to the authorized domains list and add the domain. - Click Save.
Setting up Hosted UI Domain with Login with Amazon
- Sign in with your Amazon credentials.
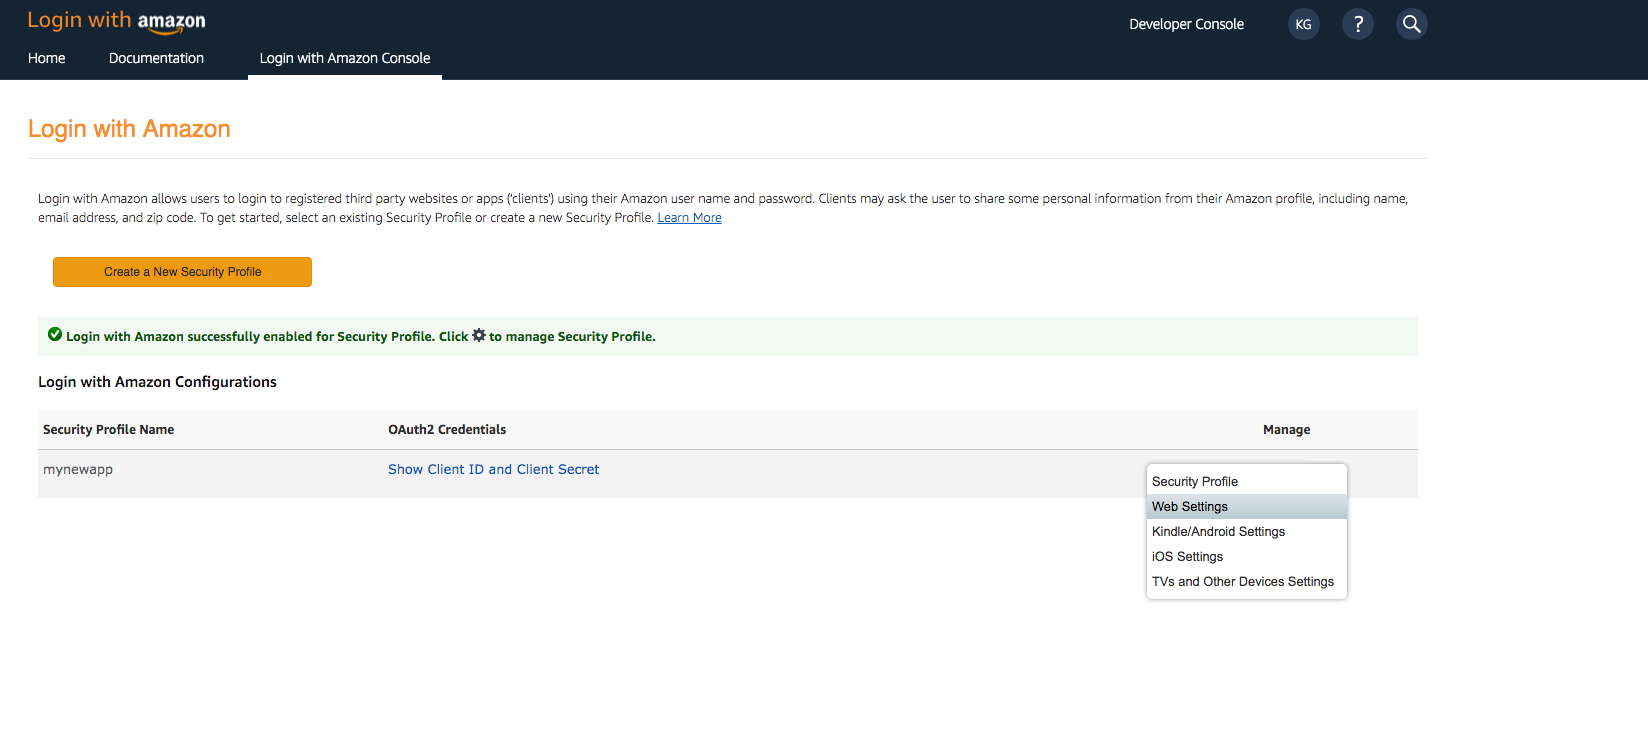
- Hover over the gear and choose Web Settings associated with the security profile you created in the previous step, and then choose Edit.
- Type your user pool domain into Allowed Origins and type your user pool domain with the /oauth2/idpresponse endpoint into Allowed Return URLs.
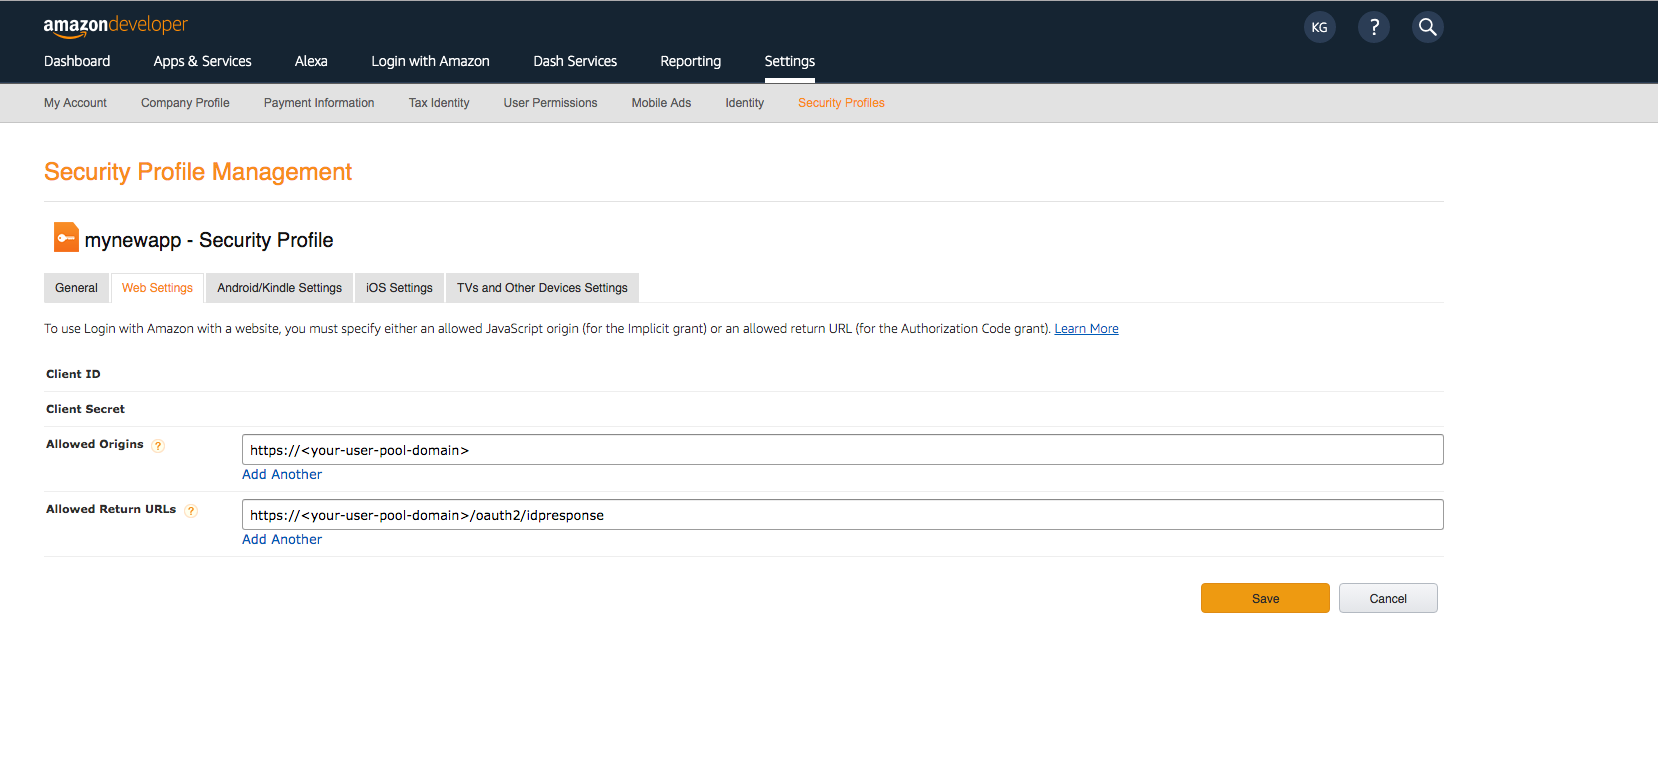
- Choose Save.
Manual Setup
To configure your application for hosted UI, you need to use HostedUI options. Update your awsconfiguration.json file to add a new configuration for Auth. The configuration should look like this:
{
    "IdentityManager": {
        ...
    },
    "CredentialsProvider": {
        ...
    },
    "CognitoUserPool": {
        ...
    },
    "Auth": {
        "Default": {
            "OAuth": {
                "WebDomain": "YOUR_AUTH_DOMAIN.auth.us-west-2.amazoncognito.com", // Do not include the https:// prefix
                "AppClientId": "YOUR_APP_CLIENT_ID",
                "SignInRedirectURI": "myapp://callback",
                "SignOutRedirectURI": "myapp://signout",
                "Scopes": ["openid", "email"]
            }
        }
    }
}
Note: The User Pool OIDC JWT token obtained from a successful sign-in will be federated into a configured Cognito Identity pool in the awsconfiguration.json and the SDK will automatically exchange this with Cognito Identity to also retrieve AWS credentials.
Setup Amazon Cognito Hosted UI in Android App
-
Add
myapp://to your app’s Intent filters located inAndroidManifest.xml. Theyour.package.YourAuthIntentHandlingActivitywill be referenced in the next step.<?xml version="1.0" encoding="utf-8"?> <manifest xmlns:android="http://schemas.android.com/apk/res/android" xmlns:amazon="http://schemas.amazon.com/apk/res/android" package="com.amazonaws.mobile.client"> <uses-permission android:name="android.permission.INTERNET"/> <uses-permission android:name="android.permission.ACCESS_NETWORK_STATE"/> <application> <activity android:name="your.package.YourAuthIntentHandlingActivity"> <intent-filter> <action android:name="android.intent.action.VIEW" /> <category android:name="android.intent.category.DEFAULT" /> <category android:name="android.intent.category.BROWSABLE" /> <data android:scheme="myapp" /> </intent-filter> </activity> </application> </manifest> -
Attach an intent callback so that the AWSMobileClient can handle the callback and confirm sign-in or sign-out. This should be in
your.package.YourAuthIntentHandlingActivity.@Override protected void onResume() { super.onResume(); Intent activityIntent = getIntent(); if (activityIntent.getData() != null && "myapp".equals(activityIntent.getData().getScheme())) { AWSMobileClient.getInstance().handleAuthResponse(activityIntent); } }
Launching the Hosted UI
To launch the Hosted UI from from your application, you can use the showSignIn API of AWSMobileClient.getInstance():
// No options are being specified, only the config will be used
HostedUIOptions hostedUIOptions = HostedUIOptions.builder()
        .scopes("openid", "email")
        .build();
SignInUIOptions signInUIOptions = SignInUIOptions.builder()
        .hostedUIOptions(hostedUIOptions)
        .build();
// 'this' refers to the current active Activity
AWSMobileClient.getInstance().showSignIn(this, signInUIOptions, new Callback<UserStateDetails>() {
    @Override
    public void onResult(UserStateDetails details) {
        Log.d(TAG, "onResult: " + details.getUserState());
    }

    @Override
    public void onError(Exception e) {
        Log.e(TAG, "onError: ", e);
    }
});
Note: By default, the Hosted UI will show all sign-in options; the username-password flow as well as any social providers which are configured. If you wish to bypass the extra sign-in screen showing all the provider options and launch your desired social provider login directly, you can set the HostedUIOptions as shown in the next section.
Configuring Hosted UI to launch Facebook/ Google/ SAML sign in directly
// For Google
HostedUIOptions hostedUIOptions = HostedUIOptions.builder()
    .scopes("openid", "email")
    .identityProvider("Google")
    .build();

// For Facebook
HostedUIOptions hostedUIOptions = HostedUIOptions.builder()
    .scopes("openid", "email")
    .identityProvider("Facebook")
    .build();

SignInUIOptions signInUIOptions = SignInUIOptions.builder()
    .hostedUIOptions(hostedUIOptions)
    .build();
// 'this' refers to the current active Activity
AWSMobileClient.getInstance().showSignIn(this, signInUIOptions, new Callback<UserStateDetails>() {
    @Override
    public void onResult(UserStateDetails details) {
        Log.d(TAG, "onResult: " + details.getUserState());
    }

    @Override
    public void onError(Exception e) {
        Log.e(TAG, "onError: ", e);
    }
});
Sign Out from HostedUI
AWSMobileClient.getInstance().signOut(SignOutOptions.builder().invalidateTokens(true).build(), new Callback<Void>() {
    @Override
    public void onResult(Void result) {
        Log.d(TAG, "onResult: ");
    }

    @Override
    public void onError(Exception e) {
        Log.e(TAG, "onError: ", e);
    }
});
If you want to sign out locally by just deleting tokens, you can call signOut method:
AWSMobileClient.getInstance().signOut();
Using Auth0 Hosted UI
You can use AWSMobileClient to use Auth0 as OAuth 2.0 provider.
You can use Auth0 as one of the providers of your Cognito Federated Identity Pool.
This will allow users authenticated via Auth0 have access to your AWS resources. Learn how to integrate Auth0 with Cognito Federated Identity Pools
Setup Auth0 Hosted UI in Android App
Setup Amazon Cognito Hosted UI in Android App
-
To configure your application for hosted UI, you need to use HostedUI options. Update your
awsconfiguration.jsonfile to add a new configuration forAuth. The configuration should look like this:{ "IdentityManager": { ... }, "CredentialsProvider": { ... }, "CognitoUserPool": { ... }, "Auth": { "Default": { "OAuth": { "AppClientId": "YOUR_AUTH0_APP_CLIENT_ID", "TokenURI": "https://YOUR_AUTH0_DOMAIN.auth0.com/oauth/token", "SignInURI": "https://YOUR_AUTH0_DOMAIN.auth0.com/authorize", "SignInRedirectURI": "com.your.bundle.configured.in.auth0://YOUR_AUTH0_DOMAIN.auth0.com/android/com.your.bundle/callback", "SignOutURI": "https://YOUR_AUTH0_DOMAIN.auth0.com/v2/logout", "SignOutRedirectURI": "com.your.bundle.configured.in.auth0://yourserver.auth0.com/android/com.amazonaws.AWSAuthSDKTestApp/signout", "SignOutURIQueryParameters": { "client_id" : "YOUR_AUTH0_APP_CLIENT_ID", "returnTo" : "com.your.bundle.configured.in.auth0://yourserver.auth0.com/android/com.amazonaws.AWSAuthSDKTestApp/signout" }, "Scopes": ["openid", "email"] } } } } -
Add the sign-in and sign-out redirect URIs to your app’s Intent filters located in
AndroidManifest.xml.<?xml version="1.0" encoding="utf-8"?> <manifest xmlns:android="http://schemas.android.com/apk/res/android" xmlns:amazon="http://schemas.amazon.com/apk/res/android" package="com.amazonaws.mobile.client"> <uses-permission android:name="android.permission.INTERNET"/> <uses-permission android:name="android.permission.ACCESS_NETWORK_STATE"/> <application> <activity android:name="your.package.YourAuthIntentHandlingActivity"> <intent-filter> <action android:name="android.intent.action.VIEW" /> <category android:name="android.intent.category.DEFAULT" /> <category android:name="android.intent.category.BROWSABLE" /> <data android:scheme="com.your.bundle.configured.in.auth0" /> </intent-filter> </activity> </application> </manifest> -
Attach an intent callback so that the AWSMobileClient can handle the callback and confirm sign-in or sign-out. This should be in
your.package.YourAuthIntentHandlingActivity.@Override protected void onResume() { super.onResume(); Intent activityIntent = getIntent(); if (activityIntent.getData() != null && "myapp".equals(activityIntent.getData().getScheme())) { AWSMobileClient.getInstance().handleAuthResponse(activityIntent); } }
Launching the Hosted UI for Auth0
To launch the Hosted UI from from your application, you can use the showSignIn API of AWSMobileClient.getInstance():
final HostedUIOptions hostedUIOptions = HostedUIOptions.builder()
        .federationProviderName("YOUR_AUTH0_DOMAIN.auth0.com")
        .build();
final SignInUIOptions signInUIOptions = SignInUIOptions.builder()
        .hostedUIOptions(hostedUIOptions)
        .build();
// 'this' refers to the current active Activity
AWSMobileClient.getInstance().showSignIn(this, signInUIOptions, new Callback<UserStateDetails>() {
    @Override
    public void onResult(UserStateDetails result) {
        Log.d(TAG, "onResult: " + result.getUserState());
    }

    @Override
    public void onError(Exception e) {
        Log.e(TAG, "onError: ", e);
    }
});
Sign Out from HostedUI
AWSMobileClient.getInstance().signOut(SignOutOptions.builder().invalidateTokens(true).build(), new Callback<Void>() {
    @Override
    public void onResult(Void result) {
        Log.d(TAG, "onResult: ");
    }

    @Override
    public void onError(Exception e) {
        Log.e(TAG, "onError: ", e);
    }
});
If you want to sign out locally by just deleting tokens, you can call signOut method:
AWSMobileClient.getInstance().signOut();
Customizing Authentication Flow
Amazon Cognito User Pools supports customizing the authentication flow to enable custom challenge types, in addition to a password in order to verify the identity of users. These challenge types may include CAPTCHAs or dynamic challenge questions.
To define your challenges for custom authentication flow, you need to implement three Lambda triggers for Amazon Cognito.
For more information about working with Lambda Triggers for custom authentication challenges, please visit Amazon Cognito Developer Documentation.
Custom Authentication in Amplify
To initiate a custom authentication flow in your app, specify authenticationFlowType as CUSTOM_AUTH in the awsconfiguration.json file. Note that is not currently supported by the CLI and developers must manually update the awsconfiguration.json to specify authenticationFlowType as follows :
{
  "CognitoUserPool": {
    "Default": {
      "PoolId": "XX-XXXX-X_abcd1234",
      "AppClientId": "XXXXXXXX",
      "AppClientSecret": "XXXXXXXXX",
      "Region": "XX-XXXX-X"
    }
  },
  "Auth": {
    "Default": {
      "authenticationFlowType": "CUSTOM_AUTH"
    }
  }
}
Next, in the app code call signIn with a dummy password. Any custom challenges needs to be answered using the confirmSignIn method as follows:
public void signIn() {
    AWSMobileClient.getInstance().signIn(username, password, null, new Callback<SignInResult>() {
        @Override
        public void onResult(final SignInResult signInResult) {
            runOnUiThread(new Runnable() {
                @Override
                public void run() {
                    Log.d("APP", "Sign-in callback state: " + signInResult.getSignInState());
                    switch (signInResult.getSignInState()) {
                        case DONE:
                            Log.d(TAG, "Sign-in done.");
                            break;
                        case SMS_MFA:
                            Log.d(TAG, "Please confirm sign-in with SMS.");
                            break;
                        case NEW_PASSWORD_REQUIRED:
                            Log.d(TAG, "Please confirm sign-in with new password.");
                            break;
                        case CUSTOM_CHALLENGE:
                            confirmSignIn();
                            break;
                        default:
                            Log.d(TAG, "Unsupported sign-in confirmation: " + signInResult.getSignInState());
                            break;
                    }
                }
            });
        }

        @Override
        public void onError(Exception e) {
            Log.e(TAG, "Sign-in error", e);
        }
    });
}

public void confirmSignIn() {
    Map<String, String> res = new HashMap<String, String>();
    res.put(CognitoServiceConstants.CHLG_RESP_ANSWER, "<CHALLENGE_RESPONSE>");
    AWSMobileClient.getInstance().confirmSignIn(res, new Callback<SignInResult>() {
        @Override
        public void onResult(final SignInResult signInResult) {
            runOnUiThread(new Runnable() {
                @Override
                public void run() {
                    Log.d(TAG, "Sign-in callback state: " + signInResult.getSignInState());
                    switch (signInResult.getSignInState()) {
                        case DONE:
                            Log.d(TAG, "Sign-in done.");
                            break;
                        case SMS_MFA:
                            Log.d(TAG, "Please confirm sign-in with SMS.");
                            break;
                        case NEW_PASSWORD_REQUIRED:
                            Log.d(TAG, "Please confirm sign-in with new password.");
                            break;
                        default:
                            Log.d(TAG, "Unsupported sign-in confirmation: " + signInResult.getSignInState());
                            break;
                    }
                }
            });
        }

        @Override
        public void onError(Exception e) {
            Log.e(TAG, "Confirm Custom auth Sign-in error", e);
        }
    });
}
Lambda trigger setup
Amplify CLI can be used generate lambda triggers required by a custom authentication flow. See documentation for details. Amplify CLI creates a custom auth flow skeleton that you can manually edit. More information on each of the triggers can be found in Cognito documentation.
AWSMobileClient assumes that custom auth flows start with username and password. If you want a passwordless custom authentication flow, modify your Define Auth Challenge Lambda trigger to bypass the initial username/password verification and proceed to the custom challenge, as in the code below.
exports.handler = (event, context) => {
  if (event.request.session.length === 1 &&
    event.request.session[0].challengeName === 'SRP_A') {
    event.response.issueTokens = false;
    event.response.failAuthentication = false;
    event.response.challengeName = 'CUSTOM_CHALLENGE';
  } else if (
    event.request.session.length === 2 &&
    event.request.session[1].challengeName === 'CUSTOM_CHALLENGE' &&
    event.request.session[1].challengeResult === true
  ) {
    event.response.issueTokens = true;
    event.response.failAuthentication = false;
  } else {
    event.response.issueTokens = false;
    event.response.failAuthentication = true;
  }
  context.done(null, event);
};
Using Device Features
You can use the device related features of Amazon Cognito UserPools by enabling the Devices features. Go to your Cognito UserPool, click on Devices in Left Navigation Menu and chose one of User Opt In or Always.
If you chose Always every device used by your application’s users is remembered.
You can read more about the device features in the following blog.
Terminology
- Tracked
When devices are tracked, a set of device credentials consisting of a key and secret key pair is assigned to every device. You can view all tracked devices for a specific user from the Amazon Cognito console device browser, which you can view by choosing a user from the Users panel. In addition, you can see some metadata (whether it is remembered, time it began being tracked, last authenticated time, etc.) associated with the device and its usage.
- Remembered
Remembered devices are also tracked. During user authentication, the key and secret pair assigned to a remembered device is used to authenticate the device to verify that it is the same device that the user previously used to sign in to the application. You can also see remembered devices from the Amazon Cognito console.
- Not Remembered
A not-remembered device is the flipside of being remembered, though the device is still tracked. The device is treated as if it was never used during the user authentication flow. This means that the device credentials are not used to authenticate the device. The new APIs in the AWS Mobile SDK do not expose these devices, but you can see them in the Amazon Cognito console.
Remember Device
This option will mark the tracked device as remembered
AWSMobileClient.getInstance().getDeviceOperations().updateStatus(true, new Callback<Void>() {
    @Override
    public void onResult(Void result) {
        Log.d(TAG, "onResult: ");
    }

    @Override
    public void onError(Exception e) {
        Log.e(TAG, "onError: ", e);
    }
});
Update Device
This option will mark the tracked device as not remembered.
AWSMobileClient.getInstance().getDeviceOperations().updateStatus(false, new Callback<Void>() {
    @Override
    public void onResult(Void result) {
        Log.d(TAG, "onResult: ");
    }

    @Override
    public void onError(Exception e) {
        Log.e(TAG, "onError: ", e);
    }
});
Forget Device
This option will stop tracking the device altogether.
AWSMobileClient.getInstance().getDeviceOperations().forget(new Callback<Void>() {
    @Override
    public void onResult(Void result) {
        Log.d(TAG, "onResult: ");
    }

    @Override
    public void onError(Exception e) {
        Log.e(TAG, "onError: ", e);
    }
});
Note: Once you call
forget, you can update the status of the device in the same auth session. The end user will have to sign in again to remember the device.
Get Device Details
AWSMobileClient.getInstance().getDeviceOperations().get(new Callback<Device>() {
    @Override
    public void onResult(Device result) {
        Log.d(TAG, "onResult: ");
    }

    @Override
    public void onError(Exception e) {
        Log.e(TAG, "onError: ", e);
    }
});
List Devices
AWSMobileClient.getInstance().getDeviceOperations().list(new Callback<ListDevicesResult>() {
    @Override
    public void onResult(ListDevicesResult result) {
        Log.d(TAG, "onResult: ");
    }

    @Override
    public void onError(Exception e) {
        Log.e(TAG, "onError: ", e);
    }
});